Best All-In-One Printers for Multifunctional Tasks to Buy in July 2026
HP OfficeJet Pro 8125e Wireless All-in-One Color Inkjet Printer, Print, scan, Copy, ADF, Duplex Printing Best-for-Home Office, 3 Month Instant Ink Trial Included, AI-Enabled (405T6A)
- FAST, PROFESSIONAL-QUALITY COLOR PRINTS UP TO 20 PPM FOR HOME OFFICES.
- EFFORTLESS WIRELESS PRINTING WITH RELIABLE DUAL-BAND WI-FI CONNECTIVITY.
- ENJOY 3 MONTHS OF FREE INK DELIVERY WITH INSTANT INK SUBSCRIPTION ACTIVATION.


Brother Work Smart 1360 Wireless Color Inkjet All-in-One Printer with Automatic Duplex Printing and 1.8” Color Display | Includes Refresh Subscription Trial(1) (MFC-J1360DW) (Uses LC501 Series Inks)
- ALL-IN-ONE PRINTER: PRINT, COPY, AND SCAN FOR HOME OFFICE NEEDS.
- SEAMLESS CLOUD APP INTEGRATION FOR EFFORTLESS PRINTING AND SCANNING.
- FAST PRINTING WITH DUPLEX AND ADF FOR ENHANCED PRODUCTIVITY.
Epson EcoTank ET-2800 Wireless Color All-in-One Cartridge-Free Supertank Printer with Scan and Copy – The Ideal Basic Home Printer - Black, Medium
- SAVE UP TO 90% ON INK COSTS WITH ECOTANK’S CARTRIDGE-FREE SYSTEM!
- PRINT UP TO 4,500 PAGES BLACK OR 7,500 COLOR WITH ONE INK SET!
- ENJOY STRESS-FREE PRINTING WITH 2 YEARS OF INK INCLUDED IN THE BOX!
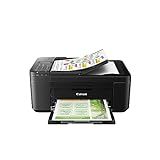
Canon PIXMA TR4720 All-in-One Wireless Printer, Home Use with Auto Document Feeder, Mobile Printing and Built-in Fax, Black
-
VERSATILE 4-IN-1 FUNCTIONALITY: PRINT, COPY, SCAN, FAX SEAMLESSLY!
-
SMART INK MANAGEMENT: ALEXA KEEPS YOU UPDATED AND ORDERS AUTOMATICALLY!
-
ECO-FRIENDLY DESIGN: ENERGY STAR RATED WITH LOW POWER CONSUMPTION!
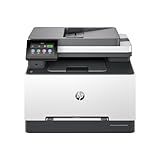
HP Color Laserjet Pro MFP 3301sdw Wireless All-in-One Color Laser Printer, Scanner, Copier, Best-for-Office (499Q3F)
-
FAST COLOR PRINTING UP TO 26 PPM FOR EFFICIENT WORKFLOWS.
-
HIGH-QUALITY TERRAJET TONER DELIVERS VIBRANT, PROFESSIONAL RESULTS.
-
AWARD-WINNING RELIABILITY ENSURES CONSISTENT PERFORMANCE EVERY TIME.
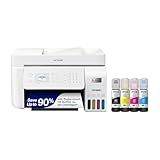
Epson EcoTank ET-4800 Wireless All-in-One Cartridge-Free Supertank Printer with Scanner, Copier, Fax, ADF and Ethernet – Ideal-for Your Home Office, White
- SAVE MONEY WITH HIGH-CAPACITY INK TANKS, NO MORE COSTLY CARTRIDGES!
- ENJOY SHARP PRINTS AND VIBRANT COLORS WITH HEAT-FREE TECHNOLOGY!
- REDUCE WASTE AND GO GREEN WITH ZERO CARTRIDGE DISPOSAL!
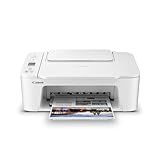
Canon PIXMA TS3720 Wireless All-in-One Printer (6671C022)
- ALL-IN-ONE FUNCTIONALITY: PRINT, COPY, SCAN FOR FULL CONTROL.
- FAST PRINTING: 7.7 BLACK AND 4 COLOR IMAGES PER MINUTE SPEED.
- EASY TO INSTALL: QUICK SETUP AND SIMPLE INK REPLACEMENT PROCESS.
All-in-one printers are versatile devices designed to perform multiple functions, including scanning, copying, and printing. However, these tasks require the use of different components within the printer, such as the scanner bed for scanning, the printing mechanism for producing copies, and potentially shared resources like the processor and memory. As a result, most all-in-one printers cannot perform all these tasks simultaneously. Typically, these printers can only handle one primary task at a time, meaning that while one function is active, the others are queued until the ongoing task is completed. This limitation is mainly due to hardware constraints and the need to allocate resources efficiently to ensure each function operates correctly. Some high-end models might offer greater multitasking capabilities, but generally, an all-in-one printer will sequentially manage scanning, copying, and printing tasks rather than performing them concurrently.
How to print wirelessly from an all-in-one printer?
Printing wirelessly from an all-in-one printer involves a few setup steps, which can vary slightly depending on the printer model and your specific devices. Here’s a general guide to help you get started:
1. Ensure Network Compatibility
- Wi-Fi Connection: Ensure your printer supports wireless printing and is connected to the same Wi-Fi network as your computer or mobile device.
- Check Printer Manual: Consult the printer’s manual for any specific requirements or compatibility issues.
2. Configure Printer for Wireless Printing
- Printer’s Display Panel: Use the printer’s control panel to select a Wi-Fi network. Enter the network password if prompted.
- Wi-Fi Protected Setup (WPS): If your router supports WPS, you can press the WPS button on your router and on your printer to connect them automatically.
3. Install Printer Software
- Download Drivers: Visit the printer manufacturer’s website to download the latest drivers and software for your printer model.
- Install Drivers: Follow the on-screen instructions to install the printer on your computer. During setup, select the option to add a wireless printer.
4. Add Printer to Your Device
- Windows: Go to Settings > Devices > Printers & Scanners. Click on Add a printer or scanner. Select your printer from the list and click Add device.
- Mac: Go to System Preferences > Printers & Scanners. Click the + button to add a new printer. Select your printer from the list and click Add.
- Mobile (iOS/Android): iOS: Ensure your printer supports AirPrint. Open an app and select the print option. Choose your printer from the list. Android: Install the manufacturer's printing app or the "Printer Service Plugin" from the Play Store. Select the print option and choose your printer.
5. Test the Connection
- Print a test page from your computer or mobile device to ensure that everything is working correctly. This step helps verify that your printer is properly connected to the network and configured for wireless printing.
6. Troubleshoot if Necessary
- Check Connection: Ensure both the printer and the device are connected to the same Wi-Fi network.
- Reboot Devices: Restart your printer and device to reset connections.
- Update Firmware: Check for any firmware updates for your printer that may resolve connectivity issues.
By following these steps, you should be able to print wirelessly from your all-in-one printer. If you encounter specific issues, refer to your printer’s manual or the manufacturer’s website for detailed troubleshooting tips.
What are the main features of an all-in-one printer?
An all-in-one printer is a versatile device that combines multiple functions into a single machine. The main features typically include:
- Printing: This is the core function, supporting various types of printing such as monochrome, color, and often, photo printing. Many models support different paper sizes and types.
- Copying: All-in-one printers have copying capabilities, allowing users to make duplicates of documents without needing a separate photocopier.
- Scanning: They are equipped with a scanner, often supporting high-resolution scanning, which allows conversion of paper documents into digital formats.
- Faxing: Some models include fax capabilities, although this feature is becoming less common with the rise of digital communication.
- Wireless Connectivity: Many all-in-one printers support wireless connections through Wi-Fi or Bluetooth, enabling printing from computers, smartphones, and tablets without a physical connection.
- Automatic Document Feeder (ADF): This feature allows multiple pages to be scanned or copied automatically without manually feeding each page, improving efficiency for multi-page documents.
- Duplex Printing: Automatic double-sided printing helps save paper and is a convenient feature for printing long documents.
- Touchscreen Interface: Modern models often come with a touchscreen for easier management and navigation of tasks.
- Cloud Printing and Mobile Printing: Features like Google Cloud Print, Apple AirPrint, or dedicated apps allow for printing documents directly from cloud storage or mobile devices.
- High-volume Printing Options: Some have high-capacity paper trays and ink tanks suitable for larger volume printing, ideal for office environments.
These features collectively make all-in-one printers suitable for both home and office use, offering convenience and efficiency by combining multiple functions into a single, integrated device.
How to connect an all-in-one printer to a smartphone?
Connecting an all-in-one printer to a smartphone can generally be done via Wi-Fi, a manufacturer-specific app, or directly using Bluetooth or Wi-Fi Direct. Here's a general guide to help you through the process:
1. Connect the Printer to Wi-Fi:
Before you begin, make sure that your printer is connected to the same Wi-Fi network as your smartphone.
- Printer Control Panel: Use the onboard display panel of your printer to navigate to Network settings. Select Wireless Setup Wizard and follow the instructions to connect the printer to your Wi-Fi network.
- WPS Method (if supported): Press the WPS button on your Wi-Fi router. Press the WPS button on your printer.
2. Download the Printer App:
- iOS (App Store) or Android (Google Play Store): Download and install the printer manufacturer's app (such as HP Smart, Canon PRINT, Epson iPrint, Brother iPrint&Scan, etc.).
3. Connect Smartphone to Printer:
- Using the Printer Manufacturer's App: Open the app you downloaded. Follow the in-app instructions to detect and add your printer. This usually involves ensuring that your phone’s Wi-Fi is turned on and connected to the same network as the printer.
- Using Wi-Fi Direct (Alternative): Switch on the Wi-Fi Direct feature on your printer (usually available in the network settings of the printer). On your smartphone, go to Wi-Fi settings and connect to the printer’s Wi-Fi Direct network. You may need a password, which can typically be printed from the printer or found in the printer’s manual.
4. Print a Document or Photo:
- From the App: Use the app to select documents or photos you wish to print. Adjust settings as needed and send the print job to the printer.
- Direct Printing (iOS and Android): On iOS, use AirPrint by selecting the print option in apps like Safari, Photos, etc. and choosing your printer. On Android, go to Settings > Connected devices and ensure “Printing” is enabled. Use the app that supports printing by selecting the print option.
5. Troubleshooting Common Issues:
- Ensure Network Compatibility: Make sure both the printer and smartphone are on the same Wi-Fi network.
- Update Firmware or Apps: Ensure that both your printer’s firmware and smartphone apps are up to date.
- Restart Devices: Sometimes, simply restarting the printer, smartphone, and router can resolve connectivity issues.
Following these steps should help establish a successful connection between your all-in-one printer and smartphone, allowing you to easily print documents and photos as needed.
How to enable duplex printing on an all-in-one printer?
Enabling duplex printing on an all-in-one printer can usually be done through your computer’s operating system and printer settings. The process might vary slightly depending on the brand and model of your printer, as well as your operating system. Here’s a general guide on how to enable duplex printing:
From Windows:
- Open Control Panel: Go to the Start menu and open the Control Panel.
- Devices and Printers: Click on "Devices and Printers" or "View devices and printers".
- Select Printer: Right-click on your all-in-one printer and select "Printing preferences."
- Duplex Printing Option: In the printing preferences window, look for a tab or setting like "Finishing", "Layout", or "Features". Find an option for "Duplex Printing" or "Print on Both Sides".
- Enable Duplex Printing: Select the duplex printing option you prefer (e.g., flip on long edge or flip on short edge). Click "Apply" or "OK" to save your changes.
From macOS:
- Open System Preferences: Click on the Apple icon in the top-left corner and open "System Preferences".
- Printers & Scanners: Click on "Printers & Scanners".
- Select Printer: Select your all-in-one printer from the list on the left.
- Printer Settings: Click on "Options & Supplies", then go to the "Driver" tab or "Options". Ensure that the option for "Duplex Unit" or "Two-Sided Printing" is checked. If not, check it and click "OK".
- Enable Duplex Printing: When printing a document, select the printer and then click on "Show Details" or "Layout." Choose "Two-Sided" and select the binding option (e.g., long-edge binding).
Printer’s Control Panel:
- Some printers have a control panel or touchscreen that allows you to enable duplex printing directly on the device. Refer to your printer's manual for specific instructions.
Check for Printer Software:
- Some printers come with their own software. You might need to check or adjust the duplex settings from the printer's proprietary software.
Notes:
- Hardware Support: Ensure that your printer supports automatic duplex printing. If not, you might have to manually reinsert the pages to print on the other side.
- Driver Installation: Make sure the printer driver is updated; outdated drivers might not support duplex printing.
- Document Settings: Check the individual application’s print dialog (like Word, Adobe, etc.) as they may also have settings for duplex printing.
If you encounter any issues or cannot find the duplex settings, consult the printer’s manual or the manufacturer’s website for further guidance.
What is a multifunction printer as compared to an all-in-one printer?
The terms "multifunction printer" (MFP) and "all-in-one printer" are often used interchangeably, but they can sometimes imply slightly different things depending on the context and marketing. Both refer to devices that combine multiple functions beyond just printing, but here are some nuances:
- Multifunction Printer (MFP): Typically refers to devices that are designed for business and office environments. Often includes capabilities such as printing, scanning, copying, and faxing. May emphasize efficiencies and features that appeal to business needs, such as higher print volumes, faster speeds, advanced connectivity options, duplex scanning, and robust network management. Generally built to handle more rigorous usage and may support more extensive paper handling features.
- All-in-One Printer: Generally targeted towards home or small office environments. Includes similar functionalities like printing, scanning, copying, and sometimes faxing. Focuses on ease of use and compact design to fit personal or small office spaces. Often prioritized for their simplicity, affordability, and convenience for everyday tasks.
While these distinctions exist, it's important to note that the overlap in functionality and features can be significant. Often, manufacturers might use these terms based on marketing strategies rather than strict technical differences, so it's beneficial to look at the specific features and specifications of the devices rather than just the label.
How to troubleshoot common issues with all-in-one printers?
Troubleshooting common issues with all-in-one printers can vary depending on the brand and model, but there are general steps and solutions that you can follow to address most problems. Here are some common issues and troubleshooting steps:
1. Printer Won’t Turn On
- Check Power Supply: Ensure the printer is plugged in securely and try a different outlet.
- Power Button: Ensure you’ve pressed the power button properly.
- Overheated Printer: Allow it to cool down if it’s been running for an extended period.
2. Paper Jams
- Inspect the Paper Path: Open all accessible areas like trays and hatches to clear any stuck paper.
- Use the Right Paper: Ensure you’re using the correct paper size and quality as recommended.
- Load Paper Properly: Align and fan the paper before placing it into the tray to prevent sticking.
3. Poor Print Quality
- Check Ink or Toner Levels: Replace low or empty cartridges.
- Clean Printheads: Use the printer’s cleaning utility to remove any clogs.
- Adjust Print Settings: Ensure settings match the type of document or photo being printed.
4. Scanner Issues
- Check Connections: Ensure all cables, especially USB, are properly connected.
- Clean the Glass Surface: Remove any smudges or dirt on the scanner bed.
- Update Drivers: Ensure the latest drivers are installed for compatibility.
5. Connectivity Problems
- Wi-Fi Connection: Check the Wi-Fi settings and restart the router and printer.
- USB Connections: Ensure the cable isn’t damaged and is securely connected.
- Software Updates: Make sure the printer firmware and related apps are up to date.
6. Printer Offline
- Check Printer Status: Set it as the default printer in the computer’s control panel or settings.
- Restart Printer and Computer: Reboot both devices to re-establish connections.
- Run Troubleshooter: Use built-in troubleshooters in your operating system.
7. Driver Issues
- Reinstall Drivers: Download the latest drivers from the manufacturer’s website and reinstall them.
- Compatibility Mode: Try running drivers in compatibility mode if you have a newer operating system.
8. Error Messages
- Reference the Manual: Cross-check error codes in your user manual for specific solutions.
- Clear Print Queue: Cancel all pending jobs and reset the printer queue.
9. Faded or Ghosting Prints
- Toner Cartridge: Make sure the toner is not low or expired.
- Drum Unit Maintenance: Replace or clean the imaging drum if necessary.
10. Multifunction Features Not Working
- Reboot the Device: Simple restarts can resolve minor glitches.
- Official Support: Contact customer support for manufacturer-specific multifunction issues.
General Tips
- Regular Maintenance: Clean the printer regularly and perform periodic maintenance.
- User Manual: Always check the user manual for any specific instructions related to your printer model.
- Professional Help: For repetitive or complex issues, contact technical support or a professional technician.
By systematically approaching each issue, you can typically resolve most common problems with all-in-one printers.