Best TensorFlow Tools to Buy in February 2026
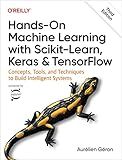
Hands-On Machine Learning with Scikit-Learn, Keras, and TensorFlow: Concepts, Tools, and Techniques to Build Intelligent Systems
- MASTER END-TO-END ML PROJECT TRACKING WITH SCIKIT-LEARN!
- EXPLORE DIVERSE MODELS: SVMS, DECISION TREES, AND MORE!
- BUILD CUTTING-EDGE NEURAL NETS WITH TENSORFLOW AND KERAS!


Hands-On Machine Learning with Scikit-Learn and TensorFlow: Concepts, Tools, and Techniques to Build Intelligent Systems


Beginning with Deep Learning Using TensorFlow: A Beginners Guide to TensorFlow and Keras for Practicing Deep Learning Principles and Applications (English Edition)


Deep Learning with TensorFlow and Keras: From Fundamentals to Advanced Architectures: Master Neural Networks, CNNs, RNNs, GANs & Transfer Learning with ... Intelligence & Machine Learning)


TensorFlow Guide: Unlock the Next Level: Your Essential Middle Guide to TensorFlow and Beyond!


TensorFlow Guide: Dive into Deep Learning with TensorFlow: Your Ultimate Beginners' Guide!


Deep Learning with TensorFlow and PyTorch: Build, Train, and Deploy Powerful AI Models


Scaling Machine Learning with Spark: Distributed ML with MLlib, TensorFlow, and PyTorch


Python Machine Learning - Second Edition: Machine Learning and Deep Learning with Python, scikit-learn, and TensorFlow


To delete rows in a tensor with TensorFlow, you can use the tf.gather() function. This function allows you to select specific rows from a tensor based on their indices.
First, you need to create a list of indices that you want to delete from the tensor. Then, you can use the tf.gather() function to extract the rows that you want to keep.
For example, if you have a tensor named "my_tensor" with shape (m, n) and you want to delete rows with indices [1, 3, 5], you can use the following code snippet:
indices_to_keep = [i for i in range(my_tensor.shape[0]) if i not in [1, 3, 5]] filtered_tensor = tf.gather(my_tensor, indices_to_keep)
After running this code, the "filtered_tensor" will contain all rows from the original "my_tensor" except for the rows with indices 1, 3, and 5. This is how you can delete rows in a tensor with TensorFlow.
How to implement backpropagation in TensorFlow?
In TensorFlow, you can implement backpropagation by defining a neural network model, specifying the loss function, and using an optimizer to update the model's parameters based on the gradients computed during backpropagation. Here is a simple example of how to implement backpropagation in TensorFlow using a basic neural network model:
- Define the neural network model:
import tensorflow as tf
Define the neural network model
def create_model(): model = tf.keras.Sequential([ tf.keras.layers.Dense(64, activation='relu', input_shape=(784,)), tf.keras.layers.Dense(10, activation='softmax') ]) return model
model = create_model()
- Specify the loss function and optimizer:
# Specify the loss function and optimizer loss_function = tf.keras.losses.SparseCategoricalCrossentropy() optimizer = tf.keras.optimizers.Adam()
- Implement the training loop with backpropagation:
# Implement the training loop with backpropagation @tf.function def train_step(inputs, targets): with tf.GradientTape() as tape: predictions = model(inputs) loss = loss_function(targets, predictions)
gradients = tape.gradient(loss, model.trainable\_variables)
optimizer.apply\_gradients(zip(gradients, model.trainable\_variables))

return loss
Example training loop
for epoch in range(num_epochs): for batch_inputs, batch_targets in dataset: loss = train_step(batch_inputs, batch_targets) print('Epoch {} - Loss: {}'.format(epoch, loss))
- Compile and train the model:
# Compile the model model.compile(optimizer=optimizer, loss=loss_function, metrics=['accuracy'])
Train the model
model.fit(x_train, y_train, epochs=num_epochs, batch_size=batch_size)
By following these steps, you can implement backpropagation in TensorFlow to train your neural network model.
What is slicing in TensorFlow?
In TensorFlow, slicing refers to the process of extracting a portion of a tensor along one or more dimensions. This allows you to access specific elements or subsets of a tensor. Slicing is commonly used to manipulate and extract data from tensors in deep learning models.
How to perform gradient descent in TensorFlow?
To perform gradient descent in TensorFlow, you can follow these steps:
- Define your variables and placeholders:
import tensorflow as tf
Define your variables
w = tf.Variable(tf.constant(2.0)) b = tf.Variable(tf.constant(1.0))
Define placeholder for input data
X = tf.placeholder(tf.float32)
Define placeholder for target data
Y = tf.placeholder(tf.float32)
- Define your model and loss function:
# Define the linear regression model Y_pred = w*X + b
Define the loss function (mean squared error)
loss = tf.reduce_mean(tf.square(Y_pred - Y))
- Define the optimizer and minimize the loss:
# Define the optimizer (Gradient Descent) optimizer = tf.train.GradientDescentOptimizer(learning_rate=0.01)
Minimize the loss function
train_op = optimizer.minimize(loss)
- Initialize the variables and start the session:
init = tf.global_variables_initializer()
with tf.Session() as sess: sess.run(init)
- Perform gradient descent and update the variables in a loop:
for i in range(num_iterations): _, current_loss, current_w, current_b = sess.run([train_op, loss, w, b], feed_dict={X: x_data, Y: y_data}) print("Iteration {}: Loss={}, w={}, b={}".format(i, current_loss, current_w, current_b))
- After the loop, you will have the optimized values for w and b that minimize the loss function.
Note: In this example, x_data and y_data are your input and target data, respectively. You should replace them with your actual data. Also, you may need to adjust the learning rate and number of iterations based on your specific problem.
How to create a computational graph in TensorFlow?
To create a computational graph in TensorFlow, you can follow these steps:
- Import the TensorFlow library:
import tensorflow as tf
- Create placeholders for input data and variables for model parameters:
x = tf.placeholder(tf.float32, name='x') W = tf.Variable(tf.random_normal([1]), name='W') b = tf.Variable(tf.random_normal([1]), name='b')
- Define the operations in the graph:
y = tf.add(tf.multiply(W, x), b)
- Create a session and initialize the variables:
init = tf.global_variables_initializer() sess = tf.Session() sess.run(init)
- Run the graph to perform computations:
result = sess.run(y, feed_dict={x: 5.0}) print(result)
This is a simple example of creating a computational graph in TensorFlow. You can build more complex graphs by adding more operations and layers to the graph.
