
Best Tools to Reset Windows Laptops to Buy in July 2026
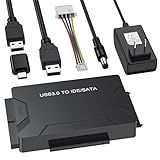
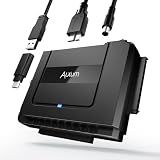
Hard Drive Reader USB 3.0 & Type C to SATA IDE Adapter, Internal Data Transfer Recovery Converter Kit with 12V/2A Power for 2.5"/3.5" SATA/IDE HDD SSD Hard Disk Internal Blu-ray Drive, up to 20TB
-
EXPERT SUPPORT ANYTIME: GET DEDICATED HELP FOR ALL USAGE ISSUES.
-
UNIVERSAL COMPATIBILITY: WORKS WITH MULTIPLE DRIVE TYPES; 20TB MAX CAPACITY!
-
FAST TRANSFER RATES: ENJOY USB 3.0 SPEEDS UP TO 5GBPS FOR EFFICIENT USE.


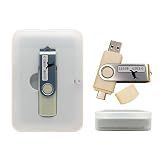
Tech Core 31-in-1 Multi-Boot USB Toolkit for IT Pros
-
BOOT & REPAIR: SUPPORTS UEFI/LEGACY BIOS - FIX BOOT ISSUES EASILY!
-
ALL-IN-ONE TOOLKIT: 128 GB USB DRIVE FOR ALL OS & RECOVERY NEEDS!
-
CUSTOMIZABLE USB: EASILY ADD OR UPGRADE BOOTABLE APPS WITH GUIDES!
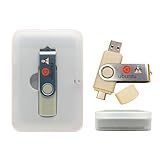
Ubuntu Linux Bootable USB for PC Desktop & Server
-
DUAL USB-A & USB-C COMPATIBILITY: WORKS WITH ALL MODERN AND LEGACY PCS.
-
FULLY CUSTOMIZABLE BOOTABLE DRIVE: EASILY INSTALL OR UPGRADE ANY ISO APP.
-
USER-FRIENDLY INTERFACE: FAST, STABLE, PRIVATE EXPERIENCE WITHOUT FORCED UPDATES.
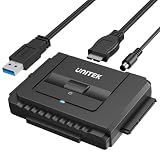
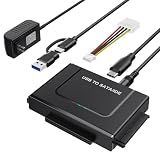
Unitek USB 3.0 to IDE and SATA Converter External Hard Drive Adapter Kit for Universal 2.5/3.5 HDD/SSD Hard Drive Disk, One Touch Backup Function, Included 12V/2A Power Adapter
-
FAST DATA TRANSFER: ACHIEVE SPEEDS UP TO 6 GBPS WITH SATA III SUPPORT.
-
DUAL DRIVE CONNECTION: USE ONE IDE AND ONE SATA DRIVE SIMULTANEOUSLY.
-
USER-FRIENDLY FEATURES: PLUG AND PLAY WITH ONE TOUCH BACKUP FOR CONVENIENCE.
SATA to USB 3.0 Adapter - External Hard Drive Reader Recovery Converter for Universal 2.5" 3.5" HDD SSD Optical Drive, 2.5/3.5 Inch SATA IDE Hard Drive Adapter Transfer Kit Included Power 12V 2A
- LIGHTNING-FAST TRANSFERS: ENJOY 5GBPS SPEEDS FOR QUICK DATA ACCESS.
- VERSATILE COMPATIBILITY: WORKS WITH ALL MAJOR OS AND VARIOUS DRIVES.
- PORTABLE & COMPACT DESIGN: EASY TO CARRY FOR ON-THE-GO DATA NEEDS.
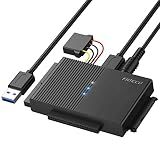
USB 3.0 to IDE SATA Adapter, USB Type C Hard Drive Reader External HDD Converter for 2.5/3.5 inches IDE SATA HDD SSD, 12V/2A Power Adapter Included
- SUPPORTS 2 DRIVES SIMULTANEOUSLY: USE IDE AND SATA DRIVES AT ONCE!
- FAST DATA TRANSFER: ENJOY UP TO 5 GBPS SPEEDS FOR QUICK BACKUPS!
- PLUG AND PLAY CONVENIENCE: NO DRIVERS NEEDED-JUST CONNECT AND GO!
FIDECO USB 3.0 to SATA or IDE Adapter, Hard Drive Adapter Cable Universal for 2.5/3.5 inch SATA HDD/SSD & IDE HDD with 12V Power Adapter
- EFFORTLESSLY RECOVER ESSENTIAL FILES FROM OLD HARD DRIVES!
- SUPER-SPEED DATA TRANSFER UP TO 5GBPS; PLUG AND PLAY SIMPLICITY!
- UNIVERSAL COMPATIBILITY WITH VARIOUS SYSTEMS AND DRIVE TYPES!

EZITSOL USB for Kali 2025,Tails 6.19,caine 13 | 3IN1 Bootable USB Flash Drive for IT Training and Security Learning (32GB) | 64-Bit Security & Privacy Toolkit
-
ALL-IN-ONE USB: THREE LINUX ENVIRONMENTS FOR VERSATILE USE.
-
LIVE OR INSTALL: FLEXIBLE OPTIONS FOR HANDS-ON LEARNING.
-
USER-FRIENDLY: INCLUDES SUPPORT GUIDE AND ACCESSIBLE CUSTOMER SERVICE.
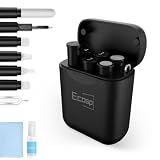
ECASP Cleaner Kit for AirPod,Multi-Tool iPhone Cleaning Kit,Cell Phone Cleaning Repair & Recovery for iPhone & iPad(Type C)Charging Port,Lightning Cables&Connectors,Easy to Store & Carry Design,Black
- CLEAN & REPAIR PORTS: KEEP DEVICES LIKE NEW, EXTENDING THEIR LIFE.
- RESTORE CABLE CONNECTORS: FIX SLOW CHARGING AND UNRELIABLE CONNECTIONS.
- PORTABLE DESIGN: LIGHTWEIGHT KIT FOR EASY CLEANING ANYWHERE, ANYTIME.
To reset a Windows laptop to factory settings, you will need to go through the following steps.
First, make sure you have a backup of all your important files and data. Resetting a laptop to factory settings will erase all the data on the hard drive, so it is crucial to have a backup to avoid permanent loss.
Next, go to the Start menu and search for "Settings." Click on the Settings app to open it.
Within the Settings app, navigate to the "Update & Security" option. Click on it to open the Update & Security settings.
In the Update & Security settings, you will find a tab called "Recovery." Click on it to proceed.
Within the Recovery settings, you will see the option to "Reset this PC." Click on the "Get Started" button located under this option.
Now, you will have two choices: "Keep my files" or "Remove everything." Choose the option that aligns with your preference. Selecting the "Keep my files" option will remove the installed apps and settings, but your files will be saved. On the other hand, selecting "Remove everything" will delete everything, including files, apps, and settings.
After making the selection, you might be prompted to enter your administrator password or provide a confirmation.
On the subsequent screen, you will have the option to "Just remove my files" or "Remove files and clean the drive." The latter option is more secure, as it will perform a secure deletion of the files, making it difficult to recover them later. Choose the appropriate option for your needs.
The reset process will now begin, and your laptop will reboot several times. During this process, Windows will be reinstalled, and your laptop will be restored to its original factory settings.
Once the process is complete, you will need to go through the initial setup, including language selection, user account creation, and other settings.
Finally, after the setup is complete, you can restore your files from the backup you created earlier.
Please note that the steps may vary slightly depending on the version of Windows you are using.
How to reset a Windows laptop if the touchpad or keyboard is not functioning?
If the touchpad or keyboard on your Windows laptop is not functioning, you can still reset the laptop using an external USB keyboard or mouse. Here are the steps you can follow:
- Connect an external USB keyboard or mouse to your laptop.
- Press and hold the power button on your laptop until it shuts down completely.
- Disconnect the power adapter from your laptop, then remove the battery (if it's removable).
- Press and hold down the power button for about 30 seconds to drain any remaining static electricity.
- Reinsert the battery (if removed), then connect the power adapter.
- Press the power button to turn on your laptop.
- Once your laptop starts booting up, it should recognize the connected external keyboard or mouse, allowing you to navigate through the reset process.
- Follow the on-screen instructions to reset your Windows laptop. The reset options may vary depending on the version of Windows you are using.
- After the reset is complete, your laptop will restart and start fresh.
Note: If the above steps do not resolve the issue, it is recommended to contact the manufacturer's support or a professional technician for further assistance.
How to back up files before resetting a Windows laptop?
To back up your files before resetting a Windows laptop, you can follow these steps:
- Identify the files you want to back up: Start by determining which files and folders you want to keep and save from your laptop. This may include documents, photos, videos, music, and other important data.
- External storage device: Connect an external storage device to your laptop. This can be an external hard drive, USB flash drive, or even a cloud storage service like Google Drive or Dropbox.
- Manual backup: Use File Explorer (Windows Explorer) to manually copy and paste the files you want to back up from your laptop to the external storage device. Navigate to the location of each file, select them, and right-click to copy. Then, go to the external storage device, right-click, and paste the files there.
- Backup software: Alternatively, you can use backup software to automate the process. Windows has a built-in backup tool called File History which you can use. To enable it, go to Settings > Update & Security > Backup > Add a drive. Then, select an external storage device for the backup.
- Cloud storage: If you prefer cloud storage, upload your files to a service like Google Drive, OneDrive, or Dropbox. Install the corresponding software on your laptop, sign in with your account, and then drag and drop the files or folders you want to back up into the software's designated folder.
- Verify backup: After the backup is complete, double-check to ensure that all the files you want to keep have been successfully copied to the external storage device or uploaded to the cloud storage service. Open some files from the backup location to ensure the backup was successful.
Once you have completed these steps and verified the backup, you can proceed with resetting your Windows laptop, knowing that your important files are safely backed up.
How to reset a Windows laptop if it is stuck in a boot loop?
If your Windows laptop is stuck in a boot loop, you can try the following steps to reset it:
- Power off your laptop completely by pressing and holding the power button.
- Press the power button to turn it on, and as soon as you see the manufacturer's logo or the Windows logo, press and hold the power button again to force it to power off.
- Repeat this process two or three times until you see the "Preparing Automatic Repair" or "Diagnosing your PC" screen.
- On this screen, you should have the option to choose "Advanced options" or "Troubleshoot". Use the arrow keys to navigate and press Enter to select.
- In the Advanced options menu, select "Startup Repair" or "Automatic Repair".
- Allow the automatic repair process to run. It will diagnose and attempt to fix any issues causing the boot loop.
- If the automatic repair doesn't work, go back to the Advanced options menu and select "Reset this PC" or "System Restore". This will reset your laptop to its original factory settings, but it will also remove all your personal files and applications, so make sure you have a backup of your important data.
- Follow the on-screen instructions to complete the reset process.
- Once the laptop is reset, it should start normally without being stuck in a boot loop.
If none of these steps work, it may indicate a hardware or software issue that requires professional assistance.