Best Mini PCs to Buy for Media Servers in July 2026
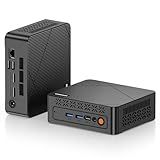
BOSGAME E2 Mini PC with AMD Ryzen 5 3550H, 16GB RAM 512GB NVMe SSD, Triple Displays via USB-C & Dual HDMI, Gigabit Ethernet, Compact Desktop Computer for Business, Office & School
-
50% FASTER PERFORMANCE: RYZEN 5 3550H FOR RAPID MULTITASKING AND EFFICIENCY.
-
TRIPLE-SCREEN CAPABILITY: SEAMLESSLY CONNECT 3 DISPLAYS FOR ENHANCED PRODUCTIVITY.
-
COMPACT & SILENT: SPACE-SAVING DESIGN WITH NEAR-ZERO NOISE FOR ANY SETUP.


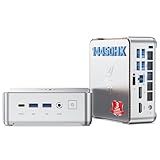
KAMRUI Pinova P1 Mini PC Computer, AMD Ryzen 4300U (Beats i3-10110U/3500U), 16GB RAM 256GB SSD, Mini Desktop Computer Support Triple 4K, USB-C, WiFi, Bluetooth, Ethernet for Business, Education, Home
-
UNMATCHED PERFORMANCE: OUTPERFORMS COMPETITORS BY UP TO 50% FOR SMOOTH MULTITASKING!
-
EXPANDABLE STORAGE: CUSTOMIZE UP TO 4TB FOR EXTENSIVE MEDIA LIBRARIES OR BACKUPS!
-
TRIPLE 4K SUPPORT: SEAMLESSLY CONNECT THREE 4K DISPLAYS FOR ULTIMATE PRODUCTIVITY ENHANCEMENT!
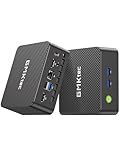
KAMRUI Pinova P2 Mini PC 16GB RAM 512GB SSD, AMD Ryzen 4300U 28W(Beats 10110U/3500U/N95,Up to 3.7GHz) Mini Computers,Triple 4K Display/HDMI+DP+Type-C/WiFi/BT for Home/Business Mini Desktop Computers
-
POWERFUL AMD RYZEN 4300U: 40% FASTER MULTITASKING PERFORMANCE!
-
TRI 4K DISPLAY READY: ENJOY SEAMLESS VISUALS WITH NO LAG!
-
VERSATILE CONNECTIVITY: USB3.2 GEN2 AND EXPANDABLE STORAGE OPTIONS!
origimagic C3 Mini PC Intel Core i3 5005U,15W Low Power Business Mini Computer with 8GB RAM((Upgradable, Not LPDDR)) 512GB SATA SSD, HDMIx2, USB3.2 Type A, USB-C/WiFi/BT, Office Business Micro PC
- SUPERB PERFORMANCE: INTEL I3-5005U EXCELS IN FAST, RELIABLE MULTITASKING.
- UPGRADE MADE EASY: EXPANDABLE 16GB RAM AND 512GB SSD FOR ALL NEEDS.
- ENERGY EFFICIENT: LOW-POWER DESIGN CUTS 50% ENERGY COSTS FOR BUSINESSES.
KAMRUI Hyper H2 Mini PC Windows 11 pro, Intel Core 14450HX Mini Computers (10C/16T, 4.8GHz), 32GB RAM 1TB PCle4.0 SSD Micro Desktop PC, Triple 4K Display, USB-C, WiFi6, BT5.2, Business Office Home
- TRIPLE 4K SUPPORT: SEAMLESSLY MULTITASK WITH THREE 4K DISPLAYS.
- DESKTOP-CLASS PERFORMANCE: INTEL I5-14450HX HANDLES HEAVY WORKLOADS EASILY.
- EXPANDABLE STORAGE: 1TB SSD, UPGRADEABLE TO 4TB FOR AMPLE SPACE.
GMKtec Mini PC N95 (Beats N100, 3.4GHz) 8GB RAM 256GB M.2 SSD Mini Desktop Computer with VESA Mount for Office Home Business HTPC Proxmox, Dual 4K Display, WiFi 5, Gigabit Ethernet G3S
- BOOST PRODUCTIVITY WITH 36% FASTER PERFORMANCE USING INTEL N95.
- EXPERIENCE QUICKER MULTITASKING WITH 8GB RAM & 256GB SSD.
- ENJOY DUAL 4K DISPLAY SUPPORT FOR SEAMLESS MULTITASKING AND MEDIA.
![GEEKOM [2026 Edition] Mini PC AI A7 MAX with AMD Ryzen 9 7940HS 16GB DDR5(Not LPDDR) & 1TB SSD(Expandable) Desktop Mini Computers for Creation,Radeon 780M Graphics 4 Modes|Premium Support|USB4|8K|SD](https://cdn.blogweb.me/1/41_Ts6_P_Qc_Jz_L_SL_160_6d3daa57cf.jpg)
GEEKOM [2026 Edition] Mini PC AI A7 MAX with AMD Ryzen 9 7940HS 16GB DDR5(Not LPDDR) & 1TB SSD(Expandable) Desktop Mini Computers for Creation,Radeon 780M Graphics 4 Modes|Premium Support|USB4|8K|SD
- SECURE A7 MAX MINI PC NOW TO LOCK IN CURRENT PRICING & 3-YEAR WARRANTY.
- EXPERIENCE SEAMLESS GAMING AND PRODUCTIVITY WITH AMD RYZEN 9 PERFORMANCE.
- FUTURE-PROOF UPGRADES: 128GB RAM & 4TB STORAGE FOR ULTIMATE VERSATILITY.
To use a Windows Mini PC as a media server, first connect the Mini PC to your home network and ensure it has sufficient storage space for your media files. Next, install a media server software such as Plex or Kodi on the Mini PC. You will need to set up the software and add your media files to the library.
Once the media server software is configured and your files are added, you can access the media server from any device on the same network. This allows you to stream videos, music, and photos to your smart TV, laptop, tablet, or smartphone. You can also set up remote access to your media server, so you can stream your content from anywhere with an internet connection.
Additionally, you can customize your media server by creating playlists, organizing your media library, and adding metadata to your files. This will make it easier to find and enjoy your favorite media content. Overall, using a Windows Mini PC as a media server is a convenient and versatile way to access your media files from various devices within your home network.
How to organize your media library on a Windows Mini PC?
Organizing your media library on a Windows Mini PC can help you easily find and enjoy your favorite content. Here are some tips on how to effectively organize your media library:
- Create a folder structure: Create a main folder for your media library, then subfolders for different types of media, such as movies, TV shows, music, and photos. You can further organize these subfolders into genres, artists, or albums.
- Name your files consistently: Use a consistent naming convention for your files to make it easier to browse and search for specific content. Include the title, year, and any other relevant information in the file name.
- Tag your files: Use metadata tags to add additional information to your media files, such as genre, actor, director, or album artist. This can help you quickly filter and sort your files based on specific criteria.
- Use a media management software: Consider using a media management software, such as Plex, Kodi, or Emby, to organize and stream your media library. These programs can automatically fetch metadata, cover art, and other information for your files, making it easier to navigate and enjoy your content.
- Regularly update and maintain your library: Take time to regularly update and maintain your media library by adding new content, removing duplicates or outdated files, and updating metadata. This will help keep your library organized and up to date.
By following these tips, you can effectively organize your media library on a Windows Mini PC and enjoy easy access to your favorite movies, TV shows, music, and photos.
What are some important security considerations for a Windows Mini PC media server?
- Keep the operating system and software up to date: Regularly install updates and patches to ensure that the system is protected against known vulnerabilities.
- Use strong passwords: Make sure to use complex, unique passwords for the Mini PC media server and any connected devices or accounts.
- Enable firewall protection: Configure the built-in Windows firewall or install a third-party firewall to restrict unauthorized access to the server.
- Secure the network: Use encryption protocols such as WPA3 for Wi-Fi networks and consider using a virtual private network (VPN) for remote access.
- Disable unnecessary services and ports: Close any open ports and disable any services that are not needed to reduce the attack surface of the server.
- Enable network sharing securely: If sharing files or media over the network, ensure that permissions are set correctly and limit access to authorized users only.
- Backup data regularly: Create backups of important data stored on the server to protect against data loss in the event of a security breach or hardware failure.
- Install antivirus software: Use reputable antivirus software to scan for and remove malware that could compromise the security of the Mini PC media server.
- Monitor system activity: Set up monitoring tools to keep track of network traffic, system logs, and user activity to detect any suspicious behavior.
- Educate users: Train users on best practices for security, such as avoiding clicking on suspicious links or downloading unknown files, to prevent potential security breaches.
How to connect external storage to your Windows Mini PC media server?
To connect external storage to your Windows Mini PC media server, follow these steps:
- Identify the type of external storage you have (e.g. External hard drive, USB flash drive, NAS drive, etc.).
- Connect the external storage device to an available USB port on your Windows Mini PC.
- If the external storage device requires a power source, make sure it is plugged in and turned on.
- Open File Explorer on your Windows Mini PC.
- Locate the external storage device under "This PC" or "Computer" in the left-hand pane of the File Explorer window.
- Double-click on the external storage device to open it and access its contents.
- You can now use the external storage device to transfer and store media files on your Windows Mini PC media server.
- If you want to set up the external storage device as a network-attached storage (NAS) drive, you may need to configure it through the Windows Mini PC's settings or network settings. Instructions for setting up a NAS drive may vary depending on the device and software you are using.
By following these steps, you should be able to easily connect external storage to your Windows Mini PC media server and expand its storage capacity for storing media files.
How to set up a backup system for your Windows Mini PC media server?
Setting up a backup system for your Windows Mini PC media server is essential to protect your valuable media files in case of hardware failure or data loss. Here are the steps to set up a backup system for your Windows Mini PC media server:
- Choose a backup storage device: You can use an external hard drive, network-attached storage (NAS) device, or cloud storage service to store your backup files. Make sure the storage device has enough capacity to hold all your media files.
- Set up Windows Backup and Restore: Windows operating system comes with a built-in backup and restore feature that allows you to create backup copies of your files and system image. Go to Control Panel > System and Security > Backup and Restore to set up a backup schedule and select the files and folders you want to back up.
- Schedule regular backups: It's important to schedule regular backups to ensure that your media files are constantly being backed up. You can set up automatic backups to run daily, weekly, or monthly, depending on your preference.
- Test your backups: After setting up your backup system, it's recommended to test your backups to make sure they are working properly. Restore some files from the backup to ensure that your backup system is reliable and your data is safely stored.
- Consider additional backup solutions: In addition to Windows Backup and Restore, you can also use third-party backup software or cloud storage services for added protection. These solutions offer advanced features such as encryption, versioning, and remote access to your backups.
By following these steps, you can set up a reliable backup system for your Windows Mini PC media server to protect your valuable media files and ensure that they are safe and easily recoverable in case of any data loss.