
Best GPUs for Pytorch to Buy in July 2026

ASUS The SFF-Ready Prime GeForce RTX™ 5070 12GB GDDR7 Graphics Card (PCIe® 5.0, 12GB GDDR7, HDMI®/DP 2.1, 2.5-Slot, Axial-tech Fans, Dual BIOS)
- LEVERAGE NVIDIA BLACKWELL & DLSS 4 FOR SUPERIOR GAMING PERFORMANCE.
- PERFECTLY FIT IN SMALL-FORM-FACTOR BUILDS FOR SPACE-SAVING CONVENIENCE.
- ADVANCED COOLING WITH AXIAL-TECH FANS FOR RELIABLE PERFORMANCE.


ASUS TUF Gaming GeForce RTX ™ 5070 12GB GDDR7 OC Edition Gaming Graphics Card (PCIe® 5.0, HDMI®/DP 2.1, 3.125-slot, Military-Grade Components, Protective PCB Coating, axial-tech Fans)
- ULTRA-DURABLE WITH MILITARY-GRADE COMPONENTS FOR LONGER LIFESPAN.
- OPTIMIZED AIRFLOW DESIGN WITH TRIPLE AXIAL-TECH FANS FOR COOLING.
- GPU TWEAK III SOFTWARE FOR INTUITIVE PERFORMANCE AND THERMAL CONTROL.
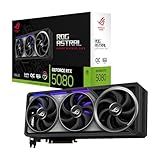
ASUS ROG Astral GeForce RTX™ 5080 OC Edition Gaming Graphics Card (PCIe® 5.0, 16GB GDDR7, HDMI®/DP 2.1, 3.8-Slot, 4-Fan Design, Axial-tech Fans, Patented Vapor Chamber, Phase-Change GPU Thermal pad)
-
EXCEPTIONAL COOLING: QUAD-FAN DESIGN BOOSTS AIRFLOW BY 20%
-
ENHANCED PERFORMANCE: ADVANCED VAPOR CHAMBER ENSURES LOWER GPU TEMPS
-
RELIABLE POWER: PHASE-CHANGE THERMAL PAD OPTIMIZES HEAT TRANSFER
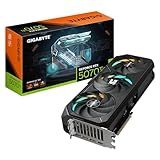
GIGABYTE GeForce RTX 5070 Ti Gaming OC 16G Graphics Card, 16GB 256-bit GDDR7, PCIe 5.0, WINDFORCE Cooling System, GV-N507TGAMING OC-16GD Video Card
- EXPERIENCE LIGHTNING-FAST PERFORMANCE WITH GEFORCE RTX 5070 TI.
- EFFORTLESS GAMING WITH 16GB GDDR7 AND PCIE 5.0 SUPPORT.
- STAY COOL UNDER PRESSURE WITH THE ADVANCED WINDFORCE COOLING SYSTEM.

GIGABYTE Radeon RX 9060 XT Gaming OC 16G Graphics Card, PCIe 5.0, 16GB GDDR6, GV-R9060XTGAMING OC-16GD Video Card
- UNMATCHED PERFORMANCE WITH RADEON RX 9060 XT POWER.
- STAY COOL WITH ADVANCED WINDFORCE COOLING SYSTEM.
- CUSTOMIZE YOUR SETUP WITH STUNNING RGB LIGHTING.

ASUS Dual GeForce RTX™ 5060 8GB GDDR7 OC Edition (PCIe 5.0, 8GB GDDR7, DLSS 4, HDMI 2.1b, DisplayPort 2.1b, 2.5-Slot Design, Axial-tech Fan Design, 0dB Technology, and More)
- ACHIEVE UNMATCHED SPEED WITH 623 AI TOPS PERFORMANCE!
- BOOST GAMING WITH UP TO 2565 MHZ IN OC MODE!
- ADVANCED COOLING WITH AXIAL-TECH FAN DESIGN FOR PEAK PERFORMANCE!
To use the GPU in PyTorch, you need to follow these steps:
- Install CUDA: CUDA is a parallel computing platform and programming model developed by NVIDIA. Check if your GPU supports CUDA and if not, consider getting a compatible GPU. Install the CUDA toolkit from the NVIDIA website.
- Install PyTorch: Install the latest version of PyTorch using either pip or conda, depending on your preference. Make sure to install the appropriate version that supports CUDA.
- Load the data: Prepare your dataset in PyTorch. This could involve loading data from files, transforming it, and creating data loaders.
- Create the model: Define your neural network model in PyTorch. This can include layers, activation functions, and any other required components.
- Move the model to the GPU: Use the to method of your model to move it to the GPU. For example, if your model is named model, you can call model.to('cuda') to transfer it to the GPU.
- Move the data to the GPU: Transfer your input data to the GPU as well. This can be done by using the to method on your input tensors. For example, if your input tensor is named input, you can call input = input.to('cuda').
- Train the model: Write code to train your model using the GPU. Use GPU-accelerated operations and libraries like CUDA tensors, CUDA-optimized functions, and CUDA kernels to gain maximum performance.
- Transfer outputs to CPU (if required): Once you're finished with training or inference, you can transfer the final outputs from the GPU back to the CPU using the to('cpu') method. For example, if your output tensor is named output, you can call output = output.to('cpu').
- Clean up: Once you're done with your computations, don't forget to free up the GPU memory by deleting unnecessary variables or calling torch.cuda.empty_cache().
By following these steps, you can leverage the power of GPU acceleration in PyTorch to significantly speed up your deep learning tasks.
How to handle missing values in PyTorch tensors?
There are several ways to handle missing values in PyTorch tensors:
- Set missing values to a specific value: You can choose a specific value to represent missing values, such as -1 or NaN. You can set the missing values in the tensor using indexing or the torch.where() function.
import torch
Create a tensor with missing values
x = torch.tensor([1, 2, -1, 4, -1])
Set missing values to 0
x[x == -1] = 0
Set missing values to NaN
x[x == -1] = float('nan')
Set missing values to 0 using torch.where()
x = torch.where(x == -1, torch.tensor(0), x)
- Ignore missing values during computations: If you want to ignore missing values during computations, you can use masking. A mask is a binary tensor that indicates whether each element is missing or not. You can create a mask using the torch.isnan() function or by comparing the tensor with the missing value representation.
import torch
Create a tensor with missing values
x = torch.tensor([1, 2, float('nan'), 4, float('nan')])
Create a mask for missing values
mask = torch.isnan(x)
Ignore missing values during computations
result = torch.sum(x[~mask])
- Impute missing values: If you want to fill in the missing values with estimated values, you can use imputation techniques. Some common imputation techniques include mean imputation and regression imputation. You can calculate the mean of non-missing values and replace the missing values with the mean value.
import torch
Create a tensor with missing values
x = torch.tensor([1, 2, -1, 4, -1])
Calculate the mean of non-missing values
mean = torch.mean(x[x != -1])
Impute missing values with mean
x[x == -1] = mean
Note that handling missing values in PyTorch tensors may vary depending on the specific use case or task that you are working on.
What is a tensor in PyTorch?
A tensor in PyTorch is a multidimensional array that can hold and manipulate data. It is similar to the concept of a matrix in linear algebra. Tensors are the fundamental data structure in PyTorch and are used to store and process data for deep learning models. Tensors can have different dimensions, such as 1D for vectors, 2D for matrices, and higher dimensions for multidimensional arrays.
Tensors in PyTorch can be created from lists, NumPy arrays, or other tensors. They can be manipulated using various mathematical operations, such as element-wise addition, subtraction, multiplication, and division. PyTorch tensors also support broadcasting, which allows operations between tensors of different sizes.
Tensors in PyTorch can be used to represent inputs, outputs, and parameters in deep learning models. They are the primary data structure that is passed through the computation graph during the forward and backward pass of model training and inference.
What is the purpose of loss functions in PyTorch?
The purpose of loss functions in PyTorch is to quantify the discrepancy between the predicted outputs of a neural network model and the true labels or targets. Loss functions are used in the training phase of machine learning models to guide the learning process by minimizing the loss value.
By computing the loss, the model can determine the error or difference between its predictions and the actual values. This error is then backpropagated through the network, adjusting the model's parameters or weights to minimize the loss. Through iterative optimization, the model learns to make better predictions and improve its performance.
PyTorch provides a range of loss functions that serve different purposes depending on the task at hand, such as mean squared error (MSE) for regression problems, binary cross-entropy for binary classification, categorical cross-entropy for multi-class classification, and more.
What is the role of CUDA in PyTorch's autograd?
CUDA (Compute Unified Device Architecture) is a parallel computing platform and application programming interface (API) model developed by NVIDIA that allows efficient utilization of GPUs (Graphics Processing Units) for general-purpose computing.
In the context of PyTorch's autograd, CUDA plays a crucial role in accelerating the computations performed during forward and backward passes of neural networks. PyTorch's autograd feature enables automatic differentiation (calculating gradients) of computational operations. It keeps track of the operations executed on tensors and builds a computational graph underlying the operations.
When using CUDA, PyTorch's autograd leverages GPU acceleration, which significantly speeds up computations compared to running code only on the CPU. By operating on tensors that are placed on the GPU, the computational operations in the autograd graph are executed in parallel across multiple GPU cores, leading to substantial performance gains. Consequently, the use of CUDA in PyTorch's autograd enables faster training and inference of neural networks, especially for large-scale models and data.
What is mini-batch gradient descent and how to implement it in PyTorch?
Mini-batch gradient descent is a variation of gradient descent in which instead of computing the gradient for the entire training dataset, the gradient is computed for a smaller subset of the data called a mini-batch. This approach strikes a balance between the computational efficiency of stochastic gradient descent (which computes the gradient based on a single sample) and the stability of batch gradient descent (which computes the gradient based on the entire dataset).
In PyTorch, mini-batch gradient descent can be implemented using the DataLoader class, which helps in loading the data and creating mini-batches. Here is an example of how to implement mini-batch gradient descent in PyTorch:
- Define your dataset and transform it into torch tensors. Let's assume you have your data stored in a NumPy array X and the corresponding labels in a NumPy array y. Convert them to PyTorch tensors using torch.from_numpy().
import numpy as np import torch from torch.utils.data import Dataset
class MyDataset(Dataset): def __init__(self, X, y): self.X = torch.from_numpy(X) self.y = torch.from_numpy(y)
def \_\_len\_\_(self):
    return len(self.X)

def \_\_getitem\_\_(self, index):
    return self.X\[index\], self.y\[index\]
Assuming you have X and y as your data and labels
dataset = MyDataset(X, y)
- Create a DataLoader object that takes the dataset and specifies the batch size. This will create mini-batches of the specified size.
from torch.utils.data import DataLoader
batch_size = 64 dataloader = DataLoader(dataset, batch_size=batch_size, shuffle=True)
- Define your model architecture and loss function. This can be done using the nn.Module class in PyTorch.
import torch.nn as nn
Define your model architecture
model = nn.Sequential( nn.Linear(input_dim, hidden_dim), nn.ReLU(), nn.Linear(hidden_dim, output_dim) )
Define your loss function
loss_fn = nn.CrossEntropyLoss()
- Iterate over the mini-batches and perform gradient descent.
optimizer = torch.optim.SGD(model.parameters(), lr=learning_rate)
epochs = 10 for epoch in range(epochs): for batch_X, batch_y in dataloader: # Forward pass outputs = model(batch_X) loss = loss_fn(outputs, batch_y)
    # Backward pass and optimization
    optimizer.zero\_grad()
    loss.backward()
    optimizer.step()
This code will perform mini-batch gradient descent for the specified number of epochs using the specified learning rate. The model parameters are updated based on the gradients computed using each mini-batch.
What is dropout and how to apply it in PyTorch?
Dropout is a regularization technique used in neural networks to prevent overfitting. It works by randomly dropping out a specified fraction of the input units (or neurons) during each training step, which helps to prevent units from relying on the presence of specific other units.
In PyTorch, dropout can be easily applied using the torch.nn module. Here's a step-by-step guide on how to apply dropout in PyTorch:
- Import the necessary libraries:
import torch import torch.nn as nn
- Define your neural network model, and add dropout layers where required. The dropout layer is typically placed after the linear transformation and before the activation function:
class MyModel(nn.Module): def __init__(self): super(MyModel, self).__init__()
    self.fc1 = nn.Linear(in\_features, hidden\_size)
    self.dropout1 = nn.Dropout(p=dropout\_prob)
    self.fc2 = nn.Linear(hidden\_size, out\_features)

def forward(self, x):
    x = self.fc1(x)
    x = self.dropout1(x)
    x = torch.relu(x)
    x = self.fc2(x)
    return x
- Instantiate the model:
model = MyModel()
- During training, enable dropout by calling model.train():
model.train()
- Pass your input data through the model:
output = model(input)
During the forward pass, dropout randomly zeros out some of the neurons in the fc1 layer, preventing them from being overly dependent on each other.
That's it! You have successfully applied dropout in PyTorch. Remember to disable dropout during testing or evaluation by calling model.eval().