
Best All-In-One Printers to Buy in July 2026
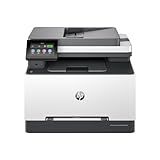
HP Color Laserjet Pro MFP 3301sdw Wireless All-in-One Color Laser Printer, Scanner, Copier, Best-for-Office (499Q3F)
- FAST & EFFICIENT: PRINT UP TO 26 PPM FOR QUICK DOCUMENT DELIVERY.
- VIVID COLORS: NEXT-GEN TERRAJET TONER ENSURES VIBRANT PROFESSIONAL PRINTS.
- RELIABLE PERFORMANCE: TRUSTED BRAND WITH CONSISTENT, AWARD-WINNING RESULTS.


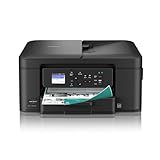
Brother Work Smart 1360 Wireless Color Inkjet All-in-One Printer with Automatic Duplex Printing and 1.8” Color Display | Includes Refresh Subscription Trial(1) (MFC-J1360DW) (Uses LC501 Series Inks)
- ALL-IN-ONE PRINTER: PRINT, COPY, SCAN FOR HOME AND OFFICE EFFICIENCY.
- CLOUD CONNECTIVITY: EFFORTLESS PRINTING FROM POPULAR APPS LIKE GOOGLE DRIVE.
- FAST PERFORMANCE: ENJOY 2-SIDED PRINTING AND UP TO 16 PAGES PER MINUTE.
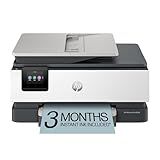
HP OfficeJet Pro 8125e Wireless All-in-One Color Inkjet Printer, Print, scan, Copy, ADF, Duplex Printing Best-for-Home Office, 3 Month Instant Ink Trial Included, AI-Enabled (405T6A)
- PRINT PROFESSIONAL-QUALITY COLOR DOCS QUICKLY-UP TO 20 PPM BLACK.
- STAY CONNECTED EFFORTLESSLY WITH DUAL-BAND WI-FI FOR RELIABLE PRINTING.
- EASY MOBILE PRINTING VIA HP APP; MANAGE PRINTS WITH A TOUCH OF A BUTTON.
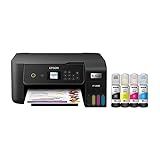
Epson EcoTank ET-2800 Wireless Color All-in-One Cartridge-Free Supertank Printer with Scan and Copy – The Ideal Basic Home Printer - Black, Medium
- SAVE UP TO 90% ON INK COSTS WITH ECOTANK'S INNOVATIVE DESIGN.
- PRINT UP TO 4,500 BLACK/7,500 COLOR PAGES WITH 2 YEARS OF INK INCLUDED.
- REDUCE LANDFILL WASTE WITH CARTRIDGE-FREE, ECO-FRIENDLY PRINTING.

Brother DCP-L2640DW Wireless Compact Monochrome Multi-Function Laser Printer with Copy and Scan, Duplex, Mobile, Black & White | Includes Refresh Subscription Trial(1), Works with Alexa
- COMPACT 3-IN-1 DESIGN BOOSTS PRODUCTIVITY FOR SMALL BUSINESSES.
- FAST PRINTING (36 PPM) & EFFICIENT SCANNING STREAMLINE WORKFLOWS.
- MOBILE APP & FLEXIBLE CONNECTIVITY ENHANCE CONVENIENCE ON-THE-GO.
Canon PIXMA TR4720 All-in-One Wireless Printer, Home Use with Auto Document Feeder, Mobile Printing and Built-in Fax, Black
- EFFICIENT 4-IN-1 FUNCTIONALITY: PRINT, COPY, SCAN, AND FAX WITH EASE.
- SMART INK MANAGEMENT: ALEXA NOTIFICATIONS AND SMART REORDERS INCLUDED.
- ECO-FRIENDLY DESIGN WITH LOW POWER CONSUMPTION AND ENERGY STAR CERTIFIED.
Epson EcoTank ET-4800 Wireless All-in-One Cartridge-Free Supertank Printer with Scanner, Copier, Fax, ADF and Ethernet – Ideal-for Your Home Office, White
- SAVE MONEY WITH HIGH-CAPACITY INK TANKS-NO MORE PRICEY CARTRIDGES!
- ENJOY STUNNING PRINTS WITH ADVANCED MICRO PIEZO HEAT-FREE TECH!
- REDUCE WASTE AND GO GREEN-NO MORE CARTRIDGES IN LANDFILLS!
Canon PIXMA TS3720 Wireless All-in-One Printer (6671C022)
- ALL-IN-ONE FUNCTIONALITY: PRINT, COPY, AND SCAN WITH EASE.
- FAST PRINT SPEEDS: QUICKLY PRINT UP TO 7.7 BLACK / 4 COLOR PPM.
- USER-FRIENDLY SETUP: GET STARTED IN MINUTES WITH EASY INSTALLATION.
HP Envy 6155e Wireless All-in-One Color Inkjet Printer, Portobello, Print, scan, copy, Duplex printing Best-for-home, 3 month Instant Ink trial included, AI-enabled (714L5A)
- EFFORTLESSLY PRINT VIBRANT DOCUMENTS AND PHOTOS WITH HP'S P3 TECHNOLOGY.
- ENJOY WIRELESS PRINTING WITH RELIABLE DUAL-BAND WI-FI CONNECTION.
- GET 3 MONTHS OF INSTANT INK DELIVERY FOR HASSLE-FREE PRINTING!
An all-in-one printer offers several advantages by integrating multiple functionalities into a single device. Firstly, it saves space and reduces clutter, making it ideal for home offices or small workplaces where space is limited. It combines printing, scanning, copying, and sometimes faxing capabilities, which enhances versatility and convenience for users who need various functions without investing in multiple machines. Additionally, an all-in-one printer is often cost-effective, as it typically costs less than purchasing separate devices for each function. This also extends to maintenance and supply costs, as you only need to manage one set of consumables and service appointments. Furthermore, these printers often come with user-friendly interfaces and software that streamline tasks, improving productivity and efficiency. Integrating cloud and wireless capabilities can also enhance connectivity and ease of use, allowing for printing or scanning directly from mobile devices or cloud storage services. Overall, an all-in-one printer is a practical solution for those seeking functionality, efficiency, and cost savings in one compact unit.
How to replace ink cartridges in an all-in-one printer?
Replacing ink cartridges in an all-in-one printer can vary slightly depending on the brand and model, but here are some general steps you can follow:
- Turn On the Printer: Make sure your printer is powered on. This will allow the ink cartridge carriage to move to the correct position.
- Open the Printer Cover: Lift the scanner unit or open the front cover, depending on your printer model. This typically causes the ink cartridge carrier to slide into view.
- Identify the Cartridge Needing Replacement: Check which cartridge needs replacing. Many printers have indicators or displays showing low or empty cartridges.
- Remove the Old Cartridge: Press down gently on the cartridge to release it. Some printers might have a lever you need to pull to release the cartridge. Carefully take it out of its slot.
- Prepare the New Cartridge: Unpack the new ink cartridge. Remove any protective tape or plastic cover that covers the ink outlet (ensure you don’t touch the copper-colored area or the ink nozzles as this might cause clogs, ink failure, and bad electrical connections).
- Insert the New Cartridge: Place the new cartridge into the empty slot. Push it gently but firmly until it clicks into place. Ensure it is in the correct slot (e.g., black cartridge in the black slot).
- Close the Printer Cover: Once the new cartridge is installed, close the printer cover or scanner unit.
- Align the New Cartridge: Many printers will automatically prompt you to run an alignment. Follow any on-screen instructions or refer to your printer’s manual to align the cartridges. This step is important for maintaining print quality.
- Test the Printer: Print a test page to ensure the new cartridge is functioning correctly.
If you encounter any issues or are unsure about any step, it's a good idea to refer to your printer's user manual for specific instructions related to your model.
How to reduce printing costs with an all-in-one printer?
Reducing printing costs with an all-in-one printer involves several strategies focused on minimizing ink or toner usage, managing paper consumption, and optimizing device settings. Here are some practical tips to help lower your printing expenses:
- Use Draft Mode: Set your printer to draft or economy mode for non-essential documents, which uses less ink and prints faster.
- Print in Black and White: Unless necessary, print in grayscale to save color ink, which is usually more expensive.
- Print Double-Sided: Enable duplex printing to use both sides of the paper, cutting your paper usage in half.
- Preview Before Printing: Use print preview to avoid unwanted pages. Ensure settings are correct to prevent mistakes that lead to reprinting.
- Use Print Management Software: Tools like PaperCut or Print Audit can track usage and suggest areas for improvement.
- Maintain Your Printer: Regular maintenance, like cleaning print heads, ensures efficient operation and longer-lasting equipment.
- Buy Ink or Toner Wisely: Purchase in bulk, look for discounts, or use subscription services. Consider high-capacity cartridges if available.
- Use Quality Paper: Invest in good-quality paper for essential prints to prevent jams, which can waste ink and paper.
- Opt for Digital Alternatives: Whenever possible, send documents electronically to reduce the need for physical copies.
- Implement User Policies: Train staff or household members on cost-saving measures and create guidelines for responsible printing.
- Monitor and Review Usage: Regularly assess your printing habits and costs to identify areas for improvement.
By applying these strategies, you can significantly reduce your printing costs while still meeting your needs effectively.
What are the cost benefits of using an all-in-one printer?
Using an all-in-one printer can offer several cost benefits for both individuals and businesses. Here are some key advantages:
- Reduced Equipment Costs: Instead of purchasing separate devices for printing, scanning, copying, and sometimes faxing, an all-in-one printer consolidates these functions into a single machine. This is often more cost-effective than buying multiple devices.
- Lower Maintenance and Repair Expenses: Maintaining a single device is typically less expensive than maintaining several. With fewer machines to service, you'll likely spend less on repairs, parts, and regular maintenance.
- Space Savings: By combining multiple functions into one device, all-in-one printers save valuable office or home space. This can lead to indirect cost savings, especially in environments where space is at a premium.
- Energy Efficiency: Operating one device instead of several can significantly reduce energy consumption, which can lead to lower utility bills. Many all-in-one printers also have energy-saving modes to further minimize power usage.
- Reduced Consumables Costs: Many all-in-one devices are designed to use standardized consumables like ink or toner, which can be easier to manage and sometimes less expensive than maintaining supplies for separate machines.
- Streamlined Procurement: Purchasing supplies and replacement parts is simpler with one machine. This can lead to savings through bulk purchasing and reduced delivery costs.
- Improved Workflow Efficiency: By having all functions in one place, work processes can be more streamlined, potentially saving time and improving productivity, which translates indirectly into cost savings.
- Vendor Discounts: Purchasing an all-in-one printer may make you eligible for vendor discounts or service packages that are not available when buying separate equipment.
While these benefits can lead to significant savings, it's also important to consider the potential downsides, such as higher upfront costs or reduced functionality compared to individual specialized devices, and evaluate them based on your specific needs and usage patterns.
How to connect an all-in-one printer to Wi-Fi?
Connecting an all-in-one printer to Wi-Fi generally involves a few straightforward steps, although the exact process can vary slightly depending on the printer's make and model. Here's a general guide to help you:
- Unpack and Setup Physical Components: Unpack the printer, remove any packing materials, and assemble any necessary parts like trays or cartridges. Plug in the printer and turn it on.
- Access the Printer’s Control Panel: Use the printer’s touchscreen or control panel to navigate settings.
- Initiate the Network Setup: Look for a menu option that may be labeled as “Network,” “Wireless Settings,” or similar. Select the wireless setup wizard or Wi-Fi setup assistant if available.
- Select Your Wi-Fi Network: The printer will search for available Wi-Fi networks. Choose your home network (SSID) from the list.
- Enter Wi-Fi Password: Enter the network password when prompted. This is the same password you use to connect other devices to your Wi-Fi. Be sure to enter the password carefully as they are case-sensitive.
- Complete the Setup: Once connected, the printer might print a confirmation page or provide an on-screen confirmation.
- Install Printer Software on Your Computer: Use the CD that came with the printer or download the latest software from the manufacturer’s website. Follow the on-screen instructions to complete the installation. When prompted, choose the ‘Wireless’ connection option as your preferred setup.
- Add Printer to Your Devices: On your computer, go to ‘Printers & Scanners’ in settings. Click ‘Add a Printer’, and your computer will search for printers. Select your printer from the list and add it.
- Test the Connection: Print a test page to ensure everything is set up correctly.
Troubleshooting Tips:
- Ensure your printer and computer are connected to the same Wi-Fi network.
- Restart your router, printer, or computer if you encounter connection issues.
- Consult the printer’s manual or support website for model-specific instructions if you face difficulties.
By following these steps, most all-in-one printers should connect seamlessly to your Wi-Fi network.
How does an all-in-one printer save space?
An all-in-one printer saves space by combining multiple functions into a single device. Here's how it achieves that:
- Consolidation of Devices: Traditional printing setups often require separate devices for printing, scanning, copying, and sometimes faxing. An all-in-one printer integrates all these functions, eliminating the need for multiple machines and the associated clutter.
- Compact Design: Many all-in-one printers are designed to be space-efficient, with compact footprints that enable them to fit into tight spaces such as small offices or home workstations.
- Reduced Cabling: With multiple devices, you would typically have a tangle of cables for power, data connections, and networking. An all-in-one printer reduces the number of cables required, which not only saves space but also makes the area look tidier.
- Simplified Setup: Having a single device simplifies the setup process, as you only need to find space for one machine instead of several. This can be particularly beneficial in environments where space is at a premium.
- Streamlined Workflow: By consolidating functions, an all-in-one printer can facilitate more efficient workflows. You can easily switch between tasks like printing, scanning, and copying without moving between different machines.
- Integrated Software: All-in-one printers often come with integrated software solutions that further condense operations and reduce the need for additional computers or dedicated stations for managing different devices.
In summary, an all-in-one printer optimizes space by eliminating the need for separate equipment for different office tasks, reducing physical and visual clutter, and offering a more efficient, centralized workflow setup.
How to perform a software update on an all-in-one printer?
Performing a software update on an all-in-one printer can help ensure that your device remains compatible with new technologies, maintains security, and benefits from the latest features. The process can vary slightly depending on the brand and model of your printer, but here’s a general guide you can follow:
Check Manufacturer Instructions:
- Refer to the Manual: Always refer to the user manual or the manufacturer's official website for specific instructions related to your printer model.
Prepare for Update:
- Power On the Printer: Ensure your printer is turned on and connected to your computer or network.
- Check Connection: Make sure your printer is connected to the internet if it supports network updates.
Download and Install Updates:
- Manufacturer’s Website: Visit the official website of your printer’s manufacturer (e.g., HP, Canon, Epson, Brother) to find the latest software updates. Navigate to the ‘Support’ or ‘Downloads’ section. Enter your printer model to search for available updates.
- Download Driver/Application: If available, download the latest printer driver or software application package. Follow the given instructions for installation. Some printers have proprietary software applications for managing updates and might not need manual file downloads.
- Use Printer Software/Utility: Open the printer software or utility on your computer (this might be installed when you first setup the printer). Look for ‘Check for Updates’ or a similar option within the utility.
- Using Printer’s Control Panel: Some all-in-one printers with display screens allow updates directly through their control panel. Navigate to the settings menu. Look for options like “Software Update” or “Firmware Update.” Follow on-screen prompts to download and install the updates.
Final Steps:
- Restart if Necessary: After the update is complete, restart your printer to ensure that all changes take effect.
- Test the Printer: Print a test page to ensure that the printer is functioning as expected after the update.
Additional Tips:
- Firmware Updates: Sometimes, what is being updated is the firmware of the printer rather than just software drivers. The process is generally similar but often involves a more critical update to the printer’s hardware functions.
- Regularly Check for Updates: Make it a routine to check for updates periodically, especially if your device isn’t set to update automatically.
- Backup Settings: If possible, backup your printer settings before performing an update, in case any setting is reset during the process.
This guide is aimed at ensuring a safe and efficient update process. Always follow specific instructions provided by your printer's manufacturer for the best results.