
Best External Hard Drives for Mac to Buy in July 2026
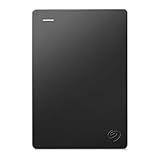
Seagate Portable 2TB External Hard Drive HDD — USB 3.0 for PC, Mac, PlayStation, & Xbox -1-Year Rescue Service (STGX2000400)
- STORE 2TB OF CONTENT EASILY, PERFECT FOR ON-THE-GO ACCESS.
- COMPATIBLE WITH WINDOWS/MAC – BACKUP MADE EFFORTLESS!
- PLUG AND PLAY SETUP-AUTOMATIC RECOGNITION, NO SOFTWARE NEEDED!


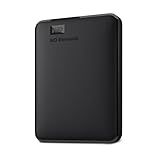
WD 2TB Elements Portable External Hard Drive for Windows, USB 3.2 Gen 1/USB 3.0 for PC & Mac, Plug and Play Ready - WDBU6Y0020BBK-WESN
- COMPACT DESIGN WITH UP TO 6TB CAPACITY FOR ON-THE-GO USERS.
- EASY PLUG-AND-PLAY EXPANDABILITY FOR INSTANT STORAGE ACCESS.
- FAST SUPERSPEED USB 3.2 GEN 1 FOR EFFICIENT DATA TRANSFERS.
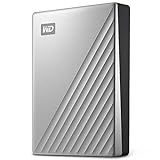
WD 5TB My Passport Ultra for Mac Silver, Portable External Hard Drive, backup software with defense against ransomware, and password protection, USB-C and USB 3.1 - WDBPMV0050BSL-WESN
- DUAL USB-C & USB 3.1 FOR SEAMLESS BUSINESS AND PERSONAL USE.
- SLEEK METAL DESIGN ADDS A TOUCH OF SOPHISTICATION.
- 256-BIT AES ENCRYPTION ENSURES TOP-NOTCH DATA SECURITY.
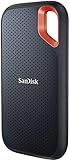
SanDisk 2TB Extreme Portable SSD - Up to 1050MB/s, USB-C, USB 3.2 Gen 2, IP65 Water and Dust Resistance, Updated Firmware - External Solid State Drive - SDSSDE61-2T00-G25
- BLAZING NVME SPEEDS: UP TO 1050MB/S READ, 1000MB/S WRITE.
- RUGGED DESIGN: 3-METER DROP PROTECTION & IP65 WATER/DUST RESISTANCE.
- SECURE YOUR DATA: 256-BIT AES ENCRYPTION FOR PEACE OF MIND.
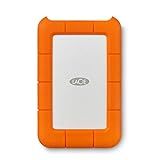
LaCie Rugged Mini 2TB External Hard Drive Portable HDD - USB 3.0/ 2.0 Compatible, Drop Shock Dust Rain Resistant Shuttle Drive, For Mac And PC Computer (LAC9000298), orange
- SHOCKPROOF DESIGN: SURVIVES DROPS UP TO 4 FEET FOR RUGGED USE.
- FAST USB 3.0: TRANSFERS DATA UP TO 4X FASTER THAN USB 2.0.
- FREE ADOBE CC: 1-MONTH MEMBERSHIP INCLUDED FOR CREATIVE PROJECTS.
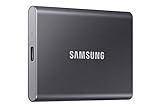
SAMSUNG T7 Portable SSD, 1TB External Solid State Drive, Speeds Up to 1,050MB/s, USB 3.2 Gen 2, Reliable Storage for Gaming, Students, Professionals, MU-PC1T0T/AM, Gray
- ULTRA-FAST SPEEDS: UP TO 1,050 MB/S FOR SEAMLESS CREATIVITY.
- MASSIVE CAPACITY: STORE UP TO 4TB OF DATA FOR ALL YOUR PROJECTS.
- SHOCK-RESISTANT DESIGN: BUILT TO ENDURE ANY ADVENTURE, HASSLE-FREE.
Kosbees 500 GB External Hard Drives,Portable Hard Drive for Windows,Ultra Slim External HDD Store Compatible with PC, MAC,Laptop,PS4, Xbox one, Xbox 360;Plug and Play Ready
-
PLUG-AND-PLAY READY: NO SOFTWARE NEEDED; JUST PLUG IN AND GO!
-
LIGHTNING-FAST TRANSFERS: ENJOY READ SPEEDS UP TO 133MB/S FOR EFFICIENCY.
-
VERSATILE COMPATIBILITY: WORKS SEAMLESSLY WITH ALL MAJOR OS AND CONSOLES!
When searching for the best external hard drive for a Mac, several factors should be considered to ensure compatibility and performance. Macs require a drive that is either pre-formatted for macOS or can be easily reformatted. Speed is a priority, which means looking for drives that support USB-C or Thunderbolt 3 connections, since these offer faster data transfer rates, aligning with modern Mac capabilities. Storage size is another crucial factor, varying based on the user's needs from a few terabytes for general use to several terabytes for professional and media-heavy tasks. Durability and portability might also be important, especially for users who frequently transport their drive. Some models offer features specifically designed for macOS, such as Time Machine compatibility, which simplifies the backup process. Price points can vary widely, so balancing cost with performance and storage needs is essential. Additionally, considering encryption and security features can provide peace of mind for sensitive data storage.
How to troubleshoot an external hard drive not recognized by a Mac?
If your external hard drive is not recognized by your Mac, there are several steps you can take to troubleshoot the issue:
- Check the Connections: Ensure that the USB or Thunderbolt cable is securely connected to both the external hard drive and the Mac. Try using a different cable to rule out any issues with the original cable. Connect the drive directly to the Mac, avoiding hubs or docking stations, to check if they might be causing the problem.
- Check the Power Supply: If your external hard drive requires an external power source, make sure it is plugged in and the power indicator is on. Try a different power outlet or adapter if possible.
- Try a Different Port: Plug the hard drive into a different USB or Thunderbolt port on your Mac. Test the drive on another computer to see if the issue persists. This can help determine if the problem is with the drive or your Mac.
- Verify in Disk Utility: Open Disk Utility (Applications > Utilities > Disk Utility) to see if the drive appears there. If it appears but is not mounted, try clicking the "Mount" button.
- Check Finder Preferences: Open Finder and go to Finder > Preferences (or press Command + ,). Under the "Sidebar" and "General" tabs, make sure "External disks" are checked to display in Finder.
- Update macOS: Ensure that your macOS is up to date, as updates can sometimes fix connectivity issues with hardware.
- Reset NVRAM/PRAM: Shut down your Mac. Turn it on and immediately press and hold Option + Command + P + R for about 20 seconds. Release the keys and let your Mac start up normally.
- Reset SMC: The process to reset SMC varies depending on the type of Mac (e.g., MacBook with a T2 chip, Intel-based Mac, etc.), so check Apple's official guide for instructions.
- Check System Information: Go to Apple Menu > About This Mac > System Report, and under "USB" or "Thunderbolt," see if your hard drive is recognized.
- Run First Aid: In Disk Utility, select the external hard drive and click "First Aid" to repair any potential issues with the drive.
- Check for File System Issues: If the drive is not formatted for macOS (e.g., formatted as NTFS), your Mac might have trouble recognizing it. Consider reformatting the drive with the appropriate file system if applicable, but be aware that this will erase all data on the drive.
- Use a Third-Party Tool: If none of the above works, considering using a third-party disk management tool to diagnose the issue.
If the problem persists after trying these steps, there might be more serious hardware issues with the drive, in which case consulting a professional or the manufacturer’s support might be necessary.
How to back up data using an external drive on a Mac?
Backing up your data on a Mac using an external drive is a smart way to secure your files. You can accomplish this by using Time Machine, which is built into macOS, or by manually copying files. Here's a step-by-step guide for both methods:
Using Time Machine
Time Machine is the easiest and most efficient way to back up your Mac data automatically.
- Connect the External Drive: Plug in your external drive to your Mac. Ensure that the drive has sufficient storage capacity for your backup.
- Format Your Drive (if necessary): Open Disk Utility (found in Applications > Utilities). Select your external drive from the list. Click on the Erase button. Choose Mac OS Extended (Journaled) or APFS as the format. Name the drive and click on Erase (Make sure to back up any important data on the external drive before erasing it).
- Set Up Time Machine: Open System Preferences from the Apple menu. Select Time Machine. Click on Select Backup Disk.... Choose your connected external drive and click Use Disk. Check the box for Back Up Automatically if you want automatic backups.
- Initial Backup: Time Machine will start its first backup, which might take some time depending on the amount of data you have. Once completed, Time Machine will continue to make hourly backups as long as the external drive is connected.
Manual Backup
If you prefer to manually backup specific files:
- Connect Your External Drive: Plug your external drive into your Mac.
- Open Finder: Navigate to the files or folders you want to back up.
- Copy Files: Drag the files or folders from your Mac and drop them into a destination folder on your external drive in Finder. Alternatively, right click on the files/folders, choose Copy, navigate to the external drive, right-click again, and choose Paste.
- Eject Safely: Once the file transfer is complete, right-click the external drive in Finder and select Eject before physically disconnecting it from your Mac.
Important Notes
- Regular Backups: To ensure data safety, set a routine (daily, weekly) for backups if using manual methods.
- Drive Protection: Store your external drive in a safe place to prevent damage or theft.
- Backup Verification: Occasionally check your external backups to ensure the data is correctly copied and accessible.
By following these steps, you can ensure your important data is safely backed up on your Mac using an external drive.
What is the best brand for external hard drives?
Determining the "best" brand for external hard drives can depend on specific needs, such as storage capacity, speed, durability, price, and additional features. However, several brands are consistently recommended and have a strong reputation:
- Western Digital (WD): Known for reliability and a wide range of options, including their My Passport and Elements series.
- Seagate: Offers a variety of external hard drives that are often noted for their speed and value for money. The Backup Plus and Expansion series are popular choices.
- Samsung: While more renowned for SSDs, Samsung's portable SSDs are highly regarded for their speed and durability.
- Toshiba: Known for affordability and reliability, their Canvio series is a popular choice among consumers looking for budget-friendly options.
- LaCie: Offers premium external hard drives often used by creative professionals who need rugged and durable drives, such as the Rugged series.
- SanDisk: Also more known for SSDs, they have some highly portable and durable options.
When choosing an external hard drive, consider what features are most important for your needs, such as the type of connection (USB, Thunderbolt), compatibility with operating systems, or specific-use cases (like video editing or gaming). It's also a good idea to check recent reviews and user feedback, as product performance can change over time with new models and updates.
How to update the firmware of an external hard drive?
Updating the firmware of an external hard drive can improve its performance, compatibility, and reliability. Here are general steps to follow, but keep in mind that the process can vary depending on the manufacturer and model of your hard drive:
- Identify the Manufacturer and Model: Find the brand and model number of your external hard drive. This information is usually found on the device itself or in any documentation that came with it.
- Visit the Manufacturer’s Website: Go to the official website of your hard drive manufacturer. This is the most reliable source for firmware updates.
- Locate the Support or Downloads Section: Look for the support or downloads section on the website. Many manufacturers have a dedicated page for software and driver downloads.
- Find Firmware Updates: Search for firmware updates specific to your hard drive model. Ensure that the update is compatible with your device.
- Download the Firmware: Download the firmware update file. It might come compressed in a ZIP file or as a standalone executable.
- Back Up Your Data: Before performing any firmware update, back up your important data. Firmware updates can potentially lead to data loss.
- Read the Instructions: If there are instructions included with the firmware update (often found in a ReadMe file or on the download page), read them carefully. They might contain specific steps or precautions.
- Connect Your External Hard Drive: Connect your drive to your computer if it isn’t already. Ensure it is recognized by your system.
- Run the Firmware Update: Execute the firmware update file. Follow any on-screen instructions provided by the updater.
- Wait for Completion: Allow the update process to complete without interruption. Do not disconnect the drive during the update process.
- Restart If Necessary: Some updates might require you to restart your computer or reconnect the external drive. Follow any additional instructions provided.
- Confirm the Update: After completion, you might want to verify that the firmware update was successful. This can often be done using software provided by the manufacturer that can display the firmware version of your drive.
If you encounter any issues or are unsure about the process, consider reaching out to customer support for assistance, or consult forums and user guides related to your specific hard drive model.
How to partition an external hard drive on a Mac?
Partitioning an external hard drive on a Mac is a straightforward process using the Disk Utility app. Here’s a step-by-step guide:
- Connect the External Drive: Attach your external hard drive to your Mac through the appropriate port (USB, Thunderbolt, etc.).
- Open Disk Utility: You can find Disk Utility by navigating to Applications > Utilities > Disk Utility, or simply search for it using Spotlight (press Cmd + Space and type "Disk Utility").
- Select the External Drive: In Disk Utility, you’ll see a list of all available drives on the left side. Locate and select your external hard drive. Ensure you select the drive itself (the root drive) and not any of its partitions if they exist.
- Partition the Drive: Click on the Partition button in the toolbar or select the Partition tab (macOS versions may vary in layout). A pie chart will appear representing your drive’s current partition layout.
- Add a Partition: Click the + button below the pie chart to add a new partition. Adjust the partition size by dragging the divider or entering a size manually.
- Set Partition Information: Name the new partition. Choose a format for it. Common formats include: Mac OS Extended (Journaled) for general use with macOS. APFS (Apple File System) for newer macOS versions with better performance and encryption support. exFAT for compatibility with both macOS and Windows systems.
- Apply Changes: Once everything is set, click Apply or Partition (button name may vary). Disk Utility will begin partitioning the drive. This process might take some time, depending on the drive size and format.
- Finalize and Eject: After partitioning, ensure the new partitions are listed in Disk Utility and are accessible in the Finder. Safely eject your external drive by dragging it to the Trash or by clicking the eject symbol next to it in the Finder sidebar.
Important Notes:
- Backup Data: Partitioning a drive typically erases all existing data on it. Make sure to back up any important files before proceeding.
- Partition Limitations: Remember that each partition acts like a separate drive; space allocated to one partition is not accessible to others.
- Repartitioning: You can later resize or remove partitions if needed, but data loss can occur, so always back up before making changes.
By following these steps, you can successfully partition your external hard drive on a Mac.
What is the difference between Thunderbolt 3 and USB 3.0?
Thunderbolt 3 and USB 3.0 are both interface standards used for connecting devices and transferring data, but they have some key differences in terms of performance, functionality, and capabilities:
- Speed and Bandwidth: Thunderbolt 3: Offers data transfer speeds of up to 40 Gbps (gigabits per second). It is significantly faster and can support multiple simultaneous data and display protocols. USB 3.0: Known as USB 3.1 Gen 1 in some cases, provides data transfer speeds of up to 5 Gbps. It is much slower compared to Thunderbolt 3.
- Connector Type: Thunderbolt 3: Uses the USB-C connector, allowing it to be compatible with devices that support USB-C but offering additional capabilities beyond standard USB-C functions. USB 3.0: Typically uses the larger USB-A connector, although it can also be found with USB-C connectors in more modern devices.
- Power Delivery: Thunderbolt 3: Supports power delivery up to 100 watts, allowing it to charge laptops and other devices. USB 3.0: Generally supports less power, typically up to 4.5 watts, unless using additional specifications like USB Power Delivery over USB-C.
- Video Outputs: Thunderbolt 3: Can support dual 4K displays at 60 Hz or a single 5K display, making it highly suitable for video and graphics professionals. USB 3.0: Does not natively support video output unless adapted through specific protocols such as DisplayLink.
- Compatibility and Features: Thunderbolt 3: Offers a range of advanced features, including the ability to connect to PCI Express (PCIe) and DisplayPort devices, as well as daisy-chaining multiple devices (up to six) from a single port. USB 3.0: Primarily designed for data transfer and charging, with fewer advanced connection options.
- Cost: Thunderbolt 3: Generally involves higher costs due to its advanced capabilities and hardware requirements. USB 3.0: Typically more cost-effective and widely available across a range of consumer devices.
In summary, Thunderbolt 3 is a more advanced, faster, and versatile connection standard compared to USB 3.0, making it ideal for users requiring high-speed data transfer, multiple display connections, and high-power delivery, whereas USB 3.0 is more suited for basic data transfer and general peripheral connectivity.