
Best Compact Keyboard Vacuums to Buy in July 2026
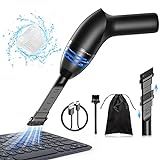
Hayousui 4.3Kpa Keyboard Vacuum Cleaner Mini:Handheld Computer Vacuum Cordless for Car Laptop Sewing Machine Portable Keyboard Vac USB Desk Crumbs Dust Cleaners
-
POWERFUL 4.3KPA SUCTION EASILY TACKLES DUST, CRUMBS, AND PET HAIR.
-
VERSATILE 2-IN-1 NOZZLE CLEANS TIGHT SPACES AND DELICATE SURFACES EFFECTIVELY.
-
USB RECHARGEABLE WITH 15-20 MINS RUN TIME FOR ON-THE-GO CONVENIENCE.


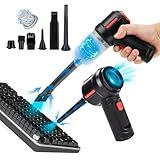
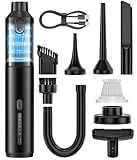
Powerful Compressed Air Duster for Deep Cleaning-Replace Compressed Air Can-No Canned Air Duster-Keyboard Cleaner-PC Cleaning-Rechargeable-3-Speeds-95000RPM Cordless Air Blower-Car Duster 8000mAh
- 3 ADJUSTABLE SPEEDS & LED LIGHT FOR PRECISION CLEANING
- HIGH-SPEED 95,000 RPM BLOWER FOR THOROUGH DUST REMOVAL
- VERSATILE 2-IN-1 DUST BLOWER & VACUUM FOR ALL SURFACES
Meudeen Air Duster - Computer Vacuum Cleaner - for Keyboard Cleaning- Cordless Canned Air- Powerful - Energy-Efficient(Air-01)
- 3-IN-1 DESIGN: VACUUM, BLOW DUST, & AIR PUMP FOR VERSATILE USE.
- MULTIPLE ACCESSORIES: 6+ ATTACHMENTS FOR CLEANING ALL HARD-TO-REACH AREAS.
- LONG BATTERY LIFE: FAST CHARGING & DURABLE LITHIUM BATTERIES FOR EXTENDED USE.
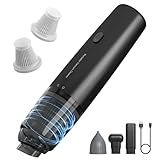
A9life Handheld Vacuum Cordless, Car Vacuum Cleaner Portable with HEPA Filter, 2 Suction Modes, Mini Hand Held Vacuum Rechargeable for Car, Home, Pet Hair, Office, Desk, Keyboards (Black)
- EFFORTLESS CORDLESS CLEANING-JUST 0.72 LBS FOR ULTIMATE CONVENIENCE!
- POWERFUL SUCTION WITH DUAL MODES-TACKLE ANY MESS IN SECONDS!
- VERSATILE TOOLS FOR EVERY SURFACE-CLEAN TIGHT SPOTS AND UPHOLSTERY EASILY!
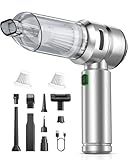
VNOST Car Vacuum,3 Suction Modes,Portable Mini Cordless Cleaner with 24000pa Suction Power,Type-C Charge,Handheld Vacuum for Home,Car, Office Desk, Keyboards(Dark Silver)
- 24000PA SUCTION POWER: EFFORTLESSLY TACKLES DIRT AND DEBRIS EVERYWHERE.
- 4-IN-1 VERSATILITY: VACUUM, BLOW, INFLATE, AND EXTRACT WITH ONE DEVICE.
- QUICK CHARGE & LONG RUNTIME: 30 MINS OF USE FROM A FAST-CHARGING BATTERY.
Car Vacuum Portable Cordless Handheld Vacuum Cleaner 4-in-1 Mini Cordless Vacuum with 2 Suction Modes and 16800pa Suction Power Blowing & Inflating 2 Modes Handheld Vacuum for Car, Desk, Keyboards
- 4-IN-1 VERSATILITY: VACUUM, BLOW, INFLATE, AND SUCTION WITH EASE!
- ULTRA-LIGHTWEIGHT: WEIGHS ONLY 1 LB FOR EFFORTLESS, PORTABLE CLEANING.
- QUICK TYPE-C CHARGING: FULL CHARGE IN JUST 2.5 HOURS, READY TO GO!
Keyboard vacuums are generally designed to be compact and easy to store. These devices are built specifically for cleaning around the small and often tight spaces of keyboards and other electronic gadgets. Their compact size ensures that they are lightweight and can be conveniently stored in a drawer, a desk, or even a small office space without taking up too much room. Additionally, many keyboard vacuums are cordless or come with rechargeable batteries, further enhancing their portability and ease of storage. Despite their small size, they are usually equipped with attachments that allow for efficient cleaning of dust, crumbs, and debris from between the keys and other hard-to-reach areas.
How to dispose of dirt collected by a keyboard vacuum?
Disposing of the dirt collected by a keyboard vacuum is straightforward and can be done in an environmentally friendly manner. Here’s a step-by-step guide to help you dispose of it properly:
- Turn Off the Vacuum: Ensure that the keyboard vacuum is turned off and unplugged or detached from its power source to avoid any accidents.
- Locate the Dust Container: Most keyboard vacuums have a detachable dust container or bag. Refer to your vacuum’s manual if you’re unsure where it is.
- Remove the Dust Container: Detach the container or bag carefully, ensuring not to spill any of its contents.
- Dispose of the Contents: General Trash: If the collected dirt consists mainly of small debris like dust, crumbs, and hair, you can typically dispose of it in your regular trash bin. Compost (if applicable): If the dirt is mostly organic material, such as food crumbs, and you have a composting setup, you might consider adding it to your compost bin.
- Clean the Container: After emptying, clean the dust container with a damp cloth or rinse it with water if it’s washable. Ensure it is completely dry before reattaching it to the vacuum.
- Check Filters: If your vacuum has filters, check if they need to be cleaned or replaced in accordance with the manufacturer's guidelines.
- Recycle if Possible: If any of the collected waste is recyclable (such as small paper bits), separate it according to your local recycling rules.
By following these steps, you’ll ensure that the dirt from your keyboard vacuum is disposed of properly without causing harm to the environment.
What is the power range for keyboard vacuums?
The power range for keyboard vacuums can vary widely depending on the design and intended use of the vacuum. Generally, these devices are relatively low-powered compared to full-sized vacuum cleaners because they are designed for small, delicate tasks like cleaning keyboards and other electronic devices. Here are some typical power ranges and considerations:
- Battery-Powered Handheld Models: Voltage: Typically between 3.7V to 12V. Power: Usually between 10 watts to 50 watts. These models are often rechargeable and are convenient for portability and ease of use.
- USB-Powered Models: Voltage: 5V (USB power standard). Power: Typically around 2 watts to 10 watts. These models draw power directly from a computer or USB power source, making them very convenient for quick, light cleaning tasks.
- Plug-in Models: Voltage and Power: These might be more powerful than battery or USB-powered versions, sometimes up to 100 watts or more. Suitable for more intensive cleaning, but less portable and generally more cumbersome to use compared to battery-operated versions.
When selecting a keyboard vacuum, it’s important to consider not just the power but also features like suction capability, attachments, size, and ease of use. Higher power does not necessarily equate to better performance if the vacuum is not well-designed for keyboard cleaning tasks.
How to clean a laptop keyboard without a vacuum?
Cleaning a laptop keyboard without a vacuum is relatively straightforward and can be done using a few simple tools and techniques. Here's a step-by-step guide:
Materials Needed:
- Compressed air canister: Helps to blow out dust and debris from under the keys.
- Soft-bristle brush: A small, clean paintbrush or a makeup brush can be used to loosen dust and dirt.
- Microfiber cloth: For wiping down the surface of the keys.
- Cotton swabs: For detailed cleaning around the keys.
- Isopropyl alcohol (at least 70%): For disinfecting and cleaning. Mix with water to create a safe cleaning solution.
- Small bowl: For mixing the cleaning solution.
- Toothpick or similar small, flat tool: Optional, for removing stubborn debris.
Steps to Clean:
- Turn Off and Unplug Your Laptop: Always power down your laptop and disconnect any cables or peripherals before cleaning.
- Use Compressed Air: Hold the canister upright and spray air between the keys. Tilt your laptop slightly to allow any debris to fall out more easily. Move in a systematic manner, ensuring you cover all the keys.
- Brush Loosely Embedded Dirt: Use a soft-bristle brush to gently sweep between the keys. This will help loosen any particles that are stuck.
- Wipe Down the Keys: Dampen a microfiber cloth with the water and isopropyl alcohol solution (around a 1:1 ratio). The cloth should be damp, not soaked. Wipe down the surfaces of the keys and the surrounding areas.
- Detail Clean with Cotton Swabs: Dip a cotton swab in the isopropyl alcohol solution and wring out excess moisture. Use it to clean around the base of each key and any tight spots.
- Remove Stubborn Debris: Use a toothpick carefully to dislodge any stubborn debris lodged between the keys. Be gentle to avoid scratching or damaging the keys.
- Let It Dry: Allow the keyboard to dry completely before turning the laptop back on. This typically takes only a few minutes.
Additional Tips:
- Avoid Excess Liquid: Never pour or spray any liquid directly onto the keyboard.
- Regular Maintenance: Regularly using compressed air and a microfiber cloth can prevent buildup.
- Be Gentle: Press gently on the keys and avoid excessive force when cleaning to prevent any damage.
This method should help keep your laptop keyboard clean and functional without using a vacuum.
What is the ideal weight for a portable keyboard vacuum?
The ideal weight for a portable keyboard vacuum typically falls between 1 to 2 pounds (0.45 to 0.9 kg). This weight range ensures the vacuum is light enough to be easily handled and maneuvered around a desk or workspace, while still providing enough power and battery capacity to effectively clean dust and debris from a keyboard and surrounding areas. Keep in mind that individual preferences, battery life, and suction power are also important factors to consider when choosing a portable keyboard vacuum.
What is the importance of keeping keyboards clean?
Keeping keyboards clean is important for several reasons:
- Hygiene: Keyboards can harbor bacteria, germs, and viruses due to their frequent use and close contact with hands. Regular cleaning helps reduce the risk of transferring pathogens, especially in shared or public environments.
- Functionality: Dust, dirt, and debris can accumulate under and around keys, potentially affecting their operation. Keeping a keyboard clean ensures that it remains fully functional and responsive.
- Aesthetics: A clean keyboard looks better and gives a more professional or organized impression, important in both personal and workplace settings.
- Durability: Regular maintenance can extend the lifespan of a keyboard by preventing wear and tear that can occur from the build-up of debris and spills.
- Improved Experience: A clean, well-maintained keyboard enhances the user experience by ensuring that typing is comfortable and efficient, without sticky or unresponsive keys.
Overall, maintaining a clean keyboard contributes to a healthier, more efficient, and pleasant working environment.