Best External Hard Drives For Gaming Consoles to Buy in July 2026
WD_BLACK 5TB P10 Game Drive, Portable External Hard Drive, Works with Playstation, Xbox, & PC - WDBA3A0050BBK-WESN
- STORE UP TO 150 GAMES-NEVER DELETE YOUR FAVORITES AGAIN!
- SLEEK, PORTABLE DESIGN FOR EASY ACCESS TO YOUR ENTIRE GAME LIBRARY.
- HIGH SPEEDS OF 130MB/S TO ENHANCE YOUR GAMING EXPERIENCE INSTANTLY!


Seagate Portable 2TB External Hard Drive HDD — USB 3.0 for PC, Mac, PlayStation, & Xbox -1-Year Rescue Service (STGX2000400)
- STORE 2TB OF CONTENT EASILY, PERFECT FOR ON-THE-GO ACCESS.
- DRAG-AND-DROP BACKUP FOR SEAMLESS DATA MANAGEMENT ON ANY SYSTEM.
- PLUG AND PLAY SETUP WITH INCLUDED USB 3.0 CABLE-NO SOFTWARE NEEDED!
WD_BLACK 8TB D10 Game Drive - Portable External Hard Drive HDD Compatible with Playstation, Xbox, PC, & Mac - WDBA3P0080HBK-NESN
- CAPTURE AND STORE YOUR BEST IN-GAME MOMENTS EFFORTLESSLY.
- BLAZING 250 MB/S SPEED WITH ACTIVE COOLING FOR UNINTERRUPTED GAMING.
- CHARGE YOUR GEAR ON-THE-GO WITH DUAL 7.5W USB TYPE-A PORTS.
KingSpec Z5 2TB External SSD - 2100MB/s, Portable Solid State Hard Drives with RGB Light, Zinc Alloy Case, USB 3.2 Gen2x2 Interface, Compatible with Mobile Phone/PS4/Laptop/TV/PC (2TB)
-
SPEEDY TRANSFERS: BOOST WORK EFFICIENCY WITH 2100MB/S DATA SPEEDS.
-
EYE-CATCHING DESIGN: STAND OUT WITH 128-COLOR RGB AMBIENT LIGHTING.
-
DURABLE BUILD: ZINC ALLOY CASING ENSURES LONGEVITY AND IMPACT RESISTANCE.
SAMSUNG T9 Portable SSD 4TB, USB 3.2 Gen 2x2 External Solid State Drive, Seq. Read Speeds Up to 2,000MB/s for Gaming, Students and Professionals,MU-PG4T0B/AM, Black (pack of 1)
- LIGHTNING-FAST SPEEDS UP TO 2,000MB/S FOR SEAMLESS EDITING.
- DYNAMIC THERMAL GUARD KEEPS THE SSD COOL UNDER HEAVY USE.
- COMPATIBLE WITH DESKTOPS, CAMERAS, AND GAMING CONSOLES.
Toshiba Canvio Gaming 2TB Portable External Hard Drive USB 3.0, Black for PlayStation, Xbox, PC & Mac - HDTX120XK3AA
- OPTIMIZED FOR GAMING: FIRMWARE-CUSTOMIZED FOR ULTRA-RESPONSIVE PLAY.
- MASSIVE STORAGE: STORE UP TO 50 GAMES WITH 2TB CAPACITY!
- PORTABLE DESIGN: SLEEK AND COMPACT FOR GAMING ON THE GO.
SAMSUNG T7 Portable SSD, 1TB External Solid State Drive, Speeds Up to 1,050MB/s, USB 3.2 Gen 2, Reliable Storage for Gaming, Students, Professionals, MU-PC1T0T/AM, Gray
- FAST SPEEDS: UP TO 1,050 MB/S FOR RAPID BACKUPS AND EDITING.
- VERSATILE COMPATIBILITY: WORKS SEAMLESSLY WITH PCS AND MOBILE DEVICES.
- DURABLE DESIGN: SHOCK RESISTANT AND BUILT TO ENDURE ANY ADVENTURE.
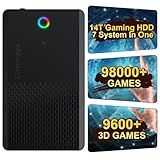
NEW 14TB Retro Gaming Hard Drive Preloaded with 98000+ Games | Plug & Play for 7 Gaming Systems | 9800+ 3D & 1000+ High-End PC Games | USB 3.1 Portable External Hard Drive for Windows PC 7/8/10/11
-
MASSIVE 14TB FOR 98,000+ RETRO GAMES, FASTER THAN USB 3.0!
-
PLUG-AND-PLAY ON 7 SYSTEMS: SEAMLESS PLAY ACROSS GENERATIONS!
-
PRO-GRADE 7200RPM DRIVE: PERFORMANCE MEETS FUTURE-READY GAMING!
Yes, you can use an external hard drive with both Xbox and PlayStation consoles. For Xbox, connecting an external hard drive is a straightforward process. Most external drives are compatible as long as they have a USB 3.0 connection or faster. The Xbox console will typically prompt you to format the drive for game storage once it's connected, making it ready for storing and playing games directly from the external drive.
For PlayStation, similar compatibility applies. On the PS4, you can use an external hard drive with USB 3.0 or later to expand your storage capacity. Once connected, the system will prompt you to format the drive for use as extended storage, where you can save and run games. The PS5 also supports external hard drives, but it's important to note that PS5 games must be played from the internal SSD or a compatible NVMe SSD; however, you can store both PS4 and PS5 games on an external drive for more space management flexibility.
In both cases, using an external drive can greatly increase your console’s storage capacity, allowing you to keep more games installed and ready to play without having to manage the internal storage space as closely. Just ensure that any external drive you plan to use meets the necessary specifications for compatibility with your console model.
How to set up game installs on an external hard drive for Xbox?
Setting up game installations on an external hard drive for your Xbox is a great way to expand your storage capacity. Here's a step-by-step guide on how to do it:
Requirements:
- External Hard Drive: Must be USB 3.0 compatible. Minimum storage capacity of 256 GB. Maximum storage capacity supported by Xbox One and Xbox Series X/S is 16 TB.
Setup Process:
Formatting the External Hard Drive:
- Connect the Hard Drive: Plug your external hard drive into one of the USB ports on your Xbox console. Xbox One and Xbox Series X/S typically have ports on the back and the side or front.
- Format the Drive: Once connected, the console should recognize the new external storage automatically. You will receive a prompt asking if you'd like to format the drive for game and app storage. Select Format storage device.
- Name the Drive: After selecting to format the drive, the console will ask you to name your external storage. You can choose any name that will help you identify the drive later.
- Choose the Default Install Location: You’ll be asked if you want to set the external drive as the default location for new game and app installations. You can choose this option if you want games to automatically install on the external drive from this point forward. You can also change this setting later if needed.
- Complete Formatting: The Xbox will handle the rest, formatting the drive specifically for Xbox use. This process only takes a few moments.
Managing Storage and Installing Games:
- Check Installed Storage: Navigate to Settings > System > Storage. Here you can see both your internal storage and external hard drive.
- Move Games Between Drives: If you have games already installed on your internal drive that you’d like to move to your external storage, go to My games & apps > Games. Highlight the game you want to move, press the Menu button on your controller (the button with three horizontal lines), and select Manage game and add-ons. Select Move or copy, then choose your external drive and select Move to transfer the game.
- Install New Games: When downloading new games, the console will install them on the designated default storage location set during setup. You can change the target drive during installation if needed.
Notes:
- Once formatted for Xbox, the external drive can store only Xbox games and apps. You cannot use it for media storage like videos or music unless reformatted for media.
- You can use the external hard drive with another Xbox console by signing in with your profile on that console.
By following these steps, you should be able to effectively manage your Xbox storage with the addition of an external hard drive.
What is the impact of using an external hard drive on console performance?
Using an external hard drive with a gaming console can have several impacts on performance, depending on factors like the type of hard drive, the console in question, and how the hard drive is utilized. Here are some key considerations:
- Load Times: One of the most noticeable impacts is on load times. Traditional external hard disk drives (HDDs) might be slower compared to internal solid-state drives (SSDs), potentially resulting in longer load times for games stored on the external drive. However, external SSDs can offer faster load times, comparable to or sometimes better than the console's internal storage, especially on older consoles.
- Storage Capacity: Using an external hard drive significantly increases the available storage space, allowing more games, media, and applications to be installed without needing to delete old content. This is particularly beneficial for consoles with limited internal storage.
- Game Performance: Generally, game performance in terms of frame rate or graphics quality isn’t directly affected by using an external hard drive. These factors are more dependent on the console's hardware (CPU, GPU, and RAM). However, any delays in loading assets due to slower storage might indirectly affect the gameplay experience.
- Game Transfers: Transferring games between the internal storage and an external hard drive can take time. The speed depends on the type of drives (HDD or SSD) and the connection interface (USB 3.0 or higher is faster than older USB interfaces).
- Compatibility and Limitations: Some newer consoles, like the PlayStation 5 and Xbox Series X/S, have specific requirements and limitations for external storage. For instance, they may only permit older generation games to be played directly from an external drive, requiring newer games to be played from the internal SSD or a specific type of external SSD.
- Heat and Power Consumption: Running an external hard drive may add a negligible amount to power consumption and can marginally increase the overall heat output, though this is usually not significant enough to impact the console's performance or lifespan.
- Convenience: External hard drives can make it easy to transfer games and data between consoles, especially useful if you’re switching consoles or need to move data between different locations.
To optimize performance, it’s advisable to use an external SSD with newer consoles due to their faster data transfer rates and reduced load times compared to traditional HDDs. Always check the console's specifications and compatibility notes before choosing an external hard drive.
How to use an external SSD with PlayStation?
Using an external SSD with your PlayStation can improve load times for games and provide additional storage space. Here's a step-by-step guide for both PlayStation 4 and PlayStation 5:
PlayStation 4 (PS4)
- Check Compatibility: Ensure your external SSD has a minimum USB 3.0 connection and storage capacity between 250GB and 8TB. It should also be formatted to either exFAT or FAT32.
- Connect the SSD: Plug the SSD into one of the available USB ports on your PS4.
- Format the SSD: Go to "Settings" > "Devices" > "USB Storage Devices." Select your external SSD and choose "Format as Extended Storage." Follow the on-screen instructions to complete the process.
- Set as Default Installation Location (Optional): Once formatted, you may be prompted to use the SSD as the default location for all new game installations. You can change this later in the storage settings if needed.
- Manage Storage: To move existing games, go to "Settings" > "Storage" > choose either System Storage or Extended Storage. Select "Applications" and press the Options button, then choose "Move to Extended Storage" or similar.
PlayStation 5 (PS5)
- Check Compatibility: Ensure your SSD is at least USB 3.1 Gen 1 or higher with a storage capacity of 250GB to 8TB. It should be formatted in exFAT.
- Connect the SSD: Attach the SSD to one of the rear USB ports for optimal performance.
- Format the SSD: Go to "Settings" > "Storage" > "USB Extended Storage." Select the external SSD and choose "Format as USB Extended Storage." Follow the prompts to format the drive.
- Manage Storage: Games stored on the external SSD can be played directly if they are PS4 titles. PS5 games can only be stored and not played from an external drive; you'll need to move them to internal storage to play. To move games, go to "Settings" > "Storage" and select either Console Storage or USB Extended Storage. Choose "Games and Apps," then select the items you want to move and click "Move."
Notes:
- Keep your system software updated for the latest enhancements in external storage support.
- Safely remove the drive: Before unplugging, always make sure to select "Stop Using This Extended Storage" from the "Storage" settings to avoid data corruption.
- PS5 Internal NVMe SSD Expansion: Note that the PS5 also supports internal SSD upgrades, but this requires a compatible M.2 SSD to be installed inside the console.
These steps should help in using and managing an external SSD with your PlayStation for better storage management and performance.
What is the maximum external hard drive size for Xbox?
As of the latest updates, the Xbox One, Xbox Series X, and Xbox Series S support external hard drives up to 16TB in size. However, it's important to note that for optimal performance, especially with Xbox Series X|S games, the external hard drive needs to be USB 3.0 compatible. Additionally, while you can store and play older Xbox One, Xbox 360, and original Xbox games from an external hard drive, Xbox Series X|S games require the internal SSD or a Seagate Storage Expansion Card to fully utilize their speed and capabilities. Always check for the latest updates and guidelines from Xbox, as these specifications can change with new firmware updates or hardware developments.
How to partition an external hard drive for PlayStation and PC use?
Partitioning an external hard drive for use with both a PlayStation and a PC involves several steps, and it requires that the drive be formatted in a way that is compatible with both devices. Here's a step-by-step guide to help you through the process:
Things to Consider Before Partitioning
- Backup Data: Partitioning will erase all data on the external hard drive. Ensure that you back up any important data before proceeding.
- Compatibility: PlayStation usually requires a specific file system, such as FAT32 or exFAT, for recognizing external drives, while PCs commonly use NTFS.
- Size Allocation: Decide how much space you want to allocate for PlayStation use and how much for PC use.
Procedure
Step 1: Connect the External Hard Drive to a PC
- Plug the external hard drive into a USB port on your PC.
Step 2: Open Disk Management
- Open the Disk Management utility: On Windows, you can do this by right-clicking on the "Start" button and selecting "Disk Management." On a Mac, use "Disk Utility," which can be found in the Applications > Utilities folder.
Step 3: Delete the Existing Partition(s)
- In Windows' Disk Management, locate your external drive in the list of disks.
- Right-click on the existing partition(s) and select "Delete Volume."
- Confirm the deletion. This will erase all data on the drive.
Step 4: Create New Partitions
- Windows Instructions: Right-click on the unallocated space on the drive and select "New Simple Volume." Follow the wizard to create a new partition. Choose a desired size for each partition based on how much you want to allocate for PlayStation and PC. For the PlayStation partition, format it as exFAT, which both PlayStation and PC can read and write. Assign a drive letter if prompted. For the PC partition, you may use either exFAT (for cross-compatibility) or NTFS (if it's going to be used mainly on Windows PC). Repeat this process for additional partitions if desired.
- Mac Instructions: Open Disk Utility and select the external drive from the menu. Click "Partition" at the top. Add partitions by clicking the "+", and adjust the size of each partition. Format the PlayStation partition as ExFAT. Format the PC partition as ExFAT or Mac OS Extended (Journaled) if not used on a Windows PC.
Step 5: Finalize
- Once partitioning and formatting are complete, eject the drive safely from your PC.
Using the Drive
- Connect the drive to your PlayStation, and it should recognize the PlayStation-compatible partition.
- Connect it to your PC, and both partitions should be accessible.
Note
- Keep in mind that some PS4/PS5 systems may have limitations on using external drives. For example, only one partition can be used for installing games/apps, while media files can be accessed from another.
- Games and applications installed on an external drive formatted by the console will not be recognized by your PC.
By following these steps, you can successfully partition an external hard drive for both PlayStation and PC use, allowing for flexibility in how you store and access your data.