Best External Hard Drives for Safe File Storage to Buy in July 2026
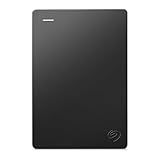
Seagate Portable 2TB External Hard Drive HDD — USB 3.0 for PC, Mac, PlayStation, & Xbox -1-Year Rescue Service (STGX2000400)
- STORE 2TB OF CONTENT EASILY-PERFECT FOR ON-THE-GO STORAGE!
- SEAMLESS BACKUP FOR WINDOWS AND MAC-JUST DRAG AND DROP!
- PLUG AND PLAY SETUP-NO SOFTWARE NEEDED FOR INSTANT ACCESS!


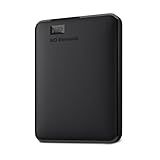
WD 2TB Elements Portable External Hard Drive for Windows, USB 3.2 Gen 1/USB 3.0 for PC & Mac, Plug and Play Ready - WDBU6Y0020BBK-WESN
- ULTRA-PORTABLE DESIGN WITH UP TO 6TB STORAGE FOR ON-THE-GO USERS.
- EASY PLUG-AND-PLAY SETUP FOR INSTANT STORAGE EXPANSION.
- FAST TRANSFER SPEEDS WITH SUPERSPEED USB 3.2 GEN 1 TECHNOLOGY.
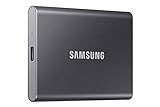
SAMSUNG T7 Portable SSD, 1TB External Solid State Drive, Speeds Up to 1,050MB/s, USB 3.2 Gen 2, Reliable Storage for Gaming, Students, Professionals, MU-PC1T0T/AM, Gray
-
BLAZING FAST SPEEDS: UP TO 1,050 MB/S FOR INSTANT FILE ACCESS & EDITING.
-
MASSIVE STORAGE: UP TO 4TB CAPACITY TO BACK UP ALL YOUR CREATIVE WORK.
-
DURABLE & RELIABLE: SHOCK-RESISTANT DESIGN FOR PROTECTION ON ANY ADVENTURE.
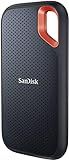
SanDisk 1TB Extreme Portable SSD - Up to 1050MB/s, USB-C, USB 3.2 Gen 2, IP65 Water and Dust Resistance, Updated Firmware - External Solid State Drive - SDSSDE61-1T00-G25
- BLAZING NVME SPEEDS: 1050MB/S READ, 1000MB/S WRITE FOR EFFICIENCY!
- RUGGED DESIGN: 3-METER DROP PROTECTION & IP65 WATER/DUST RESISTANCE!
- SECURE YOUR DATA: 256-BIT AES ENCRYPTION FOR ULTIMATE PRIVACY!
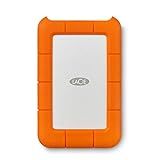
LaCie Rugged Mini 2TB External Hard Drive Portable HDD - USB 3.0/ 2.0 Compatible, Drop Shock Dust Rain Resistant Shuttle Drive, For Mac And PC Computer (LAC9000298), orange
- SHOCK-PROOF DESIGN: WITHSTANDS DROPS UP TO 4 FEET.
- USB 3.0 FOR LIGHTNING-FAST DATA TRANSFER SPEEDS.
- FREE ADOBE CREATIVE CLOUD MEMBERSHIP WITH PURCHASE!
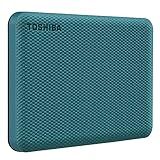
Toshiba Canvio Advance 1TB Portable External Hard Drive USB 3.0, Green - HDTCA10XG3AA, Backup 2.0
- STYLISH, COMPACT DESIGN WITH CUSTOMIZABLE COLOR OPTIONS.
- EFFORTLESS AUTOMATIC BACKUP SOFTWARE FOR WINDOWS PC USERS.
- ENHANCED SECURITY WITH PASSWORD PROTECTION FOR YOUR DATA.
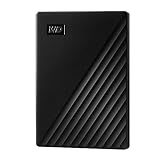
WD 2TB My Passport, Portable External Hard Drive, Black, backup software with defense against ransomware, and password protection, USB 3.1/USB 3.0 compatible - WDBYVG0020BBK-WESN
- SLIM, DURABLE DESIGN FOR EASY PORTABILITY OF IMPORTANT FILES.
- STORE UP TO 6TB OF PHOTOS, VIDEOS, AND DOCUMENTS EFFORTLESSLY.
- ADVANCED SECURITY WITH PASSWORD PROTECTION AND ENCRYPTION INCLUDED.
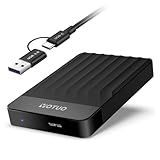
YOTUO Portable External Hard Drive Storage Expansion Mobile HDD USB 3.0 USB-C for PC, Mac, Desktop, Laptop, PS4, PS5, Xbox One X/S, Xbox 360, Xbox Series X/S, Office & Game (Black, 1TB)
- UNIVERSAL COMPATIBILITY: WORKS SEAMLESSLY WITH ALL MAJOR SYSTEMS AND DEVICES.
- SHOCKPROOF DESIGN: PATENTED SILICONE SLEEVE ENSURES MAXIMUM PROTECTION.
- ULTRA-FAST TRANSFERS: ENJOY LIGHTNING-SPEED DATA TRANSFER WITH USB 3.0.
Storing files on an external hard drive is generally considered safe as long as certain precautions are taken. External hard drives provide a convenient way to back up data, expand storage capacity, and transfer files between devices. They offer a level of physical security since they can be stored in a secure location away from the primary computer. However, their safety depends on factors such as the quality and reliability of the hard drive, proper usage, and protection against environmental hazards. It's important to handle the device with care to prevent physical damage, such as drops or exposure to moisture. Additionally, using encryption can enhance security by protecting sensitive data from unauthorized access. Regular backups and checks for drive health can also prevent data loss due to hardware failure. Therefore, while storing files on an external hard drive is generally safe, combining these practices can help ensure data protection and longevity.
How to set up automatic backups to an external hard drive?
Setting up automatic backups to an external hard drive can help protect your data from loss due to hardware failure, accidental deletion, or other issues. Here's a guide for setting up automatic backups on both Windows and macOS:
For Windows:
Using Windows File History:
- Connect the External Hard Drive: Plug your external hard drive into your computer using a USB port.
- Access File History: Go to Settings > Update & Security > Backup. Click on Add a drive and choose your connected external hard drive.
- Configure File History: Once you've selected your drive, toggle the switch to enable Automatically back up my files. To configure which folders to back up, click on More options. Here, you can add or remove folders from the backup, choose backup frequency (e.g., every hour), and set retention time for backups.
- Advanced Settings: If you want to access more advanced settings, go to Control Panel > System and Security > File History. Here, you can set up or stop File History, set a backup schedule, exclude folders, and more.
- Start the Backup: Start the initial backup by clicking on Back up now.
For macOS:
Using Time Machine:
- Connect the External Hard Drive: Plug your external hard drive into your Mac.
- Access Time Machine Preferences: Open System Preferences and click on Time Machine.
- Select Backup Disk: Click on Select Disk… and choose your external hard drive from the list. If needed, you can encrypt the backups by selecting "Encrypt backups".
- Configure Time Machine: Turn on Time Machine by selecting Back Up Automatically. Time Machine will automatically back up your entire system, including system files, applications, preferences, and personal files. It typically backs up every hour.
- Exclude Items (Optional): If you want to exclude specific files or folders from the backup, click Options... and add the items you want to exclude.
- Verify Backups: You can check your backups and adjust settings as needed via the Time Machine preferences pane.
With these steps, your system should start automatically backing up your data to your external hard drive according to the specified settings. Make sure that your external drive has sufficient space for your backups and is connected whenever you want to back up.
What is the difference between network-attached storage (NAS) and an external hard drive?
Network-Attached Storage (NAS) and external hard drives are both used for data storage, but they have different features and capabilities:
- Network Connectivity: NAS: It is connected to a network, enabling multiple devices on that network to access the stored data simultaneously. NAS devices usually have their own operating systems and network interfaces, and can often provide additional services such as media streaming, file sharing, and more. External Hard Drive: It is typically connected directly to a single computer via USB, eSATA, or another interface. It does not have its own network capability and is intended primarily for use with one device at a time, unless shared through that device.
- Functionality: NAS: Offers advanced features like RAID (Redundant Array of Independent Disks) for data redundancy, media server capabilities, cloud integration, remote access, and user management. NAS devices can support multiple users accessing data concurrently. External Hard Drive: Primarily used for simple data backup and storage. It generally lacks built-in advanced functionality, except for some models that might offer basic backup software.
- Scalability and Capacity: NAS: Typically supports multiple drives, allowing for larger storage capacities and the ability to expand storage as needed. Many NAS devices can be upgraded by adding more drives or replacing existing ones with higher-capacity options. External Hard Drive: Typically a single disk, limited to the capacity of that disk. Expansion requires purchasing additional external hard drives.
- Ease of Use: NAS: Can be more complex to set up and manage, as it involves configuring network settings and potentially dealing with more complex software features. External Hard Drive: Generally plug-and-play, requiring no network setup and minimal configuration effort. Easy for anyone to use with minimal technical knowledge.
- Performance: NAS: Performance can vary based on network speed and NAS hardware capabilities, but it can handle multiple simultaneous connections efficiently. External Hard Drive: Performance is generally consistent with the connection type (e.g., USB 3.0), offering fast data transfer speeds for direct connections.
- Price: NAS: Generally more expensive due to its advanced capabilities, built-in hardware, and potential for greater storage capacity. External Hard Drive: More cost-effective for basic storage needs, usually cheaper due to its simplicity and limited functionality.
Overall, NAS is suited for environments where shared access, data redundancy, and advanced features are valuable, while external hard drives are ideal for straightforward, portable storage solutions.
What is the lifespan of an external hard drive?
The lifespan of an external hard drive can vary significantly depending on several factors, such as the brand, build quality, usage habits, and environmental conditions. On average, most external hard drives can last between 3 to 5 years with regular use. Some may last longer, while others might fail sooner.
Here are some factors that can influence the lifespan of an external hard drive:
- Quality of the Drive: Drives from reputable manufacturers tend to last longer due to better components and quality control.
- Usage Patterns: Frequent data transfers or continuous operation can wear down the drive faster. Drives used for backups and accessed occasionally might last longer than those used for constant data streaming or writing.
- Environmental Conditions: External hard drives are sensitive to physical shocks, temperature extremes, and humidity. Keeping them in stable environments can prolong their lifespan.
- Power Surges: Fluctuations in power can damage the drive. Using a surge protector can help mitigate this risk.
- Handling: Rough handling, dropping, or improper connection/disconnection can lead to premature failure.
To maximize the lifespan of an external hard drive, it's advisable to handle it carefully, ensure it's used in a safe environment, and back up critical data regularly to prevent data loss in the event of a failure.
What is the maximum storage capacity of external hard drives?
As of the latest information available up to 2023, the maximum storage capacity of consumer external hard drives is typically around 20 to 22 terabytes (TB). These larger capacity drives are often used for extensive data storage needs, such as for backups, media collections, or professional environments requiring significant space. However, technology is always advancing, so larger capacities may become available. For the most up-to-date and specific information, checking with manufacturers like Seagate, Western Digital, or other major brands would be advisable.
How to choose the right external hard drive for storing files?
Selecting the right external hard drive for storing files involves considering a range of factors to ensure it meets your storage needs and budget. Here’s a guide to help you make an informed decision:
- Storage Capacity: Estimate the amount of data you intend to store. If you're just storing documents and photos, a drive with 500GB to 1TB might suffice. For video editing or backing up large datasets, consider 2TB or more.
- Type of Drive: HDD vs. SSD: HDDs (Hard Disk Drives) are generally cheaper and offer more storage for the price, but they are slower and more fragile due to moving parts. SSDs (Solid State Drives) are faster, more durable, and more reliable, but they come at a higher cost per GB. SSD is preferable if speed and portability are priorities, while HDD is suitable for cost-effective, large-capacity storage.
- Portability: Choose a portable drive if you need to carry data between locations. These are typically smaller and can be powered by your computer via USB. Desktop external drives are bulkier and require separate power sources but often offer more storage.
- Connection Interface: Look for USB 3.0, USB 3.1, or USB-C for fast data transfer speeds. Ensure compatibility with your current computer setup. Thunderbolt is even faster but is generally more expensive and is commonly used in professional environments.
- Compatibility: Verify that the drive is compatible with your operating system (Windows, macOS, Linux), and note any required reformatting.
- Durability & Build Quality: If you plan on traveling with your drive frequently, consider one with shock resistance or rugged design features. Weatherproofed drives are available for added protection against elements like water and dust.
- Security Features: Some drives offer built-in encryption and password protection to secure sensitive data. Consider these features if data security is a priority.
- Brand & Warranty: Stick to reputable brands like Western Digital, Seagate, Samsung, or SanDisk, and check user reviews for reliability. A longer warranty is indicative of the manufacturer’s confidence in the product.
- Price & Budget: Prices can vary significantly based on capacity, speed, and brand. Establish a budget beforehand and consider long-term needs.
- Special Features: Some drives come with backup software or cloud storage integrations, which can be beneficial for automated backups and data security.
By balancing these factors based on your specific needs, you can choose an external hard drive that provides the right mix of capacity, speed, durability, and ease of use.
How to safely eject an external hard drive from a computer?
Safely ejecting an external hard drive is important to prevent data corruption or loss. Here’s a step-by-step guide for different operating systems:
For Windows:
- Close Files and Programs: Ensure all files and applications using the drive are closed.
- Use the ‘Safely Remove Hardware’ Feature: Locate the 'Safely Remove Hardware and Eject Media' icon in the system tray (bottom-right corner of your screen). It looks like a USB plug with a checkmark. Click on the icon to view connected devices. Select the external hard drive you want to eject. Wait for the notification that says it's safe to remove the hardware, then unplug the drive.
- Through File Explorer (Alternative Method): Open 'File Explorer’. Locate ‘This PC’ or‘My Computer’, right-click on the external drive, and choose ‘Eject’. Wait for the system to prompt that it’s safe to remove the hardware.
For macOS:
- Close Files and Applications: Make sure no files from the drive are open and no applications are using its data.
- Eject from Finder: Open ‘Finder’. Locate the external hard drive under ‘Devices’ in the sidebar. Click the ‘Eject’ icon next to the drive’s name.
- From the Desktop (Alternative Method): Locate the drive icon on your desktop. Drag the drive icon to the Trash, which will change to an ‘Eject’ icon.
- Wait for the Drive to Disappear: Once the drive disappears from Finder or the desktop, it’s safe to unplug.
For Linux:
- Unmount Using the File Manager: Open your file manager (such as Nautilus or Dolphin). Locate the external drive on the left sidebar. Right-click on the drive and select ‘Unmount’ or click the eject button next to the drive.
- Use Command Line (Alternative Method): Open a terminal window. Enter the command: df -h to list all mounted drives and their paths. Identify the drive's mount point (e.g., /dev/sdb1). Type the command: sudo umount /dev/sdb1 (replace /dev/sdb1 with your drive's actual mount point). Wait for the command to execute before unplugging the drive.
For All Systems:
- LED Indicator: If your external drive has an LED, ensure it is not blinking while you eject it. Activity can indicate data being written or read.
By following these instructions, you protect your data and maintain the proper function of your external drive.