
Best Portable Monitors for Presentations to Buy in July 2026
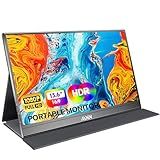
MNN Portable Monitor 15.6inch FHD 1080P USB C HDMI Gaming Ultra-Slim IPS Display w/Smart Cover & Speakers,HDR Plug&Play, External Monitor for Laptop PC Phone Mac (15.6'' 1080P)
-
FULL HD CLARITY: IMMERSE IN STUNNING 1920X1080 RESOLUTION AND VIBRANT COLORS.
-
EFFORTLESS CONNECTIVITY: DUAL TYPE-C PORTS FOR SIMPLE PLUG-AND-PLAY SETUP.
-
TRAVEL-FRIENDLY DESIGN: ULTRA-SLIM AND LIGHTWEIGHT FOR ON-THE-GO CONVENIENCE.


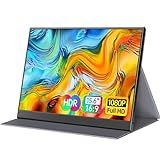
ForHelp 15.6inch Portable Monitor,1080P USB-C HDMI Second External Monitor for Laptop,PC,Mac Phone,PS,Xbox,Swich,IPS Ultra-Thin Zero Frame Gaming Display/Premium Smart Cover
-
SEAMLESS CONNECTIVITY: COMPATIBLE WITH HDMI & USB-C FOR ALL DEVICES.
-
STUNNING VISUALS: FULL HD 15.6 SCREEN WITH VIBRANT, LIFELIKE COLORS.
-
ULTRA-PORTABLE DESIGN: WEIGHS 1.52LB & 0.3 THIN FOR EASY TRAVEL.
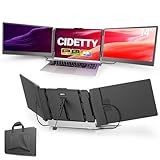
CIDETTY Laptop Screen Extender, 14'' FHD 1080P IPS Ultra-Thin Dual/Triple Monitor Display, HDMI/USB-C Plug-Play Portable Monitor for Laptop, Built-in Speakers(Mac, Win, Android)
-
FHD 1080P IPS SCREEN: ENJOY VIVID COLORS WITH EYE PROTECTION TECH.
-
PLUG-AND-PLAY COMPATIBILITY: WORKS SEAMLESSLY WITH MULTIPLE DEVICES.
-
ULTRA-SLIM & PORTABLE: LIGHTWEIGHT DESIGN WITH PROTECTIVE CASE FOR TRAVEL.
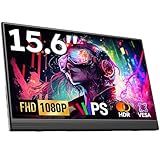
Portable Monitor, 15.6" FHD 1080P Travel Portable Monitor for Laptops, Ultra-Slim External Portable Screen for Laptop with Kickstand, Screen Extender for Laptop PC Mac Phone PS4/5 Xbox Switch
- STUNNING 1080P HDR DISPLAY FOR VIBRANT COLORS & CLARITY
- EFFORTLESS PLUG-AND-PLAY SETUP-GET GOING IN SECONDS!
- ULTRA-SLIM & LIGHTWEIGHT-PERFECT FOR ON-THE-GO PROFESSIONALS!
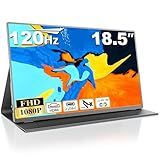
Usparkle 18.5 Inch Large Portable Monitor, 120Hz 1080P FHD IPS Portable Travel Second Screen Display for Laptop/Phone/Xbox PS4/5, 125% sRGB, Dual Speakers, VESA & Smart Cover
-
LIGHTWEIGHT & PORTABLE: 18.5 FHD SCREEN PERFECT FOR ON-THE-GO USE!
-
120HZ REFRESH RATE: ENJOY LAG-FREE GAMING AND VIBRANT COLORS!
-
UNIVERSAL CONNECTIVITY: EASILY CONNECT TO LAPTOPS, CONSOLES & MORE!
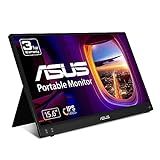
ASUS ZenScreen 15.6” 1080P Portable Monitor (MB16ACV) - Full HD, IPS, Eye Care, Flicker Free, Blue Light Filter, Kickstand, USB-C Power Delivery, for Laptop, PC, Phone, Console
- 15.6 FULL HD IPS: PERFECT FOR TRAVEL, MEETINGS, AND BUSINESS TRIPS.
- VERSATILE KICKSTAND: EFFORTLESSLY SWITCH BETWEEN PORTRAIT AND LANDSCAPE MODES.
- EYE CARE TECH: FLICKER-FREE AND LOW BLUE LIGHT FOR COMFORTABLE VIEWING.
Portable monitors can indeed be used for presentations, offering a flexible and convenient solution for professionals on the go. These monitors provide an additional screen that can display presentation content, making it easier to share information with a larger audience or collaborate with colleagues. With advancements in technology, portable monitors often come with features such as high-resolution displays, USB-C connectivity, and lightweight designs, making them easy to transport and set up in different locations. They can serve as an extended screen for a laptop or function independently with relevant adapters, enhancing the portability and efficiency of delivering presentations without relying on traditional, bulkier equipment.
How to secure a portable monitor during outdoor presentations?
Securing a portable monitor during outdoor presentations involves a combination of physical stability, protection from environmental elements, and safeguarding against theft or damage. Here are some steps to help you securely set up your portable monitor outdoors:
- Stable Surface: Ensure that the surface where you place the monitor is stable and level. Use a portable table or stand specifically designed to hold monitors securely.
- Monitor Stand or Mount: Invest in a sturdy stand or mount that can properly secure your monitor. Many stands come with adjustable grips or straps that can prevent the monitor from tipping over.
- Weather Protection: Sunlight: Use a monitor hood or sunshade to reduce glare and improve visibility in bright sunlight. Rain/Cover: Have a waterproof cover or case ready in case of unexpected rain. Consider setting up under a canopy or tent to provide shade and protection from rain.
- Wind Security: To prevent the monitor from being knocked over by the wind, use weights or sandbags at the base of the stand. You may also consider anchoring it with strong clips or ties.
- Cable Management: Secure cables to prevent tripping or accidental disconnections. Use cable ties or channels to keep them organized and out of the way.
- Power Source: If using an extension cord or portable power source, ensure it is suitable for outdoor conditions and securely connected to prevent interruptions.
- Theft Protection: Locking Mechanism: Use a lockable stand or a cable lock system to secure your monitor. Monitor Security Slot: If your monitor has a security slot (like a Kensington lock slot), use a compatible lock to deter theft.
- Transport and Storage: Use a padded case or bag for the monitor when transporting it to and from the presentation area. When not in use, store the monitor in a secure, dry place.
- Insurance: If the equipment is valuable, consider insuring it against theft or damage.
By taking these precautions, you can ensure your portable monitor remains secure, functional, and safe during outdoor presentations.
What is a portable monitor?
A portable monitor is a lightweight, compact display that can be easily transported and connected to various devices such as laptops, desktops, gaming consoles, or smartphones. These monitors are designed to enhance productivity on the go by providing additional screen space for tasks like multitasking, presentations, or gaming. They typically connect via USB-C, HDMI, or other ports and may include features like touchscreen capability, built-in batteries, and a foldable or detachable stand for easy use and setup. Portable monitors are popular among remote workers, travelers, and gamers who need flexibility and convenience.
How to choose a portable monitor with touch functionality?
Choosing a portable monitor with touch functionality involves considering several factors to ensure that it meets your needs effectively. Here are key points to guide you through the selection process:
- Display Size and Resolution: Size: Portable monitors typically range from 12 to 17 inches. Consider a size that complements your primary device and is convenient for portability. Resolution: Aim for at least Full HD (1920x1080) for a clear and sharp display. Higher resolutions like 4K are available but might not be necessary unless you need ultra-high-definition visuals.
- Touch Sensitivity: Check for multi-touch support, which allows for gestures such as pinch to zoom. Ensure the touch functionality is responsive and accurate. Look for reviews or specifications that highlight the touch panel’s sensitivity.
- Connectivity: USB-C: A USB-C connection is versatile, offering power delivery and display in one cable. Ensure your device supports USB-C with video output. HDMI: Older or additional devices may require an HDMI connection. Additional ports like mini HDMI, DisplayPort, or even a headphone jack may add versatility.
- Power Source: Some models can draw power from the connected device via USB-C, but others might require an external power source. Consider battery-powered options for maximum portability. Check the power requirements and which power modes are supported.
- Compatibility: Ensure compatibility with your devices, be it Windows, macOS, Android, or Linux. Some monitors have better integration and functionality with specific operating systems. Look for compatibility with other devices such as gaming consoles or smartphones if relevant.
- Build Quality and Portability: Check the build quality including the case, bezels, and weight. A lightweight and sturdy design ensures better portability. Features like a built-in stand, foldable case, or VESA mount compatibility can be beneficial.
- Color Accuracy and Brightness: For tasks involving design or photo editing, look for monitors with good color reproduction and brightness. An IPS panel typically offers better color and viewing angles. Verify the nits of brightness, especially if you’ll be using it in various lighting conditions.
- Additional Features: Features like blue light filters, flicker-free technology, and auto-rotation functions can enhance your experience. Some monitors come with built-in speakers, although they might not offer high-quality audio.
- Budget: Determine your budget beforehand. Portable monitors with touch functionality can range widely in price depending on features and brand. Consider warranty and customer support as part of your investment.
- Reviews and Reputation: Check user reviews and professional reviews to understand real-world performance and reliability. Consider brands with a strong reputation for quality portable monitors.
By carefully evaluating these factors, you can select a portable touch monitor that aligns with your usage needs, device compatibility, and budget.
What is the difference between portable and regular monitors?
Portable monitors and regular monitors differ in several key aspects, primarily related to their intended use, design, and functionality:
- Size and Weight: Portable Monitors: These are typically smaller and lighter to facilitate easy transport. They usually range from 13 to 17 inches in size and are designed to be slim, often weighing less than a couple of pounds. Regular Monitors: Generally larger and heavier, ranging from 20 inches to 32 inches or more. They are designed to stay in one place and are not intended for easy mobility.
- Design: Portable Monitors: Feature a slim design with minimal bezels and often include a foldable stand or case for protection and ease of setup. They prioritize compactness and portability. Regular Monitors: Have a more robust build with significant stands or mounts. They often have more connectivity options and adjustability in terms of height, tilt, and sometimes pivot.
- Resolution and Performance: Portable Monitors: While many offer full HD (1080p) resolutions, high-end models may offer higher resolutions. However, they often prioritize power efficiency over performance. Regular Monitors: Tend to offer a wide range of resolutions including 4K, and can have higher refresh rates and better color accuracy suitable for professional use and gaming.
- Connectivity: Portable Monitors: Often limited to a few ports such as USB-C, mini-HDMI, or DisplayPort intended for simple connections with laptops, smartphones, or tablets. They may include built-in batteries or use power-over-cable features. Regular Monitors: Have a wider array of inputs, including HDMI, DisplayPort, VGA, DVI, and often multiple ports for each. This makes them more versatile for various setups.
- Use Cases: Portable Monitors: Ideal for on-the-go professionals, travelers, or anyone who needs an additional display while away from their main workspace. They are popular for presentations, dual-monitor setups on the move, or lightweight gaming. Regular Monitors: Suited for stationary setups such as workstations, gaming rigs, or home entertainment systems. They offer better performance and visual quality due to more space and power capacity.
- Power Supply: Portable Monitors: May be powered via a single cable from a laptop using USB-C or have a battery for truly wireless use. Regular Monitors: Require direct connection to a power outlet.
Overall, the choice between a portable and regular monitor should be based on your specific needs regarding mobility, performance, and the intended use-case scenario.
How to connect a portable monitor to a laptop?
Connecting a portable monitor to a laptop can be a straightforward process, but it does depend on the available ports on both your laptop and the monitor. Here are the general steps you can follow:
- Identify the Ports: HDMI Port: Most portable monitors and laptops have HDMI ports. Check if your devices support it. USB-C Port: Many modern portable monitors use USB-C for both power and display (if the laptop supports DisplayPort over USB-C). Mini HDMI: Some portable monitors use mini HDMI ports, so you might need a mini HDMI to HDMI cable. DisplayPort: Less common for portable monitors, but you might see this option.
- Gather Necessary Cables/Adapters: If both your laptop and monitor have HDMI ports, you’ll need an HDMI cable. For USB-C connections, a USB-C to USB-C cable is required (ensure it supports video transmission). If the monitor uses mini HDMI and your laptop has a standard HDMI port, use a mini HDMI to HDMI cable or an adapter. If your laptop doesn’t have matching ports, you may need an adapter (e.g., USB-C to HDMI).
- Setting It Up: Power the Monitor: Some portable monitors draw power through the same cable used for display signals (like USB-C), while others need a separate power source. Connect it to a power source if needed. Connect the Cable: Attach one end of the cable to your laptop’s corresponding port. Connect the other end to the monitor. Switch Display Modes: Once connected, your laptop should automatically detect the monitor. If not, use the display settings to detect it manually. On Windows: Right-click on the desktop and select "Display settings.” You can extend or duplicate your screen here. On macOS: Go to "System Preferences" > "Displays" to arrange and configure displays.
- Configure Display Settings: Decide between extending your desktop, duplicating it, or using only the second screen. Adjust resolution and orientation as needed for optimal display.
If you encounter any issues, double-check the cables, and consult both your laptop's and monitor's manuals for troubleshooting steps specific to the models you are using.