
Best Printer Maintenance Supplies to Buy in July 2026

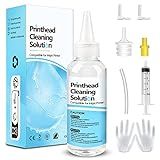
Printer Cleaning Kit for Epson, Printhead Cleaning Kit for HP, Inkjet Printer Head Cleaner for Canon, Printers Cleaner Printhead Cleaning Solution for Inkjet, Printers Print Head Cleaning Kits 100mL
- VERSATILE CLEANING FOR ALL MAJOR INKJET PRINTERS
- EASY OPERATION WITH COMPREHENSIVE CLEANING KIT INCLUDED
- OUTSTANDING PERFORMANCE WITH DYE SUBLIMATION AND HEAT TRANSFER


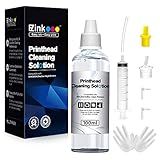
Best Printer Cleaning Kit for Epson, HP | Brother Inkjet Printhead Cleaning Kit | Inkjet Printer Head Cleaner | Printer Head Cleaning Kit with LARGE 20ml Syringe - 100ml Printer Cleaning Fluid
- BOOST PRINT QUALITY WITH OUR DIY KIT-NO EXPERTISE NEEDED!
- COMPATIBLE WITH TOP BRANDS: EPSON, HP, CANON, BROTHER & MORE!
- EXPERT-BACKED SUPPORT & HIGH SUCCESS RATE-RESTORE YOUR PRINTER!
Printhead Cleaning Kits Inkjet Printers, Printer Cleaning Kit for Epson Ecotank Printers, Printer Cleaner Kit for HP, Inkjet Printers Head Cleaning Solution for Canon Pixma Print Head Liquid Nozzles
-
UNIVERSAL COMPATIBILITY: WORKS WITH MAJOR BRANDS: EPSON, HP, CANON.
-
EASY TO USE KIT: INCLUDES ESSENTIAL TOOLS FOR HASSLE-FREE CLEANING.
-
COST-EFFECTIVE MAINTENANCE: EXTENDS PRINTER LIFE; AVOID COSTLY REPLACEMENTS.
E-Z Ink Printer Cleaning Kit for Epson Ecotank Printer, Printerhead Cleaning kit for HP/Canon/Brother Inkjet Printers, Printhead Cleaning Solution, 100ML
-
WIDE COMPATIBILITY: WORKS WITH ALL MAJOR INKJET PRINTER BRANDS.
-
EASY OPERATION: COMPLETE KIT INCLUDES TOOLS FOR EFFORTLESS CLEANING.
-
POWERFUL CLEANING: REMOVES CLOGS AND PROTECTS PRINT HEADS EFFECTIVELY.
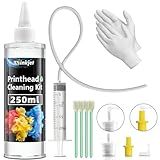
Osinkjet Printhead Cleaning Kit for Epson, 250ml Printer Cleaning kit for HP, Print Head Cleaning Solution for Canon, Printer Head Cleaner for Brother Inkjet Printers Nozzle
-
EFFICIENTLY CLEARS PRINTHEAD CLOGS FOR CRISP, CLEAR PRINTS!
-
ECO-FRIENDLY SOLUTION FOR SUSTAINABLE AND EFFECTIVE CLEANING.
-
UNIVERSAL COMPATIBILITY WITH TOP PRINTER BRANDS FOR CONVENIENCE.
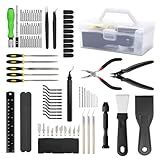
93 Pcs 3D Printing Tools Kit, Complete 3D Printer Tools, 3D Printer Accessories (Deburring Tools, Art Knife Set, Drill, Screwdriver Set ...) for Removal, Smoothing, Deburring, Craving, Maintenance
-
ALL-IN-ONE KIT: 90+ TOOLS FOR 3D PRINTING-NO MORE BUYING SEPARATELY!
-
PRECISION TOOLS: ACHIEVE FLAWLESS PRINTS WITH PRO-GRADE CUTTING & SCRAPERS.
-
PORTABLE ORGANIZER: KEEP EVERYTHING IN ONE CASE FOR EASY ACCESS ANYWHERE!
Printhead Cleaning kit 200mL for E pson Printer, Printer Cleaning Kit for HP, Print Head Cleaning Kit for Canon, Inkjet Printer Nozzle Cleaning Kit for Brother
- COMPATIBLE WITH MAJOR BRANDS: WORKS WITH EPSON, HP, CANON, AND MORE!
- COMPREHENSIVE CLEANING KIT: ALL-IN-ONE SOLUTION FOR CLOGGED PRINTHEADS.
- EXTENDED PRINTER LIFE: ENHANCE PERFORMANCE AND SAVE ON COSTLY REPAIRS!
To maintain an all-in-one printer for optimal performance, begin by regularly cleaning it to prevent dust and debris from accumulating, which can lead to jams and decreased print quality. Make sure to use a soft, lint-free cloth and avoid harsh chemicals. Regularly check and replace ink or toner cartridges before they are completely depleted to ensure consistent quality and avoid clogging the print heads. Perform routine print head alignments and nozzle checks, as most printers have built-in maintenance features that can help with this. Keep the printer firmware and software updated to benefit from performance improvements and security patches provided by the manufacturer. Additionally, use the printer periodically to prevent ink from drying in the nozzles, which can happen when a printer sits idle for too long. When not in use, cover the printer to protect it from dust. Finally, refer to the manufacturer's guidelines and maintenance recommendations specific to your model for optimal care.
What is the best way to load paper into a printer?
Loading paper into a printer properly is important to ensure smooth operation and avoid paper jams. Here are the steps to load paper into a typical printer:
- Prepare the Paper: Use the correct type and size of paper recommended for your printer. Fan the stack of paper to prevent sheets from sticking together. Tap the stack on a flat surface to align the edges.
- Open the Paper Tray: Pull out the paper tray from the printer. If you’re using a top-loading printer, locate the paper input slot.
- Adjust the Paper Guides: Locate the paper guides on the tray or input slot. Adjust them to match the width and length of the paper. They should be snug against the edges of the paper but not too tight to cause bending or warping.
- Load the Paper: Place the paper into the tray with the print side facing down (for most standard printers) or the required orientation as per your printer’s manual. Make sure the stack does not exceed the paper capacity limit of the tray, which is usually marked.
- Secure the Paper: Push the paper guides gently against the edges of the paper stack. Do not force them as it might cause jams or paper skewing.
- Insert the Tray: Carefully push the tray back into the printer until it clicks into place. Ensure it’s fully inserted to avoid feeding issues.
- Test the Setup: Run a test print to ensure the paper feeds correctly and the print quality meets expectations.
- Adjust Settings if Needed: Ensure your printer settings match the type and size of paper you have loaded, especially if you are using specialty papers like envelopes or labels.
By following these steps, you should be able to load paper into your printer effectively and minimize the chances of issues such as paper jams or misfeeds. Always refer to your specific printer’s manual for any model-specific instructions or recommendations.
How do you remove a paper jam from an all-in-one printer?
Removing a paper jam from an all-in-one printer can vary slightly depending on the model, but here are some general steps you can follow:
- Turn Off the Printer: Before you begin, turn off the printer and unplug it from the power source to prevent any risk of electric shock or damage to the printer.
- Open All Access Panels: Locate and open the main access panel. This is usually at the top or side of the printer. Open the back panel. Many printers have a rear access panel specifically designed to clear paper jams.
- Gently Remove Jammed Paper: Carefully pull out any visible jammed paper. Be sure to pull slowly and steadily to avoid tearing the paper. If the paper tears, make sure to remove any remnants to prevent future jams.
- Carefully Remove the Paper Tray: If the paper is stuck near the input tray, remove the tray and gently pull the paper out from that area.
- Check the Carriage Path: Move the printer carriage (holding ink cartridges) if necessary, but do so very gently. It should move freely when the printer is off. Remove any obstructions in the carriage path.
- Inspect for Other Obstructions: Ensure there are no small scraps of paper or debris left inside the printer.
- Reassemble the Printer: Close all panels and reinsert the paper tray.
- Reconnect and Test the Printer: Plug the printer back in, turn it on, and run a test print to ensure the jam is fully cleared and the printer is functioning correctly.
If you continue to experience problems, consult the printer’s manual or the manufacturer’s support website for model-specific instructions. If the issue persists, it may be helpful to contact customer support or a professional technician for further assistance.
How do you set up an all-in-one printer on a wireless network?
Setting up an all-in-one printer on a wireless network generally involves the following steps. The exact details may vary depending on the printer model and manufacturer, but these guidelines provide a general overview.
- Unpack the Printer and Check Contents: Unbox the printer and make sure you have all necessary components, including power cords, ink cartridges or toner, printer manuals, and installation CDs (if provided).
- Place the Printer: Position the printer within range of your Wi-Fi router to ensure a strong wireless signal.
- Power on the Printer: Connect the printer to a power source and turn it on. Refer to the printer's manual if needed.
- Install Ink Cartridges and Paper: Follow the instructions provided to install ink cartridges or toner. Load paper into the input tray as directed.
- Connect to Wi-Fi: Use the printer’s control panel display. Most modern printers have a touch screen or buttons that allow you to navigate settings. Look for "Network," "Wireless," or "Wi-Fi Setup" settings. Choose the option to set up a wireless connection. Select your Wi-Fi network name (SSID) from the list of available networks. Enter your Wi-Fi password when prompted.
- Using WPS (Wi-Fi Protected Setup) Button (optional): If your router and printer support WPS, press the WPS button on your router. Within a couple of minutes, press the WPS button on the printer (or follow on-screen instructions to activate WPS on your printer).
- Install Printer Software/Drivers: On your computer or mobile device, visit the manufacturer's website to download the latest drivers and software for your printer model. Run the installation package and follow the on-screen instructions. During installation, you may be asked to select wireless as the connection type.
- Add Printer to Your Devices: For Windows: Go to Control Panel > Devices and Printers > Add a printer. Select your printer from the list and follow any additional instructions. For macOS: Go to System Preferences > Printers & Scanners. Click the "+" button to add a new printer. Select your printer from the list and click "Add."
- Print a Test Page: Once setup is complete, print a test page from your computer or from the printer's control panel to verify the connection.
- Mobile Device Printing: Install the manufacturer’s mobile printing app (if available) on your smartphone or tablet. Ensure your mobile device is connected to the same Wi-Fi network and follow app instructions to add your printer.
If you encounter any connectivity issues, refer to the troubleshooting section of the printer's manual or the manufacturer’s support website.
What is thermal printing technology?
Thermal printing technology is a method of printing that uses heat to produce an image or text on paper. There are two main types of thermal printing: direct thermal and thermal transfer.
- Direct Thermal Printing: This method uses heat-sensitive paper, often called thermal paper. When the thermal print head applies heat to the paper, the heat-sensitive coating on the paper reacts, changing color (usually to black) where the heat is applied, thereby forming the desired image or text. Direct thermal printing is commonly used in applications like receipts, shipping labels, and tickets.
- Thermal Transfer Printing: This method involves a thermal print head that applies heat to a ribbon made of wax, resin, or a combination of both. The heat melts the ribbon's coating, which then transfers onto the paper or other substrate to form the image or text. Thermal transfer printing is known for its durability and clarity and is often used for printing labels, barcodes, and signs that require long-lasting prints.
Thermal printing is popular due to its speed, reliability, and low maintenance requirements, since it lacks moving parts like ink or toner cartridges found in other printing technologies. However, it can be limited by the need for special thermal paper or ribbons and might not be suitable for applications where color printing is required.
What is the function of a printer maintenance kit?
A printer maintenance kit serves several important functions, ensuring that a printer operates efficiently and reliably. Here are the main functions of a printer maintenance kit:
- Replacing Worn-Out Parts: Over time, certain components of a printer, such as rollers, fuser units, and separation pads, wear out or become less effective. A maintenance kit includes replacements for these parts to prevent paper jams, improve print quality, and maintain the printer’s performance.
- Preventing Paper Jams: By replacing components like rollers and separation pads, which help properly feed paper through the printer, maintenance kits help minimize the risk of paper jams and ensure smooth operation.
- Enhancing Print Quality: Components such as the fuser, which bonds toner to the paper, are included in maintenance kits to ensure consistent and high-quality print output. Replacing these parts can help eliminate issues like streaking, smudging, or fading.
- Extending Printer Lifespan: Regular maintenance using a kit can extend the overall lifespan of the printer by maintaining optimal functionality and preventing damage caused by worn-out parts.
- Reducing Downtime: Scheduled maintenance using a kit can prevent unexpected breakdowns, ensuring the printer is available and operational when needed. This is particularly important in business environments where printer downtime can disrupt workflows.
- Cost-Effectiveness: Performing regular maintenance with a kit can be more cost-effective in the long run by reducing the need for major repairs or early replacement of the printer.
Overall, a printer maintenance kit is essential for ensuring that a printer continues to operate smoothly, produce high-quality prints, and have a longer service life. Regular maintenance based on the manufacturer's recommendations is typically advised for optimal results.
What is a duplex printer, and how does it save paper?
A duplex printer is a type of printer that has the capability to print on both sides of a sheet of paper automatically. This feature is known as duplexing. In contrast, a simplex printer can only print on one side of a sheet at a time, requiring manual intervention to print on both sides.
Duplex printers save paper by reducing the number of sheets needed for print jobs. For instance, a document that would typically require 10 sheets of paper when printed single-sided (simplex) can be printed on just 5 sheets using duplex printing, effectively halving paper usage. This not only conserves paper resources but also reduces paper-related costs and environmental impact. Additionally, using duplex printing can help decrease bulk and weight, making documents more compact and manageable.