Best Mini PCs to Buy for Easy Setup in July 2026
KAMRUI AK1PLUS Mini PC Computer, Intel Celeron N5095 (Up to 2.9GHz), 16GB RAM 256GB SSD, Dual 4K Mini Desktop Computer, Support 2.5'' SSD Expansion, WiFi, Bluetooth, Ethernet, Business Home Office PC
-
UNLOCK QUICKER MULTITASKING WITH INTEL CELERON N5095 POWER!
-
EXPAND STORAGE UP TO 4TB FOR ALL YOUR FILES AND MEDIA EFFORTLESSLY.
-
DUAL 4K DISPLAYS ENHANCE PRODUCTIVITY WITHOUT CLUTTERING YOUR WORKSPACE!


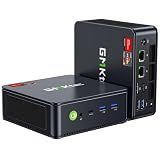
GMKtec Mini PC Computer, G10 Ryzen 5 3500U (Beats N150/4300U/3200U), 16GB RAM 512GB SSD 2.5GbE NIC LAN Desktop Office Home Business HTPC, Triple 4K Display, WiFi, BT, USB-C, DP, Type-C PD, HDMI 2.1
- POWERFUL RYZEN 5 3500U: ENHANCED MULTITASKING & GAMING PERFORMANCE!
- TRIPLE DISPLAY SUPPORT: BOOST PRODUCTIVITY WITH 3 SCREENS SIMULTANEOUSLY!
- ULTIMATE PORTABILITY: CHARGE EASILY WITH USB-C FOR ON-THE-GO USE!
GMKtec Mini PC Computers Intel N95 Processor (Turbo 3.4GHz) 8GB DDR4 256GB SSD Desktop Computer 4K Dual HDMI Display/3x USB3.2/WiFi 5 BT5.0/RJ45 Ethernet Nucbox G3S
-
EXPERIENCE 36% FASTER PERFORMANCE WITH THE 12TH INTEL N95 PROCESSOR!
-
BOOT IN SECONDS-8GB RAM & 256GB SSD FOR SEAMLESS MULTITASKING!
-
ENJOY 4K DUAL-SCREEN SUPPORT FOR IMMERSIVE HOME ENTERTAINMENT!
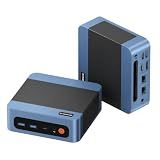
GMKtec M6 Ultra Gaming Mini PC Ryzen 7640HS (Upgraded 6600H/ 6800U), 32GB RAM DDR5 1TB SSD Dual NIC LAN 2.5GbE Desktop Computers Office Home, Triple 4K Display, WiFi 6, USB4, BT 5.2, DP, HDMI 2.0
- POWERFUL AMD RYZEN 5 FOR LIGHTNING-FAST PERFORMANCE.
- TRIPLE 4K DISPLAY SUPPORT FOR ENHANCED MULTITASKING.
- ULTRA-FAST WIFI 6 AND DUAL NIC FOR SEAMLESS CONNECTIVITY.
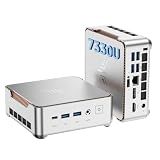
KAMRUI Pinova P2 AMD Ryzen 7330U(Beats R2544/3500U/10110U)Mini PC 16GB RAM 256GB SSD, Up to 4.3GHz, 4C/8T, 8MB L3 Smart Cache Mini Computers,Triple 4K Display for Home/Business Mini Desktop Computers
-
BLAZING FAST PERFORMANCE: AMD RYZEN 7330U CRUSHES RIVALS FOR SEAMLESS MULTITASKING.
-
TRIPLE 4K POWER: EXPERIENCE STUNNING VISUALS WITH TRIPLE 4K OUTPUT AT 60HZ.
-
SILENT AND EFFICIENT: SPACE-SAVING DESIGN WITH QUIET COOLING FOR UNINTERRUPTED WORK.
Bmax Mini PC B1 Plus, Intel Celeron J3355 (Up to 2.5GHz), 6GB RAM 128GB eMMC Support M.2 SSD Expansion (512GB/2TB), 4K Dual Display 2.4G/5G WiFi & BT5.0 Mini Desktop Computer for Home/Office
- POWERFUL INTEL CELERON J3355 FOR SEAMLESS MULTITASKING.
- EXPAND STORAGE UP TO 2TB WITH DUAL M.2 SSD SLOTS.
- ENJOY STUNNING 4K VISUALS WITH DUAL HDMI PORTS.
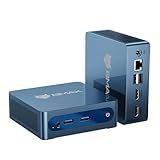
BOSGAME E5 11 Pro Mini PC, AMD Ryzen 5300U 4C/ 8T, 8GB DDR4 256GB M.2 2280 SSD, 2.5 GbE Dual Lan Desktop Computers, Triple Displays 4K 60Hz, Wi-Fi 5, BT 5.0, Business Home Office PC, Support Linux SSH
-
30% FASTER MULTI-CORE PERFORMANCE FOR SEAMLESS MULTITASKING.
-
UPGRADE TO 64GB RAM & 2TB SSD FOR GROWING DATA NEEDS.
-
TRIPLE 4K SUPPORT & DUAL 2.5GBE PORTS FOR ENHANCED PRODUCTIVITY.
To set up a Windows Mini PC for the first time, start by connecting the power adapter and any peripherals such as a keyboard, mouse, and monitor. Turn on the Mini PC and follow the on-screen instructions to set up your language, region, time zone, and user account. You may need to connect to a Wi-Fi network or Ethernet for internet access.
Next, you will need to activate Windows by entering your product key or purchasing a license if needed. You can also choose to customize your settings such as privacy preferences, background wallpaper, and default apps. Once set up is complete, you can start using your Windows Mini PC for web browsing, email, media streaming, and other tasks. Don't forget to install updates and security patches regularly to keep your system running smoothly.
How to set up remote desktop access on a Windows Mini PC?
To set up remote desktop access on a Windows Mini PC, follow these steps:
- Enable Remote Desktop on your Windows Mini PC:
- Right-click on the "Start" button and select "System."
- Click on "Remote settings" on the left pane.
- Under the Remote tab, check the box next to "Allow Remote Assistance connections to this computer" and "Allow remote connections to this computer."
- Click on "Select Users" and add the users you want to allow remote access. Click OK.
- Find the IP address of your Windows Mini PC:
- Press the Windows key + R to open the Run dialog box.
- Type "cmd" and press Enter to open the Command Prompt.
- In the Command Prompt, type "ipconfig" and press Enter.
- Note down the IPv4 address under the network adapter that your Mini PC is connected to.
- Set up port forwarding on your router (if needed):
- Access your router's settings by typing its IP address into a web browser (usually 192.168.1.1 or 192.168.0.1).
- Find the port forwarding section and forward port 3389 to the IP address of your Windows Mini PC.
- Connect to your Windows Mini PC using Remote Desktop:
- On another computer, open the Remote Desktop Connection app (search for "Remote Desktop Connection" in the Start menu).
- Enter the IP address of your Windows Mini PC in the Computer field.
- Click Connect and enter the login credentials of your Windows Mini PC.
You should now be connected to your Windows Mini PC remotely. Make sure to keep your Windows Mini PC up to date with security updates and use strong passwords to secure your remote desktop access.
How to set up a virtual private network (VPN) on a Windows Mini PC?
To set up a VPN on a Windows Mini PC, you can follow these steps:
- Choose and download a reliable VPN client: There are many VPN services available, so choose one that meets your needs and budget. Download and install the VPN client on your Windows Mini PC.
- Sign up for a VPN account: If you haven't already, sign up for a VPN account with the service provider you selected. You will need a username and password to log in to the VPN client.
- Configure VPN settings: Open the VPN client on your Windows Mini PC and enter your login credentials. You may also need to select the server location you want to connect to, depending on the VPN service.
- Connect to the VPN: Click on the connect button in the VPN client to establish a secure connection to the VPN server. You should see a notification confirming that you are connected to the VPN.
- Test the VPN connection: To ensure that your VPN is working properly, you can visit a website like whatsmyip.org to check your IP address. It should show the IP address of the VPN server, not your actual IP address.
- Customize VPN settings (optional): Depending on your preferences, you may want to customize the VPN settings, such as enabling a kill switch or split tunneling.
That's it! You have now successfully set up a VPN on your Windows Mini PC, and your internet traffic is encrypted and secure.
What is the best way to optimize performance on a Windows Mini PC?
There are several ways to optimize performance on a Windows Mini PC:
- Update the operating system and drivers: Make sure that Windows and all drivers are up to date to ensure optimal performance and stability.
- Disable unnecessary startup programs: Go to the Task Manager and disable any programs that are set to run at startup but are not essential for the Mini PC's functionality. This will help speed up the boot time and free up system resources.
- Disable visual effects: Turning off unnecessary visual effects in Windows settings can help improve performance, especially on a Mini PC with limited resources.
- Clean up disk space: Remove temporary files, old installations, and other unnecessary files to free up disk space and improve performance.
- Add more RAM: If possible, consider upgrading the Mini PC's RAM to increase performance and multitasking capabilities.
- Use a lightweight web browser: Opt for a lightweight web browser like Google Chrome or Mozilla Firefox to improve browsing speed on the Mini PC.
- Optimize power settings: Adjust power settings to prioritize performance over energy saving to ensure the Mini PC runs at its best.
- Install a solid-state drive (SSD): Upgrading to an SSD can significantly improve boot times, application loading speeds, and overall system performance on a Mini PC.
- Use performance monitoring tools: Monitor system performance with tools like Task Manager or third-party applications to identify any bottlenecks and optimize system resources accordingly.
By following these tips, you can optimize the performance of your Windows Mini PC and enjoy a smoother and faster computing experience.
How to enable firewall protection on a Windows Mini PC?
To enable firewall protection on a Windows Mini PC, follow these steps:
- Click on the Start menu and select Settings (gear icon).
- In the Settings window, click on Update & Security.
- In the Update & Security window, select Windows Security from the left-hand menu.
- Click on Firewall & network protection.
- In the Firewall & network protection window, make sure that the Windows Defender Firewall is turned on. If it is off, click on the switch to turn it on.
- You can also customize the firewall settings by clicking on Advanced settings. Here, you can create inbound and outbound rules, as well as specify which apps are allowed or blocked through the firewall.
- Once you have configured the firewall settings to your preference, close the Windows Security window.
Your Windows Mini PC is now protected by the Windows Defender Firewall.
What is the easiest way to transfer files to a Windows Mini PC?
The easiest way to transfer files to a Windows Mini PC is by using a USB flash drive. Simply copy the files you want to transfer onto the flash drive from your current device, then plug the flash drive into the USB port on the Mini PC and copy the files onto the Mini PC's hard drive. This method is quick, simple, and does not require an internet connection.
What is the process for setting up a Windows Mini PC's operating system?
To set up a Windows Mini PC's operating system, you will need to follow these steps:
- Connect the Mini PC to a power source and monitor.
- Turn on the Mini PC and enter the BIOS settings by pressing the designated key (usually F2, F10, or Del) during the boot-up process.
- In the BIOS settings, change the boot order to prioritize the USB drive or CD/DVD drive where you have inserted the Windows installation media.
- Save the changes and exit the BIOS settings.
- Restart the Mini PC and boot from the Windows installation media.
- Follow the on-screen instructions to install Windows on the Mini PC. You will be prompted to select the language, time and currency format, and keyboard or input method.
- Choose the option to install Windows and select the partition where you want to install the operating system.
- Follow the prompts to set up your user account and complete the installation process.
- Once Windows is installed, you may need to install drivers for hardware components such as the graphics card, network adapter, and audio devices. You can download the necessary drivers from the manufacturer's website or use the included installation disc.
- Finally, install any necessary software and configure Windows settings to personalize your Mini PC's operating system.