
Best Guides to Install Ubuntu to Buy in July 2026
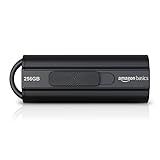
Amazon Basics 256 GB Ultra Fast USB 3.1 High Capacity Flash Drive for Data Transfer and Storage, Black
-
ULTRA-FAST 256GB USB 3.1: READS UP TO 130MB/S FOR QUICK TRANSFERS.
-
STORE UP TO 64,000 PHOTOS OR 978 MINS OF 1080P VIDEO SEAMLESSLY.
-
STYLISH, RETRACTABLE DESIGN WITH DURABLE NAND FLASH FOR DATA SECURITY.


Amazon Basics 128 GB Ultra Fast USB 3.1 Flash Drive, Black
-
LIGHTNING-FAST SPEEDS: UP TO 130MB/S READ, 30MB/S WRITE!
-
MASSIVE 128GB CAPACITY: STORE 32,000 PHOTOS OR 488 MIN VIDEO!
-
RETRACTABLE DESIGN & SECURE: PROTECTS YOUR DATA ON-THE-GO!
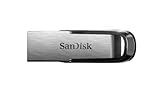
SanDisk 512GB Ultra USB 3.0 Flash Drive - SDCZ48-512G-G46, Black
- TRANSFER SPEEDS UP TO 10X FASTER THAN USB 2.0!
- SECURE FILE ENCRYPTION WITH PASSWORD PROTECTION INCLUDED.
- BACKWARD COMPATIBLE WITH USB 2.0 FOR VERSATILITY.
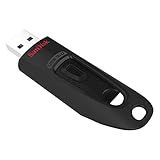
SanDisk 128GB Ultra Flair USB 3.0 Flash Drive - SDCZ73-128G-G46, black
- ACHIEVE USB 3.0 SPEEDS UP TO 150MB/S-15X FASTER THAN USB 2.0!
- TRANSFER A FULL MOVIE IN UNDER 30 SECONDS-EFFORTLESS AND QUICK!
- SECURE YOUR FILES EASILY WITH 128-BIT AES PASSWORD PROTECTION.
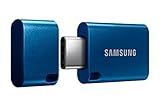
Samsung Type-C USB Flash Drive, 256GB, Transfers 4GB Files in 11 Secs w/Up to 400MB/s USB 3.2 Gen 1 Read Speeds, Compatible w/USB 3.0/2.0, Waterproof, 2022, Blue, MUF-256DA/AM
-
COMPACT & SLEEK DESIGN: FITS IN YOUR PALM, PERFECT FOR ON-THE-GO USE.
-
LIGHTNING FAST TRANSFERS: MOVE 4GB FILES IN JUST 11 SECONDS AT 400MB/S.
-
DURABLE & RELIABLE: WATERPROOF, SHOCK-PROOF, BACKED BY A 5-YEAR WARRANTY.
2 Pack 64GB USB Flash Drive USB 2.0 Thumb Drives Jump Drive Fold Storage Memory Stick Swivel Design - Black
-
DUAL PACK: 2 X 64GB USB DRIVES WITH WARRANTY FOR UNBEATABLE VALUE!
-
VERSATILE STORAGE: PERFECT FOR SCHOOL, BUSINESS, MUSIC, AND PHOTOS.
-
EASY USE & DESIGN: PLUG AND PLAY WITH SWIVEL CAP FOR ON-THE-GO CONVENIENCE.
To install Ubuntu from a flash drive, you can follow these steps:
- Download Ubuntu: Visit the official Ubuntu website and download the latest version of Ubuntu ISO file.
- Format the flash drive: Connect your flash drive to your computer and ensure it is empty as the process will delete all existing data. Format the drive in FAT32 file system.
- Create a bootable USB: To make the flash drive bootable, you need to use a tool like Rufus (for Windows) or Etcher (for macOS or Linux). Open the tool, select the Ubuntu ISO file you downloaded, and choose your flash drive as the target.
- Set up BIOS/UEFI settings: Restart your computer and enter the BIOS or UEFI settings. Look for the boot order options and set the USB flash drive as the first boot device. Save the changes and restart your computer.
- Boot from the flash drive: Once your computer restarts, it should boot from the flash drive you created. You will see the Ubuntu installer loading.
- Configure Ubuntu installation: Choose your preferred language and select "Install Ubuntu" from the menu. You can also choose to try Ubuntu without installing to test it out. Follow the on-screen prompts to configure your language, keyboard layout, and other preferences.
- Partitioning: If you're installing Ubuntu alongside another operating system, you will be prompted to choose how you want to partition your drive. Select the option that suits your needs or choose "Erase disk and install Ubuntu" if you want to replace your existing operating system.
- User setup: Set up a username and password for your Ubuntu account. You can also choose whether to log in automatically or require a password.
- Installation: Click on the "Install" button to begin the installation process. Ubuntu will copy files to your hard drive and configure the necessary settings. This may take some time.
- Complete the installation: Once the installation is complete, you will be prompted to restart your computer. Remove the flash drive and restart your computer.
- Welcome to Ubuntu: After the restart, you will be greeted with the Ubuntu login screen. Enter the username and password you set up during installation to log in.
That's it! You have successfully installed Ubuntu on your computer using a flash drive. Enjoy exploring and using Ubuntu!
Where can I find additional resources or support if I encounter problems during the installation process?
If you encounter problems during the installation process, there are several places where you can find additional resources or support:
- Manufacturer's website: Visit the website of the hardware or software manufacturer to see if they have a support section or knowledge base. Many manufacturers provide detailed installation guides, FAQs, and troubleshooting information.
- Online forums and communities: Look for dedicated forums that discuss the specific hardware or software you are trying to install. These forums often have active communities where users share tips, troubleshoot problems, and offer advice. Popular forums include Stack Overflow, Reddit, and specialized communities related to your installation.
- User manuals and documentation: Check the user manuals, documentation, or installation guides that come with the product. These resources often provide step-by-step instructions and troubleshooting tips to help you overcome common installation issues.
- Online tutorials and video guides: Search for online tutorials or video guides that walk you through the installation process. Websites like YouTube or dedicated tutorial platforms may have helpful videos that explain the installation process visually.
- Customer support: If you have purchased the product or software, contact the customer support provided by the manufacturer. They can assist you in resolving installation issues and provide specific guidance tailored to your situation.
Remember, when seeking help online, provide detailed information about the problems you are encountering. This will help others understand your issue better and offer relevant solutions.
How do I uninstall Ubuntu if I no longer want it on my system?
To uninstall Ubuntu and remove it from your system, you will need to perform the following steps:
- Backup your data: Before proceeding with the uninstallation process, it is advisable to backup any important files or data that you have on your Ubuntu installation. This way, you won't risk losing any valuable information.
- Access your Windows boot manager: Restart your computer and boot into your Windows operating system. You may need to access the boot options by pressing a specific key during startup (usually Esc, F12, or Del). Make sure you are accessing the Windows boot manager and not directly booting into Ubuntu.
- Open Disk Management: In Windows, open the Disk Management utility. You can do this by right-clicking the Start menu and selecting "Disk Management" from the context menu.
- Delete Ubuntu partition: In Disk Management, look for the partition that contains the Ubuntu installation. It might be labeled as "Linux filesystem" or something similar. Right-click on this partition and select "Delete Volume". Confirm the deletion when prompted.
- Resize Windows partition (optional): Once the Ubuntu partition is deleted, you will be left with unallocated space on your hard drive. If you want to increase the size of your Windows partition to utilize this space, you can right-click on the Windows partition and select "Extend Volume". Follow the on-screen instructions to extend the partition size.
- Remove Linux boot loader: By default, Ubuntu installs the GRUB boot loader, which allows you to choose between different operating systems during startup. To remove GRUB, you can restore the Windows boot loader. Open the command prompt in Windows as an administrator and run the following command:
bootrec /fixmbr
This command will remove GRUB and restore the Windows boot loader.
- Remove Ubuntu files (optional): After performing the above steps, you have successfully uninstalled Ubuntu from your system. However, there might still be some Ubuntu-related files or folders present on your hard drive. You can manually delete these files if you want to completely remove any traces of Ubuntu.
Remember, uninstalling Ubuntu will only remove the Ubuntu operating system. If you had a dual-boot setup with Windows and Ubuntu, your Windows installation will remain intact.
Can I install Ubuntu on a Mac using a flash drive?
Yes, you can install Ubuntu on a Mac using a flash drive. Here are the general steps to do so:
- Download the Ubuntu ISO file from the official website.
- Insert your flash drive into the Mac and format it as "MS-DOS (FAT)" using the Disk Utility application.
- Open Terminal (found in the Utilities folder within Applications) and type diskutil list to identify the flash drive's identifier (e.g., /dev/disk2).
- Assuming you have downloaded the ISO file to the Downloads folder and named it "ubuntu.iso," use the following command in Terminal to create a bootable USB drive: sudo dd if=~/Downloads/ubuntu.iso of=/dev/rdisk2 bs=1m. Replace /dev/rdisk2 with the identifier you obtained from the previous step.
- Wait for the process to complete. It may take a while.
- Eject the USB by running diskutil eject /dev/disk2 (replace disk2 with your flash drive's identifier).
- Restart your Mac and hold down the Option/Alt key while it boots up.
- When prompted, select the USB drive as the boot option.
- Follow the instructions on the Ubuntu installer to complete the installation process.
Note: Installing Ubuntu on a Mac may have some specific considerations depending on the model and hardware configuration. It's recommended to refer to the official Ubuntu documentation or relevant resources specific to your Mac model for any additional details or troubleshooting.
What are the basic applications or tools that come with Ubuntu after installation?
After installing Ubuntu, you will find some basic applications and tools pre-installed. These include:
- Web Browser: Ubuntu comes with Mozilla Firefox as the default web browser.
- LibreOffice: An open-source office suite that includes applications like Writer (word processor), Calc (spreadsheet), and Impress (presentation).
- Thunderbird: A free and open-source email client.
- Nautilus: The default file manager in Ubuntu, which allows you to navigate and manage files and folders on your system.
- Gedit: A simple and lightweight text editor for creating and editing plain text files.
- Terminal: Ubuntu includes a built-in terminal emulator, which allows you to access and interact with the command-line interface (CLI) of the system.
- Ubuntu Software Center: A graphical tool that enables you to browse, install, and manage software applications available for Ubuntu.
- System Monitor: A utility to monitor system resources like CPU usage, memory usage, network activity, and disk usage.
- Rhythmbox: A music player application that allows you to listen to and manage your music collection.
- Shotwell: A photo management application to import, organize, and edit pictures.
These are some of the basic applications and tools that come pre-installed with Ubuntu. However, you can always customize and install additional applications based on your specific needs.
How do I create a bootable flash drive for Ubuntu installation?
To create a bootable flash drive for Ubuntu installation, you can follow these steps:
- Download the Ubuntu ISO: Go to the official Ubuntu website (https://ubuntu.com/) and download the version of Ubuntu you want to install. Make sure to select the appropriate architecture (32-bit or 64-bit) depending on your computer's specifications.
- Format the flash drive: Plug in your USB flash drive and make sure it's empty. Then, go to your computer's file explorer, right-click on the flash drive, and select the option to format it. Choose the FAT32 file system and give the drive a suitable name.
- Install and use Etcher: Etcher is a cross-platform tool that makes it easy to create bootable USB drives. Download and install Etcher from its official website (https://etcher.io/).
- Launch Etcher: Open Etcher on your computer. You may need to provide administrative privileges depending on your operating system.
- Select the Ubuntu ISO: In Etcher, click on the "Select image" button and browse to the location where you saved the Ubuntu ISO file. Select the file and click "Open".
- Choose the USB drive: Ensure that the flash drive you want to make bootable is selected as the target. If it's not automatically detected, click on "Change" and select the appropriate drive from the list.
- Flash the drive: Double-check that the correct ISO file and USB drive are selected, as this process will erase all data on the drive. Once you've confirmed, click on the "Flash!" button to start the process. The tool will write the Ubuntu ISO to the flash drive, creating a bootable installation media.
- Wait for the process to complete: The flashing process may take a few minutes depending on the size of the ISO file and the speed of your flash drive.
- Eject the flash drive: Once the Etcher tool signals that the process is complete, safely eject the flash drive from your computer. You now have a bootable USB drive for installing Ubuntu.
You can then plug the bootable USB flash drive into the computer where you want to install Ubuntu, restart the computer, and set it to boot from the USB drive. This will allow you to start the Ubuntu installation process.
Can I cancel the installation process midway without any consequences?
The consequences of canceling an installation process midway depend on the specific program or software you are installing. In some cases, canceling the installation process may result in an incomplete installation, leaving the program unusable or causing potential errors. It is recommended to check the documentation or official support channels for the software you are installing to understand the potential consequences of canceling the installation process.
What do I do if some hardware components or peripherals are not working after Ubuntu installation?
If some hardware components or peripherals are not working after an Ubuntu installation, here are a few steps you can take:
- Check for system updates: Sometimes, updated drivers or firmware may be required for proper hardware compatibility. Open the "Software & Updates" application, go to the "Updates" tab, and click "Check for updates" to ensure your system is up to date.
- Install appropriate drivers: Ubuntu generally includes a wide range of drivers, but some hardware may require additional proprietary drivers. Open the "Additional Drivers" application (also known as "Software & Updates" > "Additional Drivers") and check if any proprietary drivers are available for your hardware. Install the appropriate drivers and restart your system.
- Verify hardware connections: Ensure that all cables and peripheral devices are properly connected. Sometimes, a loose connection can cause devices to malfunction or not work at all.
- Check hardware compatibility: Research if the specific hardware components or peripherals are supported by Ubuntu. Visit Ubuntu's official hardware compatibility list or search for community discussions related to your specific hardware. If the hardware is not compatible, you may need to consider alternatives or contact the manufacturer for support.
- Look for community support: The Ubuntu community is vast and active, with forums and discussion boards where users share their experiences and solutions. Search popular Ubuntu forums or ask specific questions to troubleshoot and find solutions for hardware issues.
- Use specialized utilities: If you're experiencing issues with specific hardware devices like graphics cards or Wi-Fi adapters, you can try using specialized utilities like "Hardware Enablement Stacks" or "Ukuu" to update or manage drivers for those components.
- Submit a bug report: If none of the above steps resolve the issue, consider filing a bug report. Open the "Terminal" application and run the command "ubuntu-bug packagename" (replace "packagename" with the relevant package causing the issue). Follow the prompts to provide detailed information about the problem, which will help developers investigate and address the issue.
Remember to always save any important data and back up your system before attempting any troubleshooting steps or system modifications.
How much space is required on the flash drive to install Ubuntu?
The minimum space required to install Ubuntu on a flash drive is 4 GB. However, it is recommended to have at least 8 GB of space to allow for updates, software installations, and personal files.
Can I install Ubuntu on a computer with Secure Boot enabled?
Yes, you can install Ubuntu on a computer with Secure Boot enabled. Ubuntu supports Secure Boot and includes the necessary signing keys to ensure that the installation can be carried out in a secure manner. When installing Ubuntu on a computer with Secure Boot, you may need to disable Secure Boot temporarily during the installation process or select the appropriate boot option to boot from a trusted version of Ubuntu. After the installation, you can re-enable Secure Boot if desired.