
Best Portable Monitor Screen Sizes to Buy in July 2026
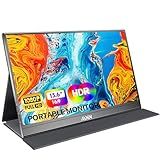
MNN Portable Monitor 15.6inch FHD 1080P USB C HDMI Gaming Ultra-Slim IPS Display w/Smart Cover & Speakers,HDR Plug&Play, External Monitor for Laptop PC Phone Mac (15.6'' 1080P)
-
VIVID VIEWING: ENJOY STUNNING FULL HD 1920X1080 RESOLUTION FOR VIBRANT VISUALS.
-
PLUG & PLAY FLEXIBILITY: EFFORTLESSLY CONNECT WITH DUAL TYPE-C PORTS-NO HASSLE!
-
TRAVEL-FRIENDLY DESIGN: LIGHTWEIGHT AND ULTRA-SLIM, PERFECT FOR ON-THE-GO USERS.


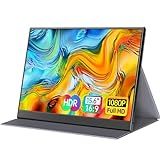
ForHelp 15.6inch Portable Monitor,1080P USB-C HDMI Second External Monitor for Laptop,PC,Mac Phone,PS,Xbox,Swich,IPS Ultra-Thin Zero Frame Gaming Display/Premium Smart Cover
-
SEAMLESS COMPATIBILITY: CONNECT EASILY VIA TYPE-C OR HDMI PORTS.
-
STUNNING FULL HD DISPLAY: ENJOY VIBRANT COLORS WITH 1920X1080 RESOLUTION.
-
ULTRA-SLIM DESIGN: LIGHTWEIGHT AND PORTABLE, PERFECT FOR ON-THE-GO USE.
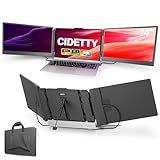
CIDETTY Laptop Screen Extender, 14'' FHD 1080P IPS Ultra-Thin Dual/Triple Monitor Display, HDMI/USB-C Plug-Play Portable Monitor for Laptop, Built-in Speakers(Mac, Win, Android)
-
FHD 1080P IPS SCREEN: ENJOY VIBRANT COLORS WITH EYE PROTECTION FEATURES.
-
PLUG-AND-PLAY COMPATIBILITY: WORKS WITH MULTIPLE DEVICES FOR VERSATILE USE.
-
ULTRA-SLIM DESIGN: LIGHTWEIGHT AND PORTABLE, PERFECT FOR ON-THE-GO SETUPS.
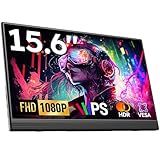
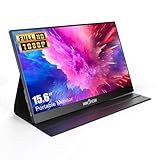
Portable Monitor, 15.6" FHD 1080P Travel Portable Monitor for Laptops, Ultra-Slim External Portable Screen for Laptop with Kickstand, Screen Extender for Laptop PC Mac Phone PS4/5 Xbox Switch
- STUNNING 15.6 FHD IPS DISPLAY FOR VIBRANT COLORS AND SHARP VISUALS!
- EFFORTLESS PLUG-AND-PLAY SETUP FOR INSTANT PRODUCTIVITY ON THE GO!
- ULTRA-LIGHTWEIGHT & SLIM DESIGN PERFECT FOR TRAVEL AND REMOTE WORK!
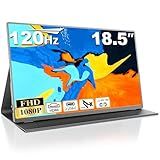
Usparkle 18.5 Inch Large Portable Monitor, 120Hz 1080P FHD IPS Portable Travel Second Screen Display for Laptop/Phone/Xbox PS4/5, 125% sRGB, Dual Speakers, VESA & Smart Cover
-
LIGHTWEIGHT DESIGN: PORTABLE 18.5 FHD MONITOR IDEAL FOR TRAVEL AND WORK.
-
120HZ REFRESH RATE: LAG-FREE GAMING AND VIVID COLORS FOR CREATIVE TASKS.
-
UNIVERSAL CONNECTIVITY: EASY CONNECTION WITH USB-C AND HDMI; VESA MOUNTABLE.
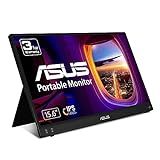
ASUS ZenScreen 15.6” 1080P Portable Monitor (MB16ACV) - Full HD, IPS, Eye Care, Flicker Free, Blue Light Filter, Kickstand, USB-C Power Delivery, for Laptop, PC, Phone, Console
- ULTRA-SLIM 15.6 FHD DISPLAY: PERFECT FOR TRAVEL AND MEETINGS.
- VERSATILE KICKSTAND FOR PORTRAIT OR LANDSCAPE VIEWING.
- EYE CARE TECH ENSURES COMFORT WITH FLICKER-FREE, LOW BLUE LIGHT.
InnoView Portable Monitor, 15.6 Inch FHD 1080P HDMI USB C Second External Monitor for Laptop, Desktop, MacBook, Phones, Tablet, PS5/4, Xbox, Switch, Built-in Speaker with Protective Case
-
NO APP NEEDED! JUST PLUG, PLAY AND EXPAND YOUR SCREEN EFFORTLESSLY!
-
LIGHTWEIGHT & PORTABLE: PERFECT FOR TRAVELERS AND REMOTE WORKERS!
-
VIVID 1080P IPS SCREEN WITH EYE PROTECTION FOR ALL-DAY USE!
The ideal screen size for a portable monitor largely depends on individual needs and usage scenarios. For most users seeking a balance between portability and usability, a screen size ranging from 13 to 15 inches tends to be the most convenient. This range provides enough screen real estate for efficient multitasking and enhanced productivity while still being lightweight and compact enough to carry easily in a laptop bag. However, some users may prioritize larger displays for graphic design or gaming, opting for sizes up to 17 inches, while those who need maximum portability might consider smaller screens, such as 12 inches or less. Ultimately, the best screen size is determined by the user's specific requirements, including portability, workspace, display quality, and intended use.
How do I troubleshoot connection issues with a portable monitor?
Troubleshooting connection issues with a portable monitor can involve several steps to identify and resolve common problems. Here's a guide to help you get started:
- Check the Connections: Ensure that all cables (HDMI, USB-C, DisplayPort, etc.) are securely connected to both the portable monitor and the device (laptop, desktop, etc.). Try different cables to rule out a faulty one. If using an adapter, ensure it is compatible and properly connected.
- Power Supply: Confirm that the portable monitor is receiving power. Some monitors require an external power source, while others draw power through a USB-C connection. Check the power cable and any power indicators on the monitor.
- Source Selection: Verify that the portable monitor is set to the correct input source. Most portable monitors have an input selection button or menu setting. Navigate the on-screen display (OSD) menu to ensure it matches the connection type in use.
- Driver and Software Updates: Update graphics drivers on your device as outdated drivers can cause compatibility issues. Check if the portable monitor manufacturer provides a driver or software update.
- Display Settings: On your device, go to display settings and make sure the monitor is detected. For Windows, this might be under "Settings" > "System" > "Display". On macOS, go to "System Preferences" > "Displays." If the monitor is not detected, click "Detect" (Windows) or "Gather Windows" (macOS) to force detection.
- Resolution and Refresh Rate: Adjust the resolution and refresh rate in your device’s display settings. Set these to match the recommended settings for your monitor. Sometimes lowering the resolution can help establish a connection.
- Testing with Another Device: Connect the portable monitor to a different device to determine if the issue is with the monitor or the original device. Similarly, connect another monitor to the original device if possible to see where the problem lies.
- Hardware Issues: Inspect the monitor for physical damage or defects. If the monitor has built-in diagnostics or self-test features, run them to check for internal issues.
- Compatibility Issues: Confirm that your device supports the connection type you are using (e.g., some laptops may not support video output over USB-C).
- Contact Support: If you've exhausted all troubleshooting steps and the issue persists, reach out to the manufacturer's customer support for assistance.
By systematically following these steps, you should be able to diagnose and potentially resolve the connection issues with your portable monitor.
How do I update the firmware on my portable monitor?
Updating the firmware on a portable monitor typically involves a few key steps. However, the exact process can vary based on the manufacturer and model of your monitor. Here are general steps you can follow:
- Check the Manufacturer's Website: Visit the official website of the monitor's manufacturer. Navigate to the support or downloads section. Search for your specific monitor model to find any available firmware updates.
- Download the Firmware Update: If an update is available, download the firmware file to your computer. It often comes in a compressed format (such as a ZIP file), so you may need to extract it.
- Review the Instructions: Manufacturers usually provide a readme file or update instructions with the firmware download. Carefully read these instructions, as they contain specific details for your monitor model.
- Prepare the Monitor: Ensure your portable monitor is connected to a power source or has sufficient battery charge. Connect the monitor to your computer using the appropriate cable (USB, HDMI, etc.).
- Update the Firmware: Depending on the manufacturer, the update could be applied via a software utility provided on their website or might require you to manually transfer files to the monitor. Follow the specific steps provided in the instructions. This often involves launching a utility tool on your computer and selecting the firmware file to begin the update process.
- Complete the Update: Do not disconnect the monitor or turn off the power during the update process, as it could harm the monitor. Wait for the update process to complete. This usually involves the monitor restarting once the update is successfully applied.
- Verify the Update: Once the update is complete, check the monitor settings or information page to ensure the firmware version has changed. Test the monitor to confirm it is functioning properly with the new firmware.
If you encounter any issues or are unsure about the process, it might be helpful to contact the manufacturer's customer service for further assistance.
How do I calibrate the colors on my portable monitor?
Calibrating the colors on your portable monitor can greatly enhance your viewing experience, whether you're doing color-sensitive work or just want the best display performance. Here’s a step-by-step guide to help you through the process:
1. Basic Requirements:
- Calibrator Tool (Optional): A hardware calibrator like the X-Rite i1Display or Datacolor Spyder can provide more accurate results than manual adjustments.
- Software: Software like DisplayCAL (free) or the proprietary software that comes with a calibrator device.
- Environment: Ensure your working environment has consistent lighting, preferably in a dim or moderately lit room.
2. Use Built-in Monitor Settings:
- Connect and Power On: Connect your monitor to your device and power it on.
- Reset to Factory Defaults: Start from a neutral setting by resetting your monitor to its factory settings. You can usually do this through the monitor's on-screen display (OSD) menu.
- Access the OSD: Use the buttons on your monitor to access the OSD menu.
- Adjust Basic Settings: Brightness and Contrast: Adjust these to get a good balance where whites are bright but not glaring and blacks are black without losing detail. Color Temperature (White Point): Set it to 6500K (D65), which is generally the standard daylight temperature. Gamma: Ideally set to 2.2 for most uses.
3. System Calibration Tool (Windows/macOS):
Windows:
- Open Display Settings: Right-click on the desktop and select ‘Display settings.’
- Advanced Display Settings: Scroll down and click on ‘Advanced display settings.’
- Calibrate Display: Select ‘Color calibration’ and follow the on-screen instructions to adjust gamma, brightness, contrast, and color balance.
macOS:
- Go to System Preferences: Select ‘Displays.’
- Color Tab: Click on the ‘Color’ tab and then ‘Calibrate.’
- Display Calibrator Assistant: Follow the assistant tool to fine-tune your display settings for brightness, contrast, and color.
4. Use a Hardware Calibrator (Optional but Recommended):
- Install Software: Install the calibration software that comes with your calibrator.
- Attach Device: Connect the calibrator to your computer and hang it on your screen as instructed.
- Run Calibration: Use the software to perform calibration. Follow the prompts to measure the screen and adjust its output based on the device readings.
- Save Profile: Once calibrated, save the color profile created by the software. This profile will be used by your system to display accurate colors.
5. Regular Calibration:
- Calibration should be done regularly, as monitors can drift over time. Depending on your needs, recalibrate every few weeks or months.
Following these steps should help you achieve a more accurate color representation on your portable monitor. If extreme precision is needed for professional work, investing in a hardware calibrator is recommended.