Best Solutions for External Hard Drives Not Showing Up to Buy in July 2026
Seagate Portable 2TB External Hard Drive HDD — USB 3.0 for PC, Mac, PlayStation, & Xbox -1-Year Rescue Service (STGX2000400)
- STORE 2TB OF CONTENT EASILY WITH PORTABLE, PLUG-AND-PLAY DESIGN.
- SEAMLESSLY COMPATIBLE WITH WINDOWS AND MAC-JUST DRAG AND DROP!
- NO SOFTWARE NEEDED-CONNECT FOR INSTANT ACCESS AND AUTOMATIC SETUP.


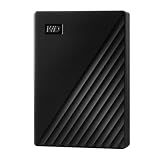
WD 2TB Elements Portable External Hard Drive for Windows, USB 3.2 Gen 1/USB 3.0 for PC & Mac, Plug and Play Ready - WDBU6Y0020BBK-WESN
- STORE 6TB OF DATA IN A COMPACT, PORTABLE DESIGN FOR ON-THE-GO NEEDS.
- EASY PLUG-AND-PLAY SETUP FOR INSTANT ACCESS TO YOUR FILES ANYTIME.
- SUPERSPEED USB 3.2 FOR LIGHTNING-FAST DATA TRANSFER UP TO 5GBPS.
Toshiba Canvio Basics 2TB Portable External Hard Drive USB 3.0, Black - HDTB520XK3AA
- SLEEK, MATTE FINISH RESISTS SMUDGES FOR A CLEAN APPEARANCE.
- PLUG & PLAY DESIGN-NO SOFTWARE INSTALLATION NEEDED, HASSLE-FREE!
- EXPAND YOUR STORAGE EASILY WITH USB 3.0/2.0 COMPATIBILITY.
WD 5TB My Passport, Portable External Hard Drive, Black, backup software with defense against ransomware, and password protection, USB 3.1/USB 3.0 compatible - WDBPKJ0050BBK-WESN
- SLIM, DURABLE DESIGN FOR ON-THE-GO FILE STORAGE.
- STORE UP TO 6TB OF PHOTOS, VIDEOS, AND DOCUMENTS.
- RANSOMWARE DEFENSE WITH PASSWORD PROTECTION INCLUDED.
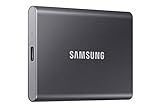
SAMSUNG T7 Portable SSD, 1TB External Solid State Drive, Speeds Up to 1,050MB/s, USB 3.2 Gen 2, Reliable Storage for Gaming, Students, Professionals, MU-PC1T0T/AM, Gray
-
FAST PERFORMANCE: UP TO 1,050 MB/S SPEEDS FOR INSTANT BACKUPS.
-
MASSIVE CAPACITY: STORE UP TO 4TB OF FILES, PHOTOS, AND VIDEOS.
-
DURABLE DESIGN: SHOCK-RESISTANT AND BUILT TO WITHSTAND ANY ADVENTURE.
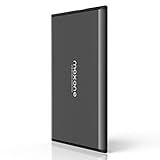
Maxone 500GB Ultra Slim Portable External Hard Drive HDD USB 3.0 Compatible with PC, Laptop, Charcoal Grey
-
ULTRA-SLIM DESIGN: JUST 0.4 INCHES, COMBINES STRENGTH AND PORTABILITY.
-
LIGHTNING-FAST USB 3.0: TRANSFER SPEEDS UP TO 5 GBIT/S FOR EFFICIENCY.
-
HASSLE-FREE SETUP: PLUG AND PLAY-NO EXTRA POWER OR SOFTWARE NEEDED!
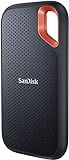
SanDisk 1TB Extreme Portable SSD - Up to 1050MB/s, USB-C, USB 3.2 Gen 2, IP65 Water and Dust Resistance, Updated Firmware - External Solid State Drive - SDSSDE61-1T00-G25
- BLAZING NVME SPEEDS: UP TO 1050MB/S READ, 1000MB/S WRITE!
- RUGGED DESIGN: 3M DROP PROTECTION & IP65 WATER/DUST RESISTANCE.
- SECURE YOUR DATA: 256-BIT AES HARDWARE ENCRYPTION INCLUDED.
When an external hard drive is not showing up on your computer, there can be several reasons behind this issue. Firstly, there might be a connection problem, such as a faulty USB port or cable; ensuring that the connection is secure and trying a different port or cable can help identify if this is the cause. Secondly, the drive may not be receiving sufficient power, which can be tested by connecting it to a powered USB hub or directly to a computer's USB port if it was plugged into a hub before. Another possibility is that the drive has not been assigned a drive letter, so it might appear in the disk management utility without an assigned letter, where you can manually assign one. It's also possible that the drive's file system is not supported by the operating system you're using, necessitating reformatting for compatibility, although this would erase all data on the drive. In some cases, the drive might be corrupted or fail, which might require repairs or professional data recovery services. Always ensure that your computer's operating system and drivers are up to date, as outdated drivers might prevent devices from being recognized properly.
How to check if an external hard drive is receiving power?
To check if an external hard drive is receiving power, you can follow these steps:
- Check the Power Indicator Light: Most external hard drives have a power indicator light. Look for a small LED light on the device. If the light is on or blinking, it usually indicates that the drive is receiving power.
- Listen for Noise: Put your ear close to the external hard drive and listen for any operational sounds. If you hear a humming or spinning noise, the drive is likely powered on.
- Feel for Vibrations: Gently touch the external hard drive and see if you can feel any vibrations. A powered hard drive often has subtle vibrations due to the spinning of the internal components.
- Check the Power Supply: Ensure the power cable is securely connected to both the hard drive and the power outlet. If your drive uses a separate power adapter, verify that it's plugged in correctly and the adapter itself is functional.
- Try Different Power Outlet: If there's no indication of power, try plugging the external hard drive into a different power outlet. This can help rule out issues with the power source.
- Test with Another USB Cable or Port: If the hard drive is powered through a USB connection, try using a different cable or plugging into another USB port on your computer to ensure both the cable and port are functioning.
- Look for Signs on the Computer: Connect the drive to your computer and check if the device is detected. Hearing a connection sound or seeing a notification that a new device is connected could indicate the drive is receiving power and functioning properly.
- Check the Device Manager (Windows) or Disk Utility (macOS): For Windows: Go to Device Manager and look for your external drive under the "Disk drives" section. For macOS: Open Disk Utility to see if the drive appears there.
If you've tried all the above steps and there are still no signs of power, there might be an issue with the power adapter, cable, or the drive itself that may require further troubleshooting or professional repair.
How to format an external hard drive to be recognized by my computer?
To format an external hard drive so that it is recognized by your computer, you will need to use built-in utilities provided by your operating system. The exact method can vary slightly depending on whether you are using Windows or macOS:
For Windows:
- Connect the External Hard Drive: Ensure your external hard drive is properly connected to your computer.
- Open Disk Management: Right-click on the Start button and select Disk Management. Alternatively, press Windows + R to open the Run dialog, type diskmgmt.msc, and press Enter.
- Select the Drive: In the Disk Management window, locate your external hard drive. It will probably be listed as Disk 1 or higher. Ensure you select the correct drive to avoid data loss on other drives.
- Format the Drive: Right-click on the drive partition (it might say New Volume if it's unformatted) and select Format. Choose a File System: NTFS is the default file system for Windows. exFAT is suitable if you want compatibility between Windows and macOS. You can also name the drive in the Volume Label field. Leave Allocation unit size as default unless you have specific requirements. Ensure Quick Format is checked for a faster formatting process.
- Complete the Format: Click OK to confirm, then OK again to proceed. Your drive will be formatted.
For macOS:
- Connect the External Hard Drive: Attach your external hard drive to your Mac.
- Open Disk Utility: Go to Finder > Applications > Utilities > Disk Utility. Alternatively, you can search for "Disk Utility" using Spotlight.
- Select the Drive: In Disk Utility, locate your external hard drive in the left sidebar.
- Erase the Drive: Select the drive, then click the Erase button at the top. In the dialog that appears: Name: Enter a name for your drive. Format: Choose Mac OS Extended (Journaled) if it's primarily for use with Macs. Choose exFAT if you need the drive to be compatible with both Macs and Windows. Scheme: Choose GUID Partition Map if available.
- Complete the Erase: Click Erase to start the process. Once it’s done, click Done to finish.
Important Notes:
- Backup Important Data: Formatting will erase all existing data on the drive. Ensure you have backups of any important files before you proceed.
- Choose the Correct Drive: Double-check that you have selected the right drive to avoid accidental data loss.
Following these steps, your external hard drive should be properly formatted and recognized by your computer. If it still does not show up, there might be a connectivity issue or a hardware defect with the drive itself.
How to initialize a new external hard drive?
Initializing a new external hard drive is an essential step to prepare it for use. This process typically involves formatting the drive and setting it up with a suitable file system for your needs. Here's how you can do it on both Windows and macOS:
For Windows:
- Connect the Drive: Plug your external hard drive into your computer using the appropriate USB or Thunderbolt port.
- Open Disk Management: Right-click on the "Start" button or press Win + X and select "Disk Management" from the list. When Disk Management opens, you should see your new drive listed as "Unallocated".
- Initialize the Disk (if prompted): If prompted to initialize the disk, select either MBR (Master Boot Record) or GPT (GUID Partition Table) as the partition style. GPT is recommended for drives over 2TB or if you plan to boot from this drive on an EFI-based system.
- Right-click the Unallocated Space: Choose "New Simple Volume". Follow the wizard to specify the volume size, assign a drive letter, and choose a file system (NTFS is typically recommended for Windows).
- Format the Drive: During the wizard, choose a file system. NTFS is preferred for Windows-only use. For compatibility with both Windows and macOS, you may consider exFAT. Enter a volume label if you wish and perform a Quick Format.
- Complete the Wizard: Click "Next" and then "Finish". Your drive should now be initialized and ready to use.
For macOS:
- Connect the Drive: Plug your external hard drive into your Mac using the appropriate USB or Thunderbolt port.
- Open Disk Utility: Go to "Applications" > "Utilities" > "Disk Utility". Alternatively, search for Disk Utility using Spotlight (Cmd + Space).
- Select the Drive: In Disk Utility, you should see your external hard drive listed on the left side.
- Erase and Format the Drive: Select the drive, not the volume underneath. Click on the "Erase" button at the top. Name your drive. Choose a Format: APFS or Mac OS Extended (Journaled) for Mac-only use or exFAT for cross-platform compatibility. Choose a Scheme: "GUID Partition Map" is recommended for most uses.
- Erase: Click "Erase" to wipe the drive clean and apply the new formatting.
- Close Disk Utility: Once the process completes, your drive is ready to use.
Additional Tips:
- Backup Important Data: If there's any data on the drive, back it up before performing these steps, as initialization will erase all existing data.
- Compatibility: Choose a file system based on your needs. exFAT is generally recommended if you plan to use the drive with both Windows and macOS.
- Storage Needs: Consider partitioning your drive if you have specific storage management needs.
By following these steps based on your operating system, you should be able to successfully initialize and prepare your external hard drive for use.