Best External Hard Drives to Buy in July 2026
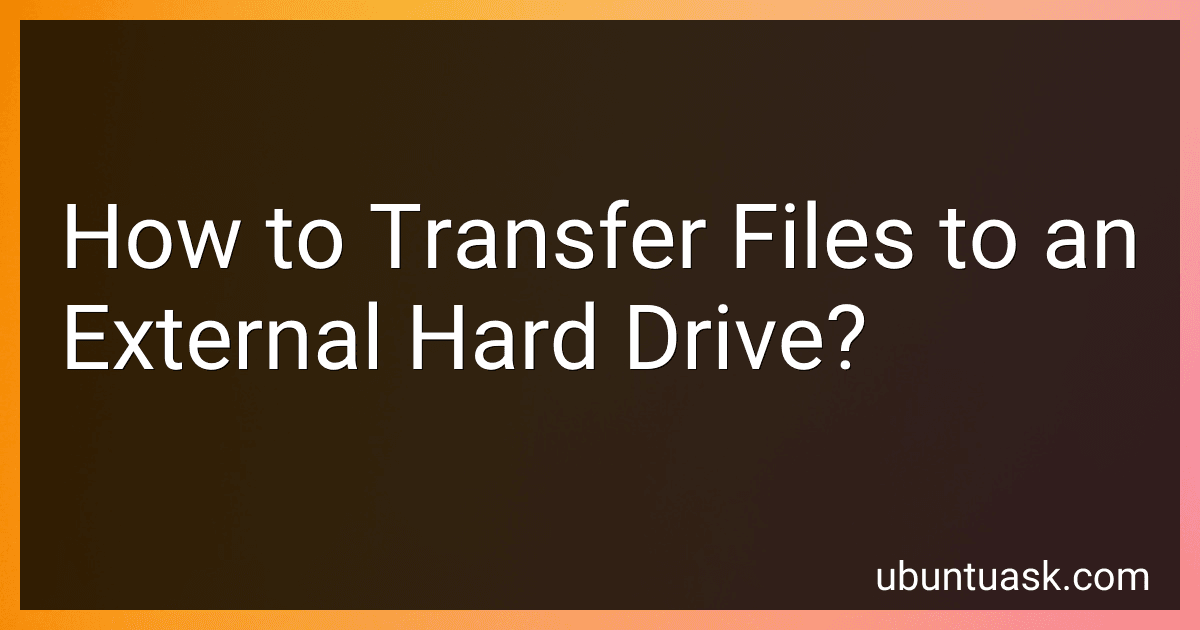
Seagate Portable 2TB External Hard Drive HDD — USB 3.0 for PC, Mac, PlayStation, & Xbox -1-Year Rescue Service (STGX2000400)
- STORE 2TB OF CONTENT EFFORTLESSLY; BACKUP MADE SIMPLE!
- COMPATIBLE WITH BOTH WINDOWS AND MAC FOR UNIVERSAL ACCESS.
- PLUG AND PLAY SETUP MEANS NO SOFTWARE HASSLES-JUST CONNECT!


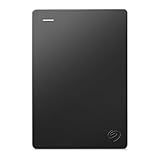
WD 2TB Elements Portable External Hard Drive for Windows, USB 3.2 Gen 1/USB 3.0 for PC & Mac, Plug and Play Ready - WDBU6Y0020BBK-WESN
- COMPACT DESIGN WITH UP TO 6TB CAPACITY FOR ULTIMATE PORTABILITY.
- EFFORTLESS PLUG-AND-PLAY EXPANDABILITY; NO SOFTWARE NEEDED!
- FAST DATA TRANSFER SPEEDS WITH SUPERSPEED USB 3.2 GEN 1.
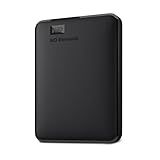
Toshiba Canvio Basics 2TB Portable External Hard Drive USB 3.0, Black - HDTB520XK3AA
- SLEEK MATTE DESIGN RESISTS SMUDGES FOR A POLISHED LOOK.
- EFFORTLESS PLUG & PLAY SETUP – NO SOFTWARE REQUIRED!
- EXPAND STORAGE EASILY WITH USB 3.0 AND USB 2.0 COMPATIBILITY.

WD 5TB My Passport, Portable External Hard Drive, Black, backup software with defense against ransomware, and password protection, USB 3.1/USB 3.0 compatible - WDBPKJ0050BBK-WESN
- SLIM, DURABLE DESIGN FOR PORTABLE FILE STORAGE ON THE GO.
- UP TO 6TB CAPACITY FOR ALL YOUR PHOTOS, VIDEOS, AND DOCUMENTS.
- PASSWORD PROTECTION AND ENCRYPTION TO SECURE YOUR IMPORTANT FILES.
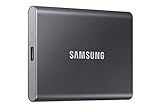
SAMSUNG T7 Portable SSD, 1TB External Solid State Drive, Speeds Up to 1,050MB/s, USB 3.2 Gen 2, Reliable Storage for Gaming, Students, Professionals, MU-PC1T0T/AM, Gray
-
ULTRA-FAST SPEEDS: ENJOY READ/WRITE SPEEDS UP TO 1,050/1,000 MB/S.
-
MASSIVE CAPACITY: SAVE UP TO 4TB FOR ALL YOUR FILES AND PROJECTS.
-
DURABLE DESIGN: RUGGED AND SHOCK-RESISTANT FOR ANY ADVENTURE.
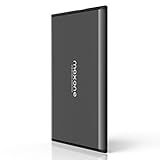
Maxone 500GB Ultra Slim Portable External Hard Drive HDD USB 3.0 Compatible with PC, Laptop, Charcoal Grey
-
ULTRA SLIM & STURDY DESIGN: 0.4 THICK FOR MAXIMUM PORTABILITY.
-
FAST USB 3.0 PERFORMANCE: ENJOY SPEEDS UP TO 5 GBIT/S SEAMLESSLY.
-
HASSLE-FREE SETUP: PLUG AND PLAY-NO INSTALLATION REQUIRED!
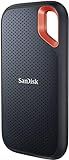
SanDisk 1TB Extreme Portable SSD - Up to 1050MB/s, USB-C, USB 3.2 Gen 2, IP65 Water and Dust Resistance, Updated Firmware - External Solid State Drive - SDSSDE61-1T00-G25
- BLAZING FAST SPEEDS: UP TO 1050MB/S READ AND 1000MB/S WRITE SPEEDS!
- RUGGED RELIABILITY: 3-METER DROP PROTECTION AND IP65 WATER RESISTANCE.
- SECURE YOUR DATA: 256-BIT AES ENCRYPTION AND PASSWORD PROTECTION INCLUDED.
To transfer files to an external hard drive, begin by connecting the external hard drive to your computer using the appropriate cable, such as a USB cable. Wait for your computer to recognize the drive, which often results in an automatic prompt or a notification. Open File Explorer on Windows or Finder on Mac to locate both your computer's internal storage and the external hard drive. Navigate to the files or folders you wish to transfer, select them, and then drag them to the external hard drive's window or use the copy and paste functions. Be mindful of available space on the external drive to ensure it can accommodate the transferred files. Once the transfer is complete, safely eject the external hard drive to prevent data corruption by clicking the 'Safely Remove Hardware' icon on Windows or dragging the drive to the Trash on Mac, which turns into an eject icon. After receiving confirmation, disconnect the external drive from your computer.
How to connect an external hard drive to a computer?
Connecting an external hard drive to a computer is a relatively simple process. Here’s a step-by-step guide to help you:
- Check Compatibility: Make sure that your external hard drive is compatible with your computer's operating system. Most external hard drives work with both Windows and macOS, but it's always good to check.
- Gather Components: You’ll need the external hard drive, a compatible cable (usually USB, but it can be Thunderbolt, eSATA, or FireWire depending on your hard drive and computer), and your computer.
- Connect the Cable: USB Connection: This is the most common connection type. Plug the wider end of the USB cable into your computer and the other end into the external hard drive. Other Connections: If using Thunderbolt, eSATA, or FireWire, connect the appropriate cable into the respective port on the computer and hard drive.
- Power On the Drive: Some external hard drives require external power (usually larger desktop models), while others are powered via the data connection (usually portable models). If your drive requires power, plug it into an outlet with the power adapter.
- Computer Detection: Windows: Once connected, Windows should automatically recognize the drive. You’ll see a notification or you can check by opening "This PC" or "My Computer" where the drive should be listed. Mac: The drive should appear on the desktop or in the Finder under "Devices."
- Install Drivers or Software (if needed): Sometimes, especially with some older or proprietary drives, you might need to install drivers or software provided by the hard drive manufacturer. Follow the on-screen instructions if this is the case.
- Format the Drive (optional but recommended): If the drive is new or being repurposed and you don’t need the data on it, you may want to format it: Windows: Right-click on the drive in "This PC", select "Format", and choose the desired file system (NTFS is standard for Windows). Mac: Open "Disk Utility" from "Applications > Utilities", select the drive, and choose "Erase". Format with the appropriate file system (APFS for macOS High Sierra and later, or Mac OS Extended).
- Safely Eject the Drive: To prevent data corruption, always eject the drive safely when disconnecting: Windows: Right-click on the drive and select "Eject" or use the "Safely Remove Hardware" icon in the taskbar. Mac: Drag the drive to the Trash (which will change to an Eject icon) or click the "Eject" button next to the drive in Finder.
Your external hard drive should now be connected and ready to use with your computer.
What is cloud storage as an alternative to external hard drives?
Cloud storage is a modern alternative to traditional external hard drives, providing users with a way to store, access, and manage data over the internet. Unlike external hard drives that require physical connectivity and manual data transfer, cloud storage offers several advantages:
- Accessibility: Cloud storage allows you to access your data from anywhere with an internet connection. This means you can retrieve or share files on multiple devices such as smartphones, tablets, and computers without needing to be in the same location as your storage device.
- Scalability: Cloud storage solutions can be easily scaled to accommodate growing storage needs. You can typically purchase additional storage space quickly and without the need for new hardware.
- Data Backup and Recovery: Many cloud storage providers offer automated backups, which can protect your data from loss due to hardware failures, theft, or disasters. In case of data loss, recovery can be more straightforward with cloud solutions.
- Collaboration: Cloud storage services often come with tools for collaboration, allowing multiple users to access, edit, and share files in real-time, which is useful for team projects or shared documents.
- Cost-effective: While there may be ongoing subscription costs associated with cloud storage, it eliminates the upfront expense and maintenance costs of physical hardware.
- Security: Cloud providers typically implement robust security measures, including encryption and multi-factor authentication, to protect data. However, users should evaluate the security features of different providers to meet their specific needs.
- Reduced Physical Clutter: Without the need for external hardware, cloud storage reduces the physical space required for data storage, which can be beneficial for individuals or organizations seeking to minimize equipment and environmental impact.
Overall, cloud storage offers flexibility, convenience, and enhanced features that can be particularly advantageous as part of a comprehensive data management strategy. However, it's essential to consider factors such as internet reliability, data privacy, and ongoing costs when evaluating cloud storage as an alternative to external hard drives.
How to troubleshoot if an external hard drive is not recognized?
If your external hard drive is not recognized by your computer, you can follow these troubleshooting steps to diagnose and potentially fix the issue:
- Check the Basics: Ensure the drive is properly connected to the computer via a working USB port. Try different ports to rule out port failure. Use a different USB cable to rule out cable issues. Connect the drive to a different computer to check if the problem persists, which can help identify if the issue is with the drive or the original computer.
- Power Supply: Some external drives require their own power source. Make sure the power adapter is connected if your drive uses one. Verify that any power switches on the drive are turned on.
- Check for Drive Activity: Listen for any sounds from the drive (e.g., spinning, clicking) that indicate activity or failure. Observe if any indicator lights on the drive turn on.
- Device Manager (Windows) / Disk Utility (Mac): Windows: Open Device Manager and look for the drive under "Disk Drives" or "Universal Serial Bus controllers." If there’s a yellow exclamation mark, there may be a driver issue. Mac: Open Disk Utility to see if the drive appears. If it does but is not mounted, try manually mounting it.
- Driver Issues (Windows): Right-click the drive in Device Manager and select "Update driver." Uninstall the device driver and then restart your computer to see if it automatically reinstalls and resolves the issue.
- Partition and Format Issues: Windows: Use Disk Management (right-click on "This PC" -> "Manage" -> "Disk Management") to see if the drive is detected but not formatted. If the drive appears unallocated, you may need to partition and format it. Be cautious as this will erase data. Mac: In Disk Utility, check if the drive needs to be erased or reformatted.
- File System Compatibility: Ensure the file system of the drive is compatible with the operating system you are using (e.g., NTFS on Windows, HFS+ on Mac, exFAT for cross-compatibility).
- Run Diagnostic Tools: Use diagnostic tools provided by the drive manufacturer to check for errors and fix issues.
- Firmware and Hardware Updates: Check for firmware updates for the drive from the manufacturer’s website. Ensure your computer's operating system is up to date with the latest updates and patches.
- Professional Help: If none of the above steps work, the drive may be experiencing hardware failure, and you might need to consult with a professional technician or seek data recovery services.
Make sure to back up any data if the drive becomes temporarily accessible, as continued issues may indicate impending drive failure.
How to transfer files wirelessly to an external hard drive?
Transferring files wirelessly to an external hard drive can be achieved through several methods, depending on the type of devices and network setup you have. Here are a few common approaches:
- Network-Attached Storage (NAS): Setup: Connect the external hard drive to a NAS device. Some NAS devices support attaching an external drive directly to them. Transfer Files: Use your computer or smartphone to connect to the NAS over the network and transfer files to it. The NAS will handle writing the files to the external drive.
- Wireless Routers with USB Ports: Setup: Some routers come with a USB port that allows you to plug in an external hard drive, effectively making it a network drive. Transfer Files: Access the drive via the network by connecting to the router’s IP address. From there, you can move files to and from the drive.
- Wi-Fi Enabled Portable Drives: Purchase: Certain external hard drives come with built-in Wi-Fi capabilities. Setup: Follow the manufacturer’s instructions to set up the Wi-Fi connection and access the drive over the network. Transfer Files: Use the provided software or app to wirelessly transfer files to the drive.
- Using a Computer as an Intermediary: Setup: Connect the external hard drive to a computer with Wi-Fi capabilities. Share Drive: Share the drive on the network using your operating system’s file sharing feature. On Windows: Right-click the drive folder > Properties > Sharing tab > Share… On macOS: System Preferences > Sharing > File Sharing > Add folder/drive. Connect and Transfer: From another device on the same network, access the shared drive and transfer files to it.
- Cloud Sync and Backup Services: Setup: Use a cloud service that allows syncing to an external drive when connected (e.g., Google Drive, Dropbox). Transfer Files to Cloud: Upload files to the cloud from your device. Sync to Drive: Set up the cloud service on a computer that has the external drive attached. Sync the cloud folder to the external drive when it’s connected.
- Third-Party Wireless File Transfer Apps: Use apps like Resilio Sync or software that enables wireless file transfer between devices, many of which support macOS, Windows, iOS, and Android.
- Ad-Hoc or Wi-Fi Direct Transfers: Use Wi-Fi Direct or ad-hoc networking features where devices can establish a direct wireless link to each other. This method might need apps or software that can facilitate such transfers.
Always ensure that your external hard drive is compatible with your chosen wireless transfer method and take necessary security precautions when enabling network sharing or wireless transfers to prevent unauthorized access.