Best All-In-One Printers to Connect to Wi-Fi to Buy in July 2026
HP OfficeJet Pro 8125e Wireless All-in-One Color Inkjet Printer, Print, scan, Copy, ADF, Duplex Printing Best-for-Home Office, 3 Month Instant Ink Trial Included, AI-Enabled (405T6A)
- FAST COLOR & BLACK PRINTING: UP TO 20 PPM BLACK, 10 PPM COLOR SPEEDS.
- HP AI PRECISION: PERFECTLY FORMATTED PRINTS, NO WASTED PAGES.
- SEAMLESS WIRELESS: RELIABLE DUAL-BAND WI-FI FOR STABLE CONNECTIONS.


Brother Work Smart 1360 Wireless Color Inkjet All-in-One Printer with Automatic Duplex Printing and 1.8” Color Display | Includes Refresh Subscription Trial(1) (MFC-J1360DW) (Uses LC501 Series Inks)
-
ALL-IN-ONE PRINTER: PRINT, COPY, AND SCAN WITH ONE COMPACT DEVICE.
-
EASY CLOUD ACCESS: CONNECT TO GOOGLE DRIVE, DROPBOX, AND MORE SEAMLESSLY.
-
FAST, EFFICIENT PRINTING: ENJOY UP TO 16 PPM BLACK AND 9 PPM COLOR OUTPUT.
Epson EcoTank ET-2800 Wireless Color All-in-One Cartridge-Free Supertank Printer with Scan and Copy – The Ideal Basic Home Printer - Black, Medium
- SAVE UP TO 90% ON INK COSTS-PRINT MORE, SPEND LESS!
- ECO-FRIENDLY & STRESS-FREE: ENJOY UP TO 2 YEARS OF INK INCLUDED.
- PRINT 10 PAGES PER MINUTE-ACCOMPLISH LARGE JOBS EFFORTLESSLY!
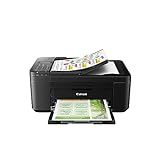
Canon PIXMA TR4720 All-in-One Wireless Printer, Home Use with Auto Document Feeder, Mobile Printing and Built-in Fax, Black
-
4-IN-1 FUNCTIONALITY: PRINT, COPY, SCAN, AND FAX EFFORTLESSLY.
-
SMART INK ALERTS: CONNECT TO ALEXA FOR LOW INK NOTIFICATIONS.
-
ENERGY EFFICIENT: ONLY 7W POWER CONSUMPTION, ENERGY STAR CERTIFIED.
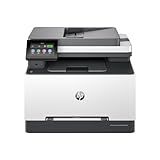
HP Color Laserjet Pro MFP 3301sdw Wireless All-in-One Color Laser Printer, Scanner, Copier, Best-for-Office (499Q3F)
- FAST PRINTING SPEEDS: PRINT UP TO 26 PPM FOR EFFICIENT WORKFLOWS.
- VIVID COLOR QUALITY: NEXT-GEN TERRAJET TONER FOR EYE-CATCHING RESULTS.
- RELIABLE PERFORMANCE: CONSISTENT, AWARD-WINNING RELIABILITY FOR BUSY TEAMS.
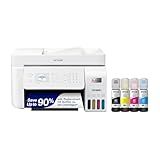
Epson EcoTank ET-4800 Wireless All-in-One Cartridge-Free Supertank Printer with Scanner, Copier, Fax, ADF and Ethernet – Ideal-for Your Home Office, White
-
ENJOY HASSLE-FREE, CARTRIDGE-FREE PRINTING WITH ECOTANK INNOVATION!
-
PRINT SHARP TEXT AND VIBRANT IMAGES WITH MICRO PIEZO HEAT-FREE TECH.
-
GO GREEN AND REDUCE LANDFILL WASTE WITH ECOTANK'S SUSTAINABLE DESIGN!
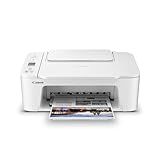
Canon PIXMA TS3720 Wireless All-in-One Printer (6671C022)
-
ALL-IN-ONE FEATURES: PRINT, COPY, AND SCAN FOR ULTIMATE CONVENIENCE.
-
FAST PRINT SPEEDS: UP TO 7.7 IPM FOR BLACK, 4 IPM FOR COLOR EFFICIENCY.
-
EASY WIRELESS SETUP: CONNECT IN MINUTES WITHOUT NEEDING A COMPUTER.
Canon MegaTank G3270 All-in-One Wireless Inkjet Printer. for Home Use, Print, Scan and Copy
- ENJOY 2 YEARS OF INK INCLUDED-NO MORE UNTIMELY PURCHASES!
- PRINT UP TO 6,000 B&W AND 7,700 COLOR PAGES WITH ONE INK SET!
- SAVE UP TO $1,000 ON INK-BOOST YOUR BUDGET AND EFFICIENCY!
To connect an all-in-one printer to Wi-Fi, start by ensuring the printer is powered on. Access the printer's control panel and navigate to the network settings menu, which could be labeled as "Network," "Wireless," or something similar depending on the brand and model. Select the option to connect to a wireless network. The printer will then scan for available Wi-Fi networks; choose your network from the list. You may be prompted to enter the Wi-Fi password-do so carefully to ensure it’s correct. Once the password is entered, confirm the connection request. The printer will attempt to connect to the Wi-Fi network, which may take a few moments. Once the connection is successful, the printer should display a confirmation message, and you can then proceed to install the necessary drivers and software on your computer to complete the setup process. This may involve using a CD provided with the printer, downloading software from the manufacturer's website, or using an automatic setup tool. Once that’s done, your printer should be ready to use wirelessly.
How to secure a printer network connection?
Securing a printer network connection is essential to protect sensitive information and prevent unauthorized access. Here are several steps you can take to improve your printer network security:
- Change Default Passwords: Immediately change the default administrator passwords for your printers to something strong and unique.
- Update Firmware: Regularly update your printer firmware to ensure you have the latest security patches and improvements.
- Use a Secure Network: Connect printers to a secure, private network. Enable encryption protocols like WPA3 for wireless connections.
- Restrict Access: Limit printer access to specific IP addresses. Use firewalls to control and monitor traffic between the printers and the network.
- Enable Strong Authentication: Employ authentication methods like usernames and passwords or even smart cards for accessing printer functions.
- Disable Unnecessary Services: Turn off unnecessary protocols and services, such as Bluetooth or Wi-Fi Direct, to minimize vulnerabilities.
- Network Segmentation: Place printers on a separate VLAN or subnet to limit exposure and potential lateral movement by attackers.
- Regularly Monitor and Audit: Implement logging and monitoring to track usage patterns and detect any unusual activity.
- Secure Print Features: Enable secure print job release (sometimes known as "pull printing"), requiring a user to authenticate before a document is printed.
- Use Encryption: Ensure data sent to the printer is encrypted using protocols such as SSL/TLS.
- Turn Off Unnecessary Features: Disable any printer features that are not in use to reduce potential attack vectors, such as remote printing services.
- Security Software: Install and use security software that can scan for vulnerabilities and monitor threats specific to printers.
- Physical Security: Secure the physical location of the printers to prevent tampering or unauthorized access.
- Regularly Train Employees: Educate staff about the importance of printer security and encourage practices like immediate reporting of suspicious activity.
- Implement Access Control Lists (ACLs): Define who can access and use your printers by setting up ACLs based on job function or department.
By taking these measures, you can significantly enhance the security of your printer network connections, safeguarding against unauthorized access and potential data breaches.
How to reset network settings on an all-in-one printer?
Resetting the network settings on an all-in-one printer can vary depending on the brand and model, but here are some general steps you can follow for most printers:
For HP Printers:
- Access the Control Panel: Press the Home button on the printer display.
- Navigate to Settings: Use the arrows to find and select Network Setup or Network Settings.
- Restore Network Defaults: Look for an option like Restore Network Settings or Restore Network Defaults. Confirm when prompted.
- Restart the Printer: Restart your printer to ensure changes take effect.
For Canon Printers:
- Enter Setup Mode: Press Setup on the control panel.
- Menu Navigation: Use the arrow keys to navigate to Device Settings and press OK.
- Reset Settings: Find Reset Settings and choose LAN Settings. Confirm to reset.
- Reboot: Turn off the printer and turn it back on.
For Brother Printers:
- Access Menu: Press the Menu button on the printer.
- Network Settings: Use navigation buttons to find Network and then Network Reset.
- Execute Reset: Confirm the reset by selecting Yes when prompted.
- Restart the Printer: Turn off and then turn on the printer.
For Epson Printers:
- Access Home Screen: Press Home on the control panel.
- Navigate to Setup: Use the Up/Down arrow buttons to find Setup or Settings.
- Network Settings: Look for Restore Default Settings and select All Settings or specifically Network Settings.
- Restart: Restart your printer afterward.
General Tips:
- Consult Manual: Always refer to your specific printer’s user manual for precise instructions.
- Check Online: The manufacturer's website or customer support section can also provide detailed guides or videos.
- Backup Settings: If possible, record your current settings so you can easily reconfigure the printer.
After resetting network settings, you'll need to reconnect it to your network. Follow the initial setup procedures to re-establish the Wi-Fi or wired connection.
How to connect a printer via Bluetooth?
Connecting a printer via Bluetooth can vary slightly based on the specific printer model and the device you're pairing it with, but here's a general guide to get you started:
Step-by-Step Guide:
- Check Compatibility: Ensure that both your printer and the device (e.g., computer, tablet, or smartphone) you are trying to connect support Bluetooth connectivity.
- Prepare the Printer: Turn on the printer. Enable Bluetooth on the printer. This often involves navigating through the printer's settings menu using its display screen. Look for a section titled "Bluetooth," "Wireless," or "Network Settings."
- Activate Bluetooth Pairing Mode: Set the printer to "pairing mode" if necessary. This might require pressing a specific button or selecting an option from the printer menu. Refer to the user manual for exact instructions, as this varies by model.
- Enable Bluetooth on Your Device: On your computer, tablet, or smartphone, go to the Bluetooth settings. This can typically be found in system settings under "Bluetooth" or "Connections."
- Pair the Devices: Scan for available Bluetooth devices from your device. The printer should appear on the list of discoverable devices. The device name often includes the printer's brand or model number. Select the printer from the list. You may need to confirm the pairing on both your device and the printer. If prompted, enter the pairing PIN. The default PIN is often "0000" or "1234" if it's not provided in the instruction manual.
- Install Necessary Drivers/Software: Some printers require specific software or drivers to enable all features. It’s a good idea to download any recommended drivers from the printer manufacturer’s website and install them on your device.
- Test the Connection: Send a test print job to the printer to ensure the connection works. You may need to select the printer as the default printing device on your computer or mobile device.
Troubleshooting Tips:
- Distance: Ensure that the printer and device are within Bluetooth range, usually about 10 meters or 33 feet.
- Interference: Remove potential sources of interference, such as walls or electronic devices between the printer and the device.
- Restart Devices: If you encounter issues, try restarting both the printer and the device.
- Update Firmware/Software: Check for any updates for the printer's firmware or the Bluetooth drivers on your device.
For specific instructions tailored to your printer model, consult the printer’s user manual or the manufacturer’s website, as they often provide detailed setup guides.