Best Python GUI Tools to Buy in February 2026
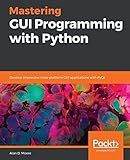
Mastering GUI Programming with Python: Develop impressive cross-platform GUI applications with PyQt


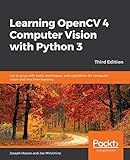
Learning OpenCV 4 Computer Vision with Python 3: Get to grips with tools, techniques, and algorithms for computer vision and machine learning, 3rd Edition


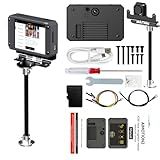
Yahboom K230 AI Development Board 1.6GHz High-performance chip/2.4-inch Display/Open Source Robot Maker Python, Supports AI Visual Recognition CanMV Sensor (with Heightened Bracket)
- UNMATCHED SPEED: 13.7X KPU POWER FOR REAL-TIME AI TASKS!
- EASY EXPANSION: 12PIN GPIO + PRE-INSTALLED GUI FOR INSTANT USE!
- WIDE COMPATIBILITY: CONNECT TO ALL MAJOR CONTROLLERS EFFORTLESSLY!


Python GUI Projects for Developers : Design and build projects and user-friendly GUI applications


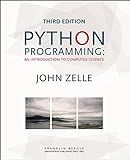
Python Programming: An Introduction to Computer Science, 3rd Ed.


Make GUI Applications with Python for Deveplopers: Build Apps with PyQt, PyQt's, SQL and more


Tkinter GUI Application Development Blueprints: Master GUI programming in Tkinter as you design, implement, and deliver 10 real-world applications


To add input to a command line prompt from wxPython, you can use the wx.TextEntryDialog class to create a dialog box where the user can input the desired value. You can then retrieve the input from the dialog box and pass it to the command line prompt using the subprocess module in Python. By combining these two components, you can create a user-friendly interface for entering input to a command line prompt directly from a wxPython application.
How to format user input for command execution in wxpython?
To format user input for command execution in wxPython, you can follow these steps:
- Obtain the user input from a text box or any other input widget.
- Validate the input to ensure it is safe and appropriate for command execution.
- Format the input as needed for the specific command you want to execute. This may include adding quotes, escaping special characters, or converting the input to a specific data type.
- Execute the command with the formatted input using the subprocess module or any other appropriate method.
- Handle any errors or exceptions that may occur during the command execution.
Here is an example of formatting user input for command execution in wxPython:
import wx import subprocess
class MyFrame(wx.Frame): def __init__(self): wx.Frame.__init__(self, None, title="Command Execution Example")
    panel = wx.Panel(self)
    self.text\_ctrl = wx.TextCtrl(panel, style=wx.TE\_PROCESS\_ENTER)
    self.text\_ctrl.Bind(wx.EVT\_TEXT\_ENTER, self.on\_execute\_command)

    sizer = wx.BoxSizer(wx.HORIZONTAL)
    sizer.Add(self.text\_ctrl, proportion=1, flag=wx.EXPAND)
    panel.SetSizer(sizer)

def on\_execute\_command(self, event):
    command = self.text\_ctrl.GetValue()
    formatted\_command = '"' + command.replace('"', '\\\\"') + '"'

    try:
        subprocess.run(formatted\_command, shell=True)
    except subprocess.CalledProcessError as e:
        wx.MessageBox(str(e), "Command Execution Error", wx.OK | wx.ICON\_ERROR)
if __name__ == '__main__': app = wx.App() frame = MyFrame() frame.Show() app.MainLoop()
In this example, the user input is obtained from a text box and formatted with double quotes and escaped double quotes before executing the command using the subprocess module. The command execution is wrapped in a try-except block to handle any errors that may occur.
What is the impact of input validation on the reliability of a wxpython application?
Input validation is essential for ensuring the reliability of a wxPython application. By validating user inputs, the application can prevent errors, vulnerabilities, and unexpected behavior that could compromise its functionality and stability.
- Prevents errors: Input validation helps to ensure that users provide only valid and expected data, which reduces the chances of errors occurring in the application. By restricting input to specific formats or ranges, the application can avoid issues such as data type mismatch, null values, or invalid characters.
- Enhances security: Input validation is crucial for protecting the application against security threats such as injection attacks (e.g., SQL injection, XSS), buffer overflows, and other malicious activities. By validating and sanitizing user inputs, the application can prevent attackers from exploiting vulnerabilities and gaining unauthorized access to sensitive data.
- Improves user experience: Proper input validation can also enhance the overall user experience by providing clear feedback to users when they enter invalid data. By displaying error messages or prompts, users can easily identify and correct their mistakes, thus reducing frustration and improving usability.
- Ensures data integrity: Input validation plays a key role in maintaining data integrity by ensuring that only valid and properly formatted data is stored in the application's database. By enforcing data validation rules at the input stage, the application can prevent inconsistencies, data corruption, and other issues that could affect the reliability of stored data.
Overall, input validation is a critical factor in enhancing the reliability of a wxPython application by reducing errors, improving security, enhancing user experience, and ensuring data integrity. By following best practices for input validation, developers can create robust and dependable applications that meet the needs and expectations of users.
What is the difference between user input handling in wxpython and other frameworks?
User input handling in wxPython is similar to handling user input in other GUI frameworks, but there are some differences in how it is implemented.
One key difference is that wxPython uses event handling to manage user input. Events are triggered when a user interacts with a GUI component, such as clicking a button or typing in a text field. In wxPython, you can bind event handlers to specific events using the Bind method, which allows you to specify a function to be called when the event is triggered.
In some other frameworks, user input handling may be done through callback functions or through a message-passing system. For example, in PyQt, user input is typically handled by connecting signals to slots, which are functions that are called when a signal is emitted.
Overall, while the specifics of how user input is handled may differ between frameworks, the basic concepts are generally the same. It is important to understand how events, signals, or other mechanisms are used in a particular framework to manage user input effectively.
How to secure user input data in a command line prompt in wxpython?
To secure user input data in a command line prompt in wxPython, you can use the wx.TextEntryDialog or wx.PasswordEntryDialog classes to create a pop-up dialog to get the input from the user instead of directly taking it from the command line prompt. This will ensure that the input is securely entered without being visible in the command line.
Here is an example code snippet to demonstrate how to use wx.TextEntryDialog to securely get user input data in a wxPython application:
import wx
app = wx.App()
text_entry_dialog = wx.TextEntryDialog(None, "Enter your username:", "Username Input", style=wx.TextEntryDialogStyle) if text_entry_dialog.ShowModal() == wx.ID_OK: username = text_entry_dialog.GetValue() text_entry_dialog.Destroy()
password_entry_dialog = wx.PasswordEntryDialog(None, "Enter your password:", "Password Input") if password_entry_dialog.ShowModal() == wx.ID_OK: password = password_entry_dialog.GetValue() password_entry_dialog.Destroy()
print("Username:", username) print("Password:", password)
app.MainLoop()
In this code snippet, we first create a wx.TextEntryDialog to get the username input from the user and a wx.PasswordEntryDialog to get the password input in a secure manner. The values entered by the user are then stored in variables username and password respectively, which can be used for further processing in your application.
By using wxPython dialog classes to get user input data, you can ensure that the input is securely obtained without being visible in the command line prompt.
How to create a text input field in wxpython?
To create a text input field in wxPython, you can use the wx.TextCtrl class. Here is an example code snippet to create a simple text input field in wxPython:
import wx
app = wx.App() frame = wx.Frame(None, title="Text Input Field Example") panel = wx.Panel(frame)
text_ctrl = wx.TextCtrl(panel)
sizer = wx.BoxSizer(wx.VERTICAL) sizer.Add(text_ctrl, 0, wx.EXPAND | wx.ALL, 10)
panel.SetSizer(sizer)
frame.Show() app.MainLoop()
In this code snippet, we create a wxPython application with a frame and a panel. We then create a wx.TextCtrl instance and add it to the panel with a box sizer. Finally, we display the frame and start the application event loop.
You can further customize the text input field by setting properties such as size, font, style, and event handling. For more advanced functionalities, you can explore the wxPython documentation and examples.
