
Best Histogram Tools to Buy in July 2026
Mastering Photographic Histograms: The key to fine-tuning exposure and better photo editing.


Exposure and Understanding the Histogram
Temtop PM2.5 Monitor P600, Essential Air Particle Meter PM2.5 PM10 Air Quality Tester for Indoor/Outdoor Air Pollution Detection, Particle-Centric Detector w/Data Histogram Display
- VISUAL AIR QUALITY DATA: COLORFUL INDICATORS ENSURE EASY MONITORING.
- LONG-LASTING SENSOR: INDUSTRIAL-GRADE ACCURACY WITH 20,000+ HOURS LIFESPAN.
- USER-FRIENDLY DESIGN: LIGHTWEIGHT AND PORTABLE FOR INDOOR/OUTDOOR USE.
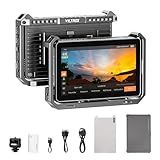
VILTROX DC-X2 6'' Touchscreen Full HD IPS Camera Monitor, 2000 nits 4K HDMI in/Out Video Field Monitor Kit with Sunshade Hood, 3D LUT, Waveform, Histogram & Vectorscope Tools, Black
- UNMATCHED BRIGHTNESS: 2000-NIT CLARITY FOR PERFECT VISUALS ANYTIME, ANYWHERE.
- PRO MONITORING TOOLS: ESSENTIAL FEATURES FOR PRECISE VISUAL CONTROL ON SET.
- CUSTOM COLOR GRADING: EASILY TAILOR YOUR COLOR WORKFLOW WITH 3DLUT SUPPORT.
VILTROX DC-X2 6'' Touchscreen Camera Monitor with Rig Cage, 2000 nits 4K HDMI in/Out Video Field Monitor Kit with Sunshade Hood, 3D LUT, Waveform, Histogram & Vectorscope Tools, Black
-
ROBUST METAL CAGE: SAFEGUARDS MONITOR FROM BUMPS, SCRATCHES, ENSURING DURABILITY.
-
PRO MONITORING TOOLS: VOLUMEBAR, HISTOGRAM, AND RGB PARADE FOR PRECISE VISUALS.
-
VERSATILE CONNECTIVITY: 4K HDMI, 3.5MM JACK, AND ACTIVE COOLING FOR OPTIMAL PERFORMANCE.
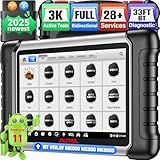
Autel Scanner MaxiCOM MK808BT PRO: 2025 Bidirectional Scan Tool Work as MK900BT, 33FT BT 2.0 Ver. of MK900 MX900 MK808S MaxiCheck MX808S MK808Z, 3K+ Active Tests, 28+ Services, OE Full Sys, OS 11, FCA
- 33FT WIRELESS RANGE: ENJOY FREEDOM FROM SHORT CABLES FOR DIAGNOSTICS.
- 3000+ ACTIVE TESTS: FAST, PRECISE BI-DIRECTIONAL CONTROL ACROSS SYSTEMS.
- 1 YEAR FREE UPDATES: STAY CURRENT WITH EVOLVING VEHICLE TECHNOLOGIES.

Modeling with Data: Tools and Techniques for Scientific Computing
Understanding Graphs & Charts: Computer Applications, Line Plot or Dot Plot, Bar Graphs, Line Graphs, Histograms, Pie Charts, Venn Diagrams (Math Activity Book, Grades 5-8+) (Reproducible Blackline Masters)
- AFFORDABLE PRICES FOR QUALITY USED BOOKS, SAVING YOU MONEY.
- THOROUGHLY INSPECTED FOR GOOD CONDITION, ENSURING CUSTOMER SATISFACTION.
- ECO-FRIENDLY CHOICE: READ, REUSE, AND REDUCE WASTE EFFECTIVELY.
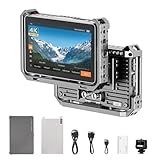
VILTROX DC-X3 Touchscreen Camera Monitor Kit with Rig Cage, 2000 nits 4K SDI HDMI in/Out Video Field Monitor Kit with Sunshade Hood, 3D LUT, Waveform, Histogram & Vectorscope Tools, Black
-
COMPREHENSIVE PROTECTION: STURDY METAL CAGE SHIELDS AGAINST BUMPS & SCRATCHES.
-
VERSATILE ACCESSORY SUPPORT: MULTIPLE ATTACHMENT POINTS FOR ALL YOUR GEAR.
-
ALL-IN-ONE SOLUTION: INTEGRATES DISPLAY, TOOLS, & CONNECTIVITY TO STREAMLINE WORKFLOWS.
Excel 2022 Pro 100 + PivotTables, Charts & Reports: Explore Excel 2022 with Graphs, Animations, Sparklines, Goal Seek, Histograms, Correlations, Dashboards (English Edition)
To create a histogram of averages by month in Grafana, you can follow these steps:
- Install and set up Grafana on your preferred system.
- Configure Grafana to connect to your desired data source (e.g., InfluxDB, Prometheus, etc.).
- Create a new Dashboard or open an existing one in Grafana.
- Add a new Panel to the Dashboard.
- In the Panel editing mode, select the appropriate data source from the drop-down menu.
- Write a query in the Query Editor to retrieve the required data. The query should include a time range, grouping by month, and an aggregation function like average. Example query: SELECT mean("value") FROM "measurement" WHERE $timeFilter GROUP BY time(30d), time(1M) (Assumption: measurement is the measurement name, value is the field name)
- Verify that the query returns the expected results by using the "Run" button or previewing the query output.
- Once you have the data, select the Visualization from the options provided by Grafana, which is a histogram in this case.
- Configure the histogram visualization settings as per your preferences (e.g., adding any necessary additional buckets, formatting the axes, etc.)
- Customize the appearance of the histogram panel using the Grafana panel options, such as color scheme, legend, grid lines, etc.
- Save the Dashboard and view the histogram of averages by month in Grafana.
Remember to adjust the query and settings based on your specific data source and requirements.
How to create interactive histograms with drill-down capabilities in Grafana?
To create interactive histograms with drill-down capabilities in Grafana, you can follow these steps:
- Install and set up Grafana: First, install Grafana on your machine or server and set it up following the official documentation.
- Connect your data source: Connect your data source to Grafana. It can be a time-series database like Prometheus, InfluxDB, or even a SQL database like MySQL or PostgreSQL.
- Create a new Dashboard: In Grafana, navigate to the Dashboards section and create a new dashboard.
- Add a Panel: Click on "Add Panel" and choose the "Histogram" visualization.
- Configure the panel: In the panel settings, select your data source and the desired metric or query for the histogram.
- Enable interactive features: To enable drill-down capabilities, you need to enable the interactive features of the histogram panel. Go to the "Panel" tab and check the "Enable" checkbox for the "Drilldown Links" option.
- Define drill-down links: Under the "Drilldown Links" option, you can define the drill-down links or URLs that should be opened when a specific part of the histogram is clicked. For example, you can define a link that leads to a more detailed dashboard or chart for that specific data point.
- Save and test the dashboard: Save your dashboard and test the interactive histogram by clicking on different parts of the chart. It should redirect you to the predefined drill-down links or URLs.
Note: The drill-down links can be dynamic, allowing you to pass additional parameters or filters to the target dashboard or chart based on the selected data point. This can be achieved by using template variables and query parameters in Grafana.
Remember to refer to the Grafana documentation for detailed information and guidance on creating and configuring panels and dashboards.
What is the recommended way to align histograms by month in Grafana?
One way to align histograms by month in Grafana is by using the date_histogram aggregation in the underlying query. Here are the recommended steps:
- Configure your data source: Ensure that your data source (e.g., Elasticsearch, InfluxDB) includes a timestamp field for each data point.
- Create a panel: In Grafana, create a new panel to visualize the histograms. You can choose a graph panel or any other applicable panel type.
- Configure the data source: In the panel configuration, select the appropriate data source and query the relevant data for your histograms.
- Group by month: In the query, use the date_histogram aggregation to group the data by month. Specify the timestamp field, set the interval to month (e.g., 1M), and add any necessary additional terms or filters.
- Configure the visualization options: Customize the visualization settings according to your needs. For example, you can choose the appropriate visualization type (e.g., histogram, bar chart), set the labels and axis titles, and adjust the display options.
- Apply time range: Ensure that the panel's time range covers the desired period (e.g., multiple months) to display the histograms appropriately.
By following these steps, the histograms in your Grafana panel will be properly aligned and presented by month.
What is the purpose of creating a histogram by month in Grafana?
Creating a histogram by month in Grafana serves the purpose of visually analyzing and representing data distribution patterns, trends, and variations over time within specific months. It allows users to understand how different variables or metrics change and fluctuate within each month. This can be helpful for various scenarios such as identifying seasonal patterns, detecting anomalies or outliers, comparing monthly performance, or monitoring trends over time. By presenting data in a histogram format, it becomes easier to identify the frequency or distribution of values within each month and visualize any patterns or changes that might occur. Ultimately, the purpose of creating a histogram by month in Grafana is to provide a clear and informative overview of data behavior within monthly intervals.
What are the different methods of data transformation for histogram creation in Grafana?
In Grafana, there are several methods of data transformation that can be used for histogram creation. Some of these methods include:
- Group By: This method groups the data by a specific field or time interval. For example, you can group the data by a particular tag or by a fixed time range, such as 1 hour or 1 day.
- Bucketize: This method divides the data into buckets based on a specific field. You can specify the size of each bucket, and the data points will be assigned to the appropriate bucket based on their value.
- Average: This method calculates the average value of each bucket. It can be useful when you have multiple data points within each bucket and want to summarize them.
- Sum: This method calculates the sum of all data points within each bucket. It is commonly used when dealing with cumulative data, such as total number of events.
- Count: This method counts the number of data points within each bucket. It can be used to visualize the distribution of data points across different buckets.
- Min/Max: These methods find the minimum and maximum values within each bucket. They can be used to highlight the range of values within each bucket.
These data transformation methods can help you analyze and visualize your data in a meaningful way in the form of histograms in Grafana.
How to create a histogram in Grafana?
To create a histogram in Grafana, follow these steps:
- Log in to Grafana and go to the dashboard where you want to create the histogram.
- Click on the "Add Panel" button to create a new panel.
- In the panel editor, select the data source for your histogram. This can either be a time series database or any other compatible data source that provides histogram data.
- In the query editor, write a query to retrieve the histogram data. The query should specify the range of data and any filters or grouping you want to apply. For example, if you are using a time series database like Prometheus, you can use the histogram_quantile function to calculate the quantile values for the histogram.
- Configure the visualization options for the histogram. You can customize the labels, colors, and other style settings according to your preference.
- Save the panel and view it on the dashboard.
Now you should have a histogram visualization based on your data in Grafana.
How to calculate percentile values from histogram data in Grafana?
To calculate percentile values from histogram data in Grafana, you can follow these steps:
- Create a histogram panel in Grafana by selecting the histogram visualization option.
- Configure the panel settings to display the desired histogram data. This may involve selecting the appropriate data source, metric, and aggregation function.
- Adjust the time range and other filtering options to narrow down the data displayed in the histogram.
- Calculate the cumulative distribution function (CDF) based on the histogram data. This can be done using the following formula: CDF(i) = (count(bins <= i) / total count) * 100 This formula calculates the cumulative percentage of data points that fall within or below a certain bin value (i).
- Identify the bin value (i) that corresponds to the desired percentile. For example, if you want to find the 75th percentile, you would need to find the bin value (i) where CDF(i) is closest to 75.
- Interpolate the bin value (i) between the two adjacent bins based on the CDF values to get a more accurate estimate of the percentile value.
- Use the interpolated bin value to determine the actual value associated with the percentile by considering the start and end values of the bin.
- Repeat the above steps for different desired percentiles or ranges of data.
Note: The exact implementation may vary depending on the specific histogram data source or plugin being used in Grafana. It's recommended to refer to the documentation or support resources for the specific histogram plugin or data source you are using in Grafana for more detailed instructions.