Best Swift Drawing Tools to Buy in July 2026
5 Pcs Pattern Tracing Stylus, Ball Embossing Stylus for Transfer Paper, Tracing Tools for Drawing, Embossing Tools for Paper, Art Dotting Tools for Nail Art, Ball Tip Clay Tools Sculpting Stylus
- VERSATILE TOOLSET: 10 BALL ENDS WITH 5 DIAMETER SIZES FOR PRECISION.
- DURABLE DESIGN: HIGH-QUALITY STAINLESS STEEL FOR LASTING PERFORMANCE.
- LIGHTWEIGHT & EASY TO GRIP: PERFECT SIZE FOR COMFORTABLE, CONTROLLED USE.


KOOTIKO 33 Pcs Blending Stumps and Tortillions Paper Art Blenders Drawing with Sandpaper Pencil Sharpener Extension Kneaded Eraser Rubbing Sponge for Student Artist Charcoal Sketch Drawing Tool
- COMPLETE ART KIT: 32 PREMIUM BLENDING TOOLS FOR PERFECT SKETCHES!
- VERSATILE SIZES: 16 BLENDING STUMPS & TORTILLIONS FOR EVERY DETAIL.
- DURABLE & REUSABLE: QUALITY MATERIALS ENSURE LASTING ARTISTRY TOOLS.
Mr. Pen- Professional Geometry Set, 17 Pcs, Architect Compass and Protractor Set, Interior Design Drafting Tools, Scale Ruler, Drawing Stencils, Metal Ruler
- COMPLETE ARCHITECT SET: TEMPLATES FOR EVERY DESIGN PROJECT.
- DURABLE TOOLS FOR PRECISE MEASUREMENTS AND EASY CLEANING.
- IDEAL FOR STUDENTS AND PROFESSIONALS IN ARCHITECTURE AND DESIGN.
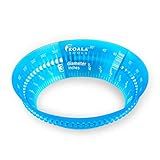
Koala Tools - Mini Ring Ruler for Circle Templates and Surfaces, Circular Ruler with 1 to 3.5-inch Adjustable Diameter, Geometric Tool for Drawing Circles
- CREATE PERFECT CIRCLES HASSLE-FREE WITH ADJUSTABLE 1-3.5” DIAMETER!
- ENJOY SWIFT, PRECISE MEASUREMENTS THAT LOCK IN PLACE EFFORTLESSLY.
- COMPACT DESIGN MAKES IT A MUST-HAVE FOR ARTISTS AND CRAFTERS!
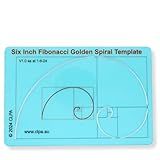
CLPA Fibonacci Spiral Stencil Template for Drawing and Drafting: A Fibonacci Spiral Drawing Tool for Artists Allows The Simple Application of The Golden or Divine Ratio for Artistic Design
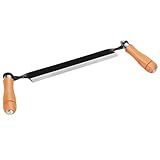
8'' Draw Knife,Draw knife debarking tool,Curved Draw Knife Draw Shave Tool Woodworking Debarking Hand Tool, Wood Razor Shaving Wood Barking Tool,Bark Peeler,Drawing Knife, Draw Shave
-
DURABLE MANGANESE STEEL: PREMIUM MATERIAL ENSURES LONGEVITY AND SHARPNESS.
-
VERSATILE FOR WOODWORKING: PERFECT FOR DIY ENTHUSIASTS AND PROFESSIONALS ALIKE.
-
USER-FRIENDLY DESIGN: ERGONOMIC HANDLE AND EASY SHARPENING FOR EFFICIENT USE.
In Swift, you can draw a line between two views by creating a custom UIView subclass and overriding the draw() method to draw a line between the two views. You can calculate the starting and ending points for the line based on the frames of the two views, and then use the UIBezierPath class to draw the line between those points. You can then add the custom UIView as a subview of the parent view to display the line between the two views.
How can I connect two views with a line in Swift?
You can achieve this by using Core Graphics in Swift. Here's an example of how you can connect two views with a line:
import UIKit
class LineView: UIView { override func draw(_ rect: CGRect) { if let context = UIGraphicsGetCurrentContext() { context.setStrokeColor(UIColor.black.cgColor) context.setLineWidth(2.0)
        let startPoint = CGPoint(x: 0, y: self.bounds.height / 2)
        let endPoint = CGPoint(x: self.bounds.width, y: self.bounds.height / 2)

        context.move(to: startPoint)
        context.addLine(to: endPoint)

        context.strokePath()
    }
}
}
// Create two views let view1 = UIView(frame: CGRect(x: 50, y: 50, width: 100, height: 100)) view1.backgroundColor = UIColor.red
let view2 = UIView(frame: CGRect(x: 200, y: 50, width: 100, height: 100)) view2.backgroundColor = UIColor.blue
// Create a line view let lineView = LineView(frame: CGRect(x: 0, y: 0, width: 1000, height: 2)) lineView.center = CGPoint(x: (view1.center.x + view2.center.x)/2, y: view1.center.y)
// Add all views to a parent view let parentView = UIView(frame: CGRect(x: 0, y: 0, width: 400, height: 200)) parentView.addSubview(view1) parentView.addSubview(view2) parentView.addSubview(lineView)
// Display the parent view let viewController = UIViewController() viewController.view = parentView
In this code snippet, we create a custom LineView class that draws a line in its draw method. We then create two views (view1 and view2) and position them on a parent view along with the LineView. Adjust the positions and sizes of the views and the line as needed to connect them with a line.
What is the significance of color when drawing a line between two views in Swift?
Color can help to differentiate between different types of objects or elements in a view, making it easier for users to understand and interact with the interface. By using different colors for different lines, it becomes clearer to the user which lines represent different connections or relationships between views. This can improve the overall user experience and make the interface more intuitive and user-friendly. Additionally, color can also be used to convey meaning or indicate status, such as highlighting errors or showing successful connections.
What is the role of constraints when drawing a line between two views in Swift?
When drawing a line between two views in Swift, constraints play a key role in determining how the views are positioned relative to one another. Constraints define the layout and relationships between different views, specifying how they should be positioned, sized, and aligned within a view hierarchy.
By setting up constraints between the two views, you can specify the exact position, size, and alignment of the line that connects them. Constraints ensure that the line remains connected to the views regardless of changes in device orientation, screen size, or other factors that may affect the layout of the views.
Constraints can be set programmatically or using Interface Builder in Xcode. By defining constraints, you can create a flexible and responsive layout that adapts to different screen sizes and orientations while ensuring that the line between the two views is displayed correctly.