Best Plotting Tools to Buy in July 2026
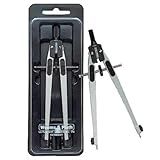
Weems & Plath #176 Marine Navigation Ultralight Divider
- DURABLE MARINE ALLOY RESISTS CORROSION FOR LASTING PERFORMANCE.
- EASY-TO-USE CENTER GEAR WITH SPARE PARTS INCLUDED.
- PREMIUM GERMAN CRAFTSMANSHIP BACKED BY A LIFETIME WARRANTY.


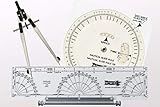
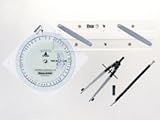
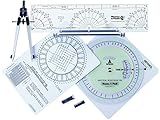
WEEMS & PLATH Essentials Navigation Kit
- ULTRALIGHT DESIGN FOR EASY PORTABILITY AND CONVENIENCE.
- PRECISION PLOTTING WITH WEEMS PARALLEL PLOTTER FOR ACCURACY.
- VERSATILE NAUTICAL SLIDE RULE FOR QUICK CALCULATIONS ON THE GO.
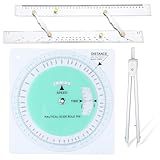
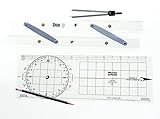
Dunzoom 3 Pcs Marine Navigation Kit, Basic Navigation Set Include 18" Marine Parallel Ruler with Clear Scales, 8" Diameter Nautical Plotter Protractor, 6" Fixed Point Divider for Boat Accessories
- ALL-IN-ONE NAVIGATION KIT: ESSENTIAL TOOLS FOR PRECISE MARINE NAVIGATION.
- DURABLE AND ACCURATE: HIGH-QUALITY MATERIALS ENSURE LONG-LASTING RELIABILITY.
- USER-FRIENDLY DESIGN: SIMPLIFIES NAVIGATION FOR BOTH NOVICE AND EXPERIENCED SAILORS.
Weems & Plath Marine Navigation Primary Navigation Set
- ULTRALIGHT DIVIDER/COMPASS FOR PRECISION NAVIGATION.
- 12 PARALLEL RULER FOR ACCURATE MEASUREMENTS EVERY TIME.
- DURABLE POUCH KEEPS YOUR TOOLS ORGANIZED AND SECURE.
Weems & Plath #317 Basic Navigation Set
- ACCURATE MEASUREMENT WITH WEEMS PROTRACTOR FOR PRECISE NAVIGATION.
- 15-INCH PARALLEL RULE ENSURES STRAIGHT LINES FOR DETAILED DESIGNS.
- DURABLE LIFETIME WARRANTY GUARANTEES LONG-TERM SATISFACTION AND RELIABILITY.
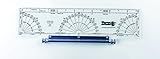
Weems & Plath Marine Navigation Parallel Plotter
- HIGH-PRECISION NAVIGATION TOOLS FOR ACCURATE MARINE PLANNING.
- DURABLE DESIGN ENSURES LONG-LASTING RELIABILITY ON THE WATER.
- USER-FRIENDLY INTERFACE FOR QUICK AND EASY OPERATION AT SEA.
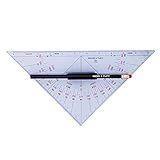
Weems & Plath #101 Protractor Triangle with Handle
- PRECISION ALIGNMENT WITH PROTRACTOR SCALE FOR EASY CHARTING
- DURABLE VINYLITE DESIGN WITH LIFETIME WARRANTY FOR LONGEVITY
- EASY MANEUVERABILITY WITH BLACK HANDLE & PENCIL HOLDER
Weems & Plath Marine Navigation Coast Guard Navigation Tool Kit
- PRECISE NAVIGATION WITH THE ULTRALIGHT DIVIDER/COMPASS FOR ACCURACY.
- CONVENIENT SPARE LEADS ENSURE UNINTERRUPTED PLOTTING AND NAVIGATION.
- ESSENTIAL TOOLS FOR SAILORS: PLOTTER, SLIDE RULE, AND COURSE IDENTIFIER.
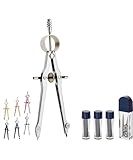
Mr. Pen- Professional Compass for Geometry, Extra Lead, Metal Compass, Compass, Compass Drawing Tool, Drawing Compass, Drafting Compass, Compass for Students, Compass Geometry, Back to School Supplies
- CREATE PERFECT CIRCLES UP TO 8 INCHES FOR MATH AND ART.
- DURABLE ALL-METAL DESIGN FOR LIFELONG USE AND SATISFACTION.
- EASY ADJUSTMENTS FOR PRECISION IN EVERY DRAWING PROJECT.
To plot synchronously with Matplotlib, you can use the plt.ion() function to turn on interactive mode. This will allow you to update your plot in real-time. You can then use the plt.pause() function to pause the plot for a specified amount of time before updating it again. This can be useful for plotting data streams or dynamically changing data. Additionally, you can use the plt.clf() function to clear the current figure before updating it with new data. By using these functions in combination, you can plot synchronously with Matplotlib to create dynamic and interactive plots.
What is the significance of using subplots in matplotlib?
Subplots in matplotlib allow multiple plots to be displayed within the same figure. This is significant because it enables the viewer to compare different data sets or different aspects of a single data set side by side, making it easier to identify patterns, trends, and relationships between variables. Subplots can also be used to create more complex, multi-panel visualizations that provide a more comprehensive view of the data. Additionally, subplots can help to save space on a plot and prevent overcrowding of information, making the graphs more aesthetically pleasing and easier to interpret.
What is matplotlib and how can it be used for plotting?
Matplotlib is a Python library used for creating static, animated, and interactive visualizations in Python. It is a powerful tool for creating plots, charts, graphs, and other types of visualizations.
Matplotlib can be used for plotting by importing the library and using its functions to create different types of plots. Some common types of plots that can be created using matplotlib include line plots, scatter plots, bar plots, histogram plots, heatmaps, and more.
To create a plot using matplotlib, you typically start by importing the library and then calling functions to create the desired plot. For example, to create a simple line plot, you can use the plt.plot() function. You can customize your plots by adding labels, titles, legends, colors, and other visual elements using the functions provided by matplotlib.
Overall, matplotlib is a versatile and powerful library that can be used for creating a wide range of visualizations in Python for data analysis, scientific research, machine learning, and many other applications.
What are the different types of plots that can be created using matplotlib?
- Line plot
- Bar plot
- Histogram
- Scatter plot
- Pie chart
- Box plot
- Violin plot
- Heatmap
- Contour plot
- Area plot
What is the function of the grid in matplotlib plots?
The grid function in matplotlib plots adds a background grid to the plot, making it easier to read and interpret the data. It helps to visually align and compare data points on the plot, allowing for a better analysis of the trends and patterns in the data. The grid function can be turned on and off, customized with different line styles and colors, and applied to both the x and y axes of the plot.
How to create a bar plot using matplotlib?
To create a bar plot using matplotlib in Python, you can follow these steps:
- Import the necessary libraries:
import matplotlib.pyplot as plt
- Define the data for the bar plot:
x = ['A', 'B', 'C', 'D', 'E'] y = [10, 20, 15, 25, 30]
- Create the bar plot using the bar function in matplotlib:
plt.bar(x, y)
- Customize the plot by adding labels, title, and grid:
plt.xlabel('Categories') plt.ylabel('Values') plt.title('Bar Plot Example') plt.grid(True)
- Display the plot:
plt.show()
By following these steps, you can create a simple bar plot using matplotlib in Python. You can further customize the plot by changing the colors, adding legends, or adjusting the bar widths.
What is the function of the xlim and ylim methods in matplotlib?
The xlim and ylim methods in Matplotlib are used to set the limits for the x-axis and y-axis, respectively.
For example, when you call plt.xlim([0, 10]), you are setting the x-axis limits from 0 to 10. Similarly, calling plt.ylim([0, 20]) sets the y-axis limits from 0 to 20.
These methods allow you to customize the range of values displayed on the plot to focus on specific regions of interest or to ensure that the data is presented in the most appropriate way.