Best PowerShell Tools to Buy in January 2026

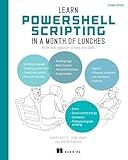
Learn PowerShell Scripting in a Month of Lunches, Second Edition: Write and organize scripts and tools


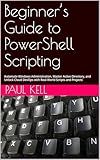
Beginner’s Guide to PowerShell Scripting: Automate Windows Administration, Master Active Directory, and Unlock Cloud DevOps with Real-World Scripts and Projects


PowerShell Advanced Cookbook: Enhance your scripting skills and master PowerShell with 90+ advanced recipes (English Edition)


The PowerShell Scripting & Toolmaking Book: Author-Authorized Second Edition


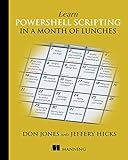
Learn PowerShell Scripting in a Month of Lunches


Trend EasyScribe Scribing Tool, Accurate Scribing Solution for Carpenters, Joiners, Tilers, Kitchen & Shop Fitters, E/SCRIBE, Black
- VERSATILE TOOL FOR SCRIBING DOORS, FLOORING, TILING, AND MORE.
- ADJUSTABLE OFFSET FROM 0.04 TO 1.57 FOR PERFECT FIT IN EVERY TASK.
- ULTRA-THIN GUIDE PLATE ALLOWS ACCESS TO TIGHT SPACES WITH EASE.


Milescraft 8407 ScribeTec - Scribing and Compass Tool
- ARTICULATING PENCIL HEAD TACKLES COMPLEX ANGLES WITH EASE.
- PRECISION POINT LOCKS FOR PERFECT RADIUS EVERY TIME YOU WRITE.
- VERSATILE GRIP FITS NO. 2 PENCILS, CARPENTERS, AND SHARPIES.


To print the previous month in PowerShell, you can use the Get-Date cmdlet to obtain the current date and then manipulate it to determine the previous month. You would typically subtract one month from the current date. Here's a simple example:
$previousMonth = (Get-Date).AddMonths(-1).ToString("MMMM") Write-Output $previousMonth
This script utilizes the AddMonths method, passing -1 as the argument to go back one month from the current date. The ToString("MMMM") method formats the date to display only the full name of the month. You can then use Write-Output to print the value of the previous month to the console.
How to convert a string to a date in PowerShell?
In PowerShell, you can convert a string to a date using the Get-Date cmdlet along with the -Date parameter or by casting the string directly to the [datetime] type. Here's how you can do it:
Method 1: Using Get-Date
You can use the Get-Date cmdlet with the -Date parameter. This is useful when you have a specific format in mind or need to specify the time zone.
$stringDate = "12/25/2023" $date = Get-Date -Date $stringDate
Method 2: Casting to [datetime]
PowerShell allows direct casting from a string to a [datetime] object. This method is straightforward and works well for standard date formats recognized by the system.
$stringDate = "12/25/2023" $date = [datetime]$stringDate
Method 3: Using ParseExact for Custom Formats
If your date string is in a custom format, you might need to use System.Globalization.CultureInfo and the ParseExact method for precise conversion.
$stringDate = "25-December-2023" $format = "dd-MMMM-yyyy" $culture = [System.Globalization.CultureInfo]::InvariantCulture $date = [datetime]::ParseExact($stringDate, $format, $culture)
Notes:
- Ensure that the date string format matches the expected input format of the method or cmdlet you are using.
- The ParseExact method is beneficial when dealing with non-standard date formats that aren't automatically recognized by PowerShell's parsing mechanisms.
By choosing the method that best fits your scenario, you can efficiently convert strings to date objects in PowerShell.
What is the purpose of the Import-Module cmdlet in PowerShell?
The Import-Module cmdlet in PowerShell is used to load modules into the current PowerShell session. Modules in PowerShell can contain a variety of resources such as cmdlets, providers, functions, variables, and aliases. When you import a module, you make these resources available for use in your session.
Here are some key purposes and functionalities of the Import-Module cmdlet:
- Loading Functionality: By importing a module, you can extend the functionality of your session with new cmdlets and functions defined in the module.
- Reusability: Modules allow you to encapsulate and organize scripts and functions so that they are easily reusable across different sessions and projects.
- Scope Control: Importing a module ensures that all the resources it provides are scoped to the current session, avoiding potential conflicts with other code.
- Version Management: You can specify the version of a module to import, ensuring that your scripts use the desired version.
- Module Initialization: Some modules have initialization scripts that set up the environment or establish connections. Importing the module runs these scripts.
- Autoload Feature: Starting with PowerShell 3.0, modules are imported automatically when a command from the module is used, thanks to the module auto-loading feature, reducing the need to manually use Import-Module in many cases.
To use the Import-Module cmdlet, you provide the name of the module you wish to import, like so:
Import-Module -Name moduleName
Overall, Import-Module is central to the modular approach of PowerShell, supporting code reusability, organization, and management.
How to send an email in PowerShell?
Sending an email in PowerShell can be accomplished using the Send-MailMessage cmdlet. Below is a basic example of how to use it:
# Define the parameters for the email $smtpServer = "smtp.your-email-provider.com" $from = "your-email@example.com" $to = "recipient@example.com" $subject = "Test Email" $body = "This is a test email sent from PowerShell."
Send the email
Send-MailMessage -SmtpServer $smtpServer -From $from -To $to -Subject $subject -Body $body
Additional Options:
- Port: If your SMTP server requires a specific port other than the default (25), you can specify it with the -Port parameter.
- Body Format: If you want to send an HTML email, you can specify the -BodyAsHtml switch.
- Attachments: Use the -Attachments parameter to send files.
- Credentials: If your SMTP server requires authentication, you can pass credentials using: $username = "your-username" $password = "your-password" $securePassword = ConvertTo-SecureString $password -AsPlainText -Force $credentials = New-Object System.Management.Automation.PSCredential ($username, $securePassword) Send-MailMessage -SmtpServer $smtpServer -From $from -To $to -Subject $subject -Body $body -Credential $credentials
- SSL/TLS: Use the -UseSsl switch if your SMTP server requires a secure connection: Send-MailMessage -SmtpServer $smtpServer -From $from -To $to -Subject $subject -Body $body -UseSsl
- Multiple Recipients/CC/BCC: You can specify multiple email addresses by separating them with commas: $to = "recipient1@example.com,recipient2@example.com" $cc = "cc@example.com" $bcc = "bcc@example.com" Send-MailMessage -SmtpServer $smtpServer -From $from -To $to -Cc $cc -Bcc $bcc -Subject $subject -Body $body
Adjust the parameters according to your SMTP server details and authentication requirements. Always ensure that you safeguard sensitive information, like passwords, when scripting.
How to debug a script in PowerShell?
Debugging a PowerShell script can help you identify and resolve errors or unexpected behavior in your code. Here are some methods to effectively debug a PowerShell script:
- Use Write-Host or Write-Output: Insert Write-Host or Write-Output statements in your script to display the current value of variables or to follow the flow of execution. This can help you understand what the script is doing at each step.
- Set Breakpoints: You can set breakpoints in your PowerShell script to pause execution and enter the debugging mode using the Set-PSBreakpoint cmdlet. Breakpoints can be set on lines, functions, or variables. Set-PSBreakpoint -Script "path\to\your\script.ps1" -Line 10
- Use Debugging Cmdlets: Get-PSBreakpoint to view current breakpoints. Remove-PSBreakpoint to remove breakpoints.
- Using the ISE or Visual Studio Code: PowerShell ISE (Integrated Scripting Environment) includes a debugger that supports setting breakpoints, stepping through code, and viewing variables. Visual Studio Code with the PowerShell extension also provides rich debugging capabilities.
- Run the Script in Debug Mode: You can run the script in debug mode using Set-PSDebug cmdlet. Example: Set-PSDebug -Trace 1 # Basic tracing Set-PSDebug -Trace 2 # More detailed tracing Remember to disable debugging with Set-PSDebug -Off after you're done.
- Step Command: Use the Step-Into, Step-Over, and Step-Out commands to navigate through the script: Step-Into # Enters into the function calls Step-Over # Steps over the function calls Step-Out # Steps out of the current function
- Inspect Variables: In the debugging mode, use commands like Get-Variable or directly access variable names to inspect current values and states.
- Errors Handling: Use Try, Catch, and Finally blocks to handle errors gracefully and capture detailed error information. Inspect $Error and $Error[0] to get error details.
- Enable PowerShell Logging: You can enable module logging, script block logging, and transcript logging for auditing and debugging purpose. This might require administrative privileges and changes to the local or group policy.
By using these techniques, you can effectively debug your PowerShell scripts and identify issues more efficiently.
