Best Swift Programming Guides to Buy in January 2026
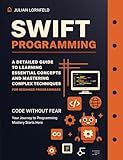
Swift Programming: A Detailed Guide to Learning Essential Concepts and Mastering Advanced Techniques


Swift Programming: The Big Nerd Ranch Guide


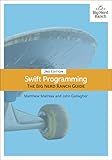
Swift Programming: The Big Nerd Ranch Guide, 2/e (Big Nerd Ranch Guides)


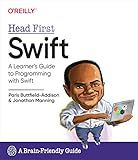
Head First Swift: A Learner's Guide to Programming with Swift


Coding iPhone Apps for Kids: A Playful Introduction to Swift



Swift Programming Cheat Sheet Mouse Pad, Quick Reference Guide for Developers, Students & iOS Programmers Essential Computer Accessories for Study, Work, and Reference Purposes NNA
- EXTRA-LARGE SPACE BOOSTS COMFORT FOR GAMING AND OFFICE TASKS.
- ULTRA-SMOOTH SURFACE ENABLES PRECISE CONTROL FOR OPTIMAL PERFORMANCE.
- DURABLE DESIGN AND WATERPROOF FEATURES ENSURE LONGEVITY AND EASY CLEANING.


A closure in Swift is a self-contained block of code that can be passed around and used within your code. They have the ability to capture and store references to any constants and variables from the surrounding context in which they are defined. This means that closures can access and modify these captured values even after the surrounding function has returned.
To use closures in Swift, you can define a closure using the following syntax:
let myClosure = { // code to be executed }
You can also specify input parameters and return types for a closure:
let additionClosure: (Int, Int) -> Int = { (a, b) in return a + b }
Closures can be assigned to variables, passed as arguments to functions, and returned from functions. They can also capture values from their surrounding context, making them powerful and flexible tools in Swift programming.
When using closures, you may need to be mindful of strong reference cycles, where closures capture a strong reference to a reference type, creating a retain cycle. To avoid this, you can use the [weak self] or [unowned self] capture list to capture a weak or unowned reference to self within the closure.
Overall, closures provide a concise and expressive way to encapsulate functionality in Swift, allowing you to write clean and readable code.
How to create a dispatch queue with closures in Swift?
In Swift, you can create a dispatch queue with closures by using the DispatchQueue class. Here is an example of how you can create a dispatch queue with a closure:
// Create a serial dispatch queue let serialQueue = DispatchQueue(label: "com.example.SerialQueue")
// Add a closure to the dispatch queue serialQueue.async { print("Executing closure on serial queue")
// Perform some work
for i in 1...5 {
    print(i)
}
}
// Create a concurrent dispatch queue let concurrentQueue = DispatchQueue(label: "com.example.ConcurrentQueue", attributes: .concurrent)
// Add a closure to the dispatch queue concurrentQueue.async { print("Executing closure on concurrent queue")
// Perform some work
for i in 1...5 {
    print(i)
}
}
In the above example, we first create a serial dispatch queue using DispatchQueue(label:) and add a closure to it using async. We then create a concurrent dispatch queue with the .concurrent attribute and add a closure to it in a similar manner.
When you run the above code, you will see that the closures are executed on the respective dispatch queues, either serially or concurrently, depending on the type of queue.
What is a completion block in Swift closures?
A completion block in Swift closures is a closure that is passed as a parameter to a function or method, and is called after the completion of an asynchronous operation. It is used to handle the result of the operation and perform any necessary actions based on that result. Completion blocks usually have a signature that includes parameters for the result or error of the operation, which can be captured and used by the closure when it is invoked.
How to use closure expressions in Swift?
Closure expressions are a shorthand way to write inline closures in Swift. They can be used in a variety of ways, such as passing a closure as a parameter to a function, assigning a closure to a variable, or using a closure as a completion handler for asynchronous operations.
Here is an example of how to use closure expressions in Swift:
- Passing a closure as a parameter to a function:
func operateOnNumbers(a: Int, b: Int, operation: (Int, Int) -> Int) -> Int { return operation(a, b) }
let result = operateOnNumbers(a: 5, b: 3, operation: { (x, y) in return x + y })
print(result) // Output: 8
- Assigning a closure to a variable:
let addClosure = { (x: Int, y: Int) -> Int in return x + y }
let result = addClosure(5, 3) print(result) // Output: 8
- Using a closure as a completion handler for asynchronous operations:
func fetchData(completion: (Result<String, Error>) -> Void) { // Simulating asynchronous network request DispatchQueue.global().async { // Assuming the data has been fetched successfully completion(.success("Hello, world!")) // If an error occurred, you can also call: completion(.failure(error)) } }
fetchData { result in switch result { case .success(let data): print(data) // Output: Hello, world! case .failure(let error): print(error) } }
These are just a few examples of how closure expressions can be used in Swift. They provide a concise and flexible way to define and pass around blocks of code in your application.
What is the @escaping keyword in Swift closures?
In Swift, the @escaping keyword is used to indicate that a closure parameter of a function will be stored for later execution, such as being stored in a property or passed to another function. By default, closure parameters are non-escaping, meaning that they are only executed within the scope of the function they are passed to. However, if a closure needs to be executed after the function has returned, it should be marked as @escaping to prevent retain cycles or memory leaks.
What is a closure typealias in Swift?
A closure typealias in Swift is a way of defining a type alias for a closure. This can be useful when you have a complex closure signature that you want to reuse in multiple places in your code. By defining a typealias for the closure, you can give it a more descriptive name and make your code more readable and maintainable. It can also help to reduce the amount of boilerplate code needed to define the closure signature each time it is used.
How to capture values in a closure in Swift?
To capture values in a closure in Swift, you can use either value or reference capturing. Value capturing captures the value of a variable at the time the closure is created, while reference capturing captures a reference to the variable, allowing the closure to access and modify its current value.
Here is an example of value capturing in a closure in Swift:
func makeIncrementer(forIncrement amount: Int) -> () -> Int { var runningTotal = 0 return { runningTotal += amount return runningTotal } }
let incrementByTen = makeIncrementer(forIncrement: 10) print(incrementByTen()) // Output: 10 print(incrementByTen()) // Output: 20
In this example, the makeIncrementer function creates a closure that captures the value of the runningTotal variable when the closure is created. Subsequent calls to the closure increment the runningTotal value by the specified amount, starting from the captured initial value of 0.
You can also use reference capturing in closures by declaring a variable as var instead of let:
func makeMultiplier(forMultiplier amount: Int) -> () -> Int { var runningTotal = 1 return { runningTotal *= amount return runningTotal } }
let multiplyByTwo = makeMultiplier(forMultiplier: 2) print(multiplyByTwo()) // Output: 2 print(multiplyByTwo()) // Output: 4
In this example, the runningTotal variable is captured by reference, allowing the closure to modify its current value directly. Subsequent calls to the closure multiply the runningTotal value by the specified amount, starting from the captured initial value of 1.
Overall, capturing values in closures in Swift can be achieved through value or reference capturing, depending on your specific requirements and use case.
