Best Swift Programming Guides to Buy in February 2026
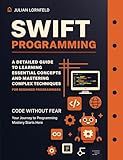
Swift Programming: A Detailed Guide to Learning Essential Concepts and Mastering Advanced Techniques


Swift Programming: The Big Nerd Ranch Guide, 7/e (Big Nerd Ranch Guides)


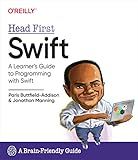
Head First Swift: A Learner's Guide to Programming with Swift


Swift Programming: The Big Nerd Ranch Guide


iOS 26 Programming for Beginners: A hands-on guide to kickstarting your iOS app development journey with Swift 6, UIKit, and Xcode 26


Swift Programming for Beginners


Swift Programming: The Big Nerd Ranch Guide (Big Nerd Ranch Guides)


Swift Programming Cheat Sheet Mouse Pad, Quick Reference Guide for Developers, Students & iOS Programmers Essential Computer Accessories for Study, Work, and Reference Purposes NNA
-
EXTRA LARGE COMFORT: AMPLE SPACE FOR MOUSE, KEYBOARD, AND MORE!
-
ULTRA-SMOOTH SURFACE: ENJOY EFFORTLESS CONTROL FOR GAMING AND WORK!
-
DURABLE & WATERPROOF: SLEEK DESIGN WITH EASY CLEANING FOR LONGEVITY!


In Swift, the do-catch statement is used to handle errors that may occur while executing a block of code. The do block contains the code that may throw an error, and the catch block is used to catch and handle any errors that are thrown.
To use a do-catch statement, you first write the do keyword followed by the block of code that may throw an error. Inside the do block, you can use the try keyword to indicate that a function call or expression may throw an error. If an error is thrown, code execution immediately jumps to the corresponding catch block.
In the catch block, you can specify the type of error that you want to handle. You can also use the error object to obtain more information about the error that occurred.
Here is an example of how to use a do-catch statement in Swift:
do { let result = try divideNumbers(10, by: 0) print("Result: (result)") } catch CustomError.divisionByZero { print("Error: Cannot divide by zero") } catch { print("An error occurred: (error)") }
In this example, the divideNumbers function may throw a CustomError.divisionByZero error if the divisor is zero. The do block contains the call to divideNumbers using the try keyword, and the catch block handles the specific error case where a division by zero occurs.
Overall, the do-catch statement allows you to safely handle errors that may occur in your code, making your Swift programs more robust and reliable.
How to nest multiple do-catch blocks in Swift?
To nest multiple do-catch blocks in Swift, you can place one or more do-catch blocks inside another do block. Each do block can have its own associated catch block for handling errors that may occur within that specific block. Here's an example of how you can nest multiple do-catch blocks in Swift:
do { try do { // Code that may potentially throw an error let result = try someFunctionThatThrowsError() print("Success: \(result)") } catch { // Handle error from inner do block print("Error from inner block: \(error)") } } catch { // Handle error from outer do block print("Error from outer block: \(error)") }
In the above example, we have an outer do block with its own associated catch block for handling errors that may occur within that block. Inside the outer do block, we have an inner do block with its own associated catch block for handling errors specific to that block. If an error occurs within the inner block, it will be caught and handled by the inner catch block. If an error occurs within the outer block or is propagated from the inner block, it will be caught and handled by the outer catch block.
How to create custom error types to throw in a do-catch block?
To create custom error types to throw in a do-catch block in Swift, you can define a new enum that conforms to the Error protocol. Here's an example of how to create a custom error type:
enum CustomError: Error { case invalidInput case networkError case serverError }
func processData() throws { // Perform some operations that may throw errors throw CustomError.invalidInput }
do { try processData() // Code to handle successful processing } catch CustomError.invalidInput { print("Invalid input error") } catch CustomError.networkError { print("Network error") } catch CustomError.serverError { print("Server error") } catch { print("An unknown error occurred") }
In this example, we defined a custom error type CustomError as an enum that conforms to the Error protocol. The processData function throws an error of type CustomError.invalidInput. In the do-catch block, we catch specific instances of the CustomError enum and handle each error case accordingly. If an unknown error occurs, it will be caught by the generic catch block.
How to create a generic error handler function to use with do-catch blocks?
To create a generic error handler function to use with do-catch blocks in Swift, you can follow these steps:
- Define a function that takes an error as a parameter:
func handleError(error: Error) { print("An error occurred: \(error.localizedDescription)") }
- Use this function in the catch block of your do-catch block to handle errors:
do { // Code that may throw an error try someFunction() } catch { handleError(error: error) }
By using a generic error handler function like this, you can avoid writing repetitive error-handling code in multiple catch blocks and centralize error handling logic in one place. You can customize the handleError function to fit your specific error handling needs, such as logging the error, displaying an alert to the user, or performing additional error handling actions.
How to pass errors between do-catch blocks in a cascading manner?
To pass errors between do-catch blocks in a cascading manner, you can use the try-catch blocks within each other and handle the errors accordingly. Here is an example of how you can pass errors between nested do-catch blocks:
func nestedErrorHandling() { do { try firstFunction() } catch { // Handle error from firstFunction print("Error in firstFunction: \(error)") do { try secondFunction() } catch { // Handle error from secondFunction print("Error in secondFunction: \(error)") } } }
func firstFunction() throws { throw MyError.someError }
func secondFunction() throws { throw MyError.anotherError }
enum MyError: Error { case someError case anotherError }
nestedErrorHandling()
In this example, nestedErrorHandling function calls firstFunction which can potentially throw an error. If an error is thrown, it is caught and handled within the first catch block. Inside the catch block, another function secondFunction is called, which may also throw an error. If an error is thrown in secondFunction, it is caught and handled separately.
By nesting the try-catch blocks, you can pass errors between them in a cascading manner and handle them at each level as needed.
