
Best Ultraportable Laptops for Multiple Monitors to Buy in July 2026
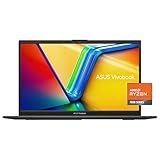
ASUS Vivobook Go 15.6” FHD Slim Laptop, AMD Ryzen 3 7320U Quad Core Processor, 8GB DDR5 RAM, 128GB SSD, Windows 11 Home, Fast Charging, Webcam Sheild, Military Grade Durability, Black, E1504FA-AS33
-
STUNNING 15.6 NANOEDGE DISPLAY FOR VIBRANT VISUALS ANYWHERE.
-
POWERFUL AMD RYZEN 3 FOR SMOOTH MULTITASKING AND PRODUCTIVITY.
-
ULTRA-PORTABLE DESIGN AT JUST 3.59 LBS-PERFECT FOR ON-THE-GO!


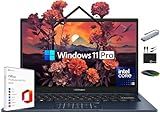
ASUS Vivobook Laptop 2025 Ultra Portable Business Computer, 14" FHD Display, 16GB RAM, 1TB Storage (512GB SSD + 500GB Ext), 6-Core Intel i3-1315U, MarxsolAccessory, Win 11 Pro, Lifetime Office 2024
- UNMATCHED SPEED: 16GB RAM + 1TB STORAGE FOR SEAMLESS MULTITASKING.
- HIGH-PERFORMANCE: 6-CORE INTEL I3 PROCESSOR FOR GAMING & PRODUCTIVITY.
- ENHANCED PRIVACY: FHD DISPLAY WITH INTEGRATED WEBCAM PRIVACY SHIELD.
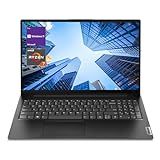
Lenovo V-Series V15 Business Laptop, 15.6" FHD Display, AMD Ryzen 7 7730U, 40GB RAM, 1TB SSD, Numeric Keypad, HDMI, RJ45, Webcam, Wi-Fi, Windows 11 Pro, Black
-
UNMATCHED PERFORMANCE: 40GB RAM & 1TB SSD FOR SEAMLESS MULTITASKING.
-
POWERFUL PROCESSING: AMD RYZEN 7 WITH 8 CORES FOR LIGHTNING-FAST SPEED.
-
ENHANCED DISPLAY: 15.6 FHD FOR VIBRANT VISUALS AND BETTER PRODUCTIVITY.
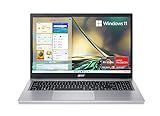
Acer Aspire 3 A315-24P-R7VH Slim Laptop | 15.6" Full HD | AMD Ryzen 3 7320U Quad-Core | AMD Radeon Graphics | 8GB LPDDR5 | 128GB NVMe SSD | Wi-Fi 6 | Windows 11 Home
- SLEEK & LIGHTWEIGHT DESIGN: TRAVEL EASILY WHILE LOOKING STYLISH.
- POWERFUL AMD RYZEN PERFORMANCE: PERFECT FOR MULTITASKING AND FAMILY USE.
- STUNNING FULL HD DISPLAY: ENJOY VIBRANT VISUALS WITH NARROW BEZELS.
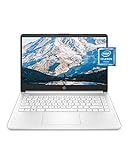
HP 14 Laptop, Intel Celeron N4020, 4 GB RAM, 64 GB Storage, 14-inch Micro-edge HD Display, Windows 11 Home, Thin & Portable, 4K Graphics, One Year of Microsoft 365 (14-dq0040nr, Snowflake White)
- ULTRA-PORTABLE DESIGN WITH 6.5 MM BEZEL FOR ON-THE-GO PRODUCTIVITY!
- ENJOY CRYSTAL-CLEAR VISUALS ON A STUNNING 14-INCH HD DISPLAY!
- POWERFUL DUAL-CORE INTEL CELERON FOR ALL-DAY PERFORMANCE!
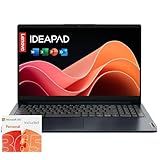
Lenovo IdeaPad 1i Laptop with Microsoft 365 Home and Business • 12GB RAM • 1TB Cloud Storage and 256GB SSD • Intel Core • 15 Anti-Glare Screen • WiFi-6 • 11HR Battery • Windows 11 • w/o Earbuds
- STUNNING 15.6 HD DISPLAY WITH 87% ACTIVE AREA FOR IMMERSIVE VIEWING.
- ENHANCED PRIVACY WITH A PHYSICAL SHUTTER ON THE 720P CAMERA.
- EFFORTLESS MULTITASKING AND SMART FEATURES FOR PRODUCTIVITY ON THE GO.

HP 2025 14 Inch Ultra Light Laptop, Stylish Willow Green, Intel Processor N150, 16GB RAM, 384GB Storage(128GB UFS+256GB MSD), Wi-Fi 6, Windows 11 Pro, Copilot Key, w/Accessories
- POWERFUL INTEL N150: TURBO UP TO 3.6GHZ FOR SUPERIOR PERFORMANCE.
- COMPLETE PORTABLE BUNDLE: INCLUDES WINDOWS 11 PRO AND ESSENTIAL ACCESSORIES.
- AI PRODUCTIVITY BOOSTER: INSTANT ACCESS TO MICROSOFT COPILOT FOR TASKS.
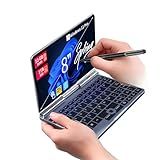
KOOFORWAY 8 Inch 2-in-1 Mini Laptop,HD Rotatable Touch Screen Support Handwriting Windows 11 Pro Small Laptop, N150,12GB RAM, 1TB SSD,Wi-Fi 6, BT 5.2,2 MP Camera,G-Sensor,HDMI,Type C Ultra Pocket PC
-
ULTIMATE PORTABILITY: WEIGHS JUST 0.78 KG; FITS IN BAGS OR POCKETS EASILY.
-
VERSATILE 2-IN-1 DESIGN: INSTANT SWITCH FROM LAPTOP TO TABLET FOR MULTITASKING.
-
POWERFUL PERFORMANCE: N150 PROCESSOR AND 12 GB RAM FOR SMOOTH PRODUCTIVITY.
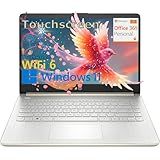
HP Touchscreen Laptop Computer for Home Student Study, 1-Year Office 365, Intel Processor, 14 inch Display, WiFi 6, Bluetooth, Pale Gold, Windows 11 Home S (16GB RAM, 512GB PCIe SSD)
-
SMOOTH PERFORMANCE: INTEL CELERON N4500, UP TO 2.80 GHZ FOR SEAMLESS TASKS.
-
STUNNING DISPLAY: 14 HD TOUCHSCREEN WITH ANTI-GLARE, PERFECT FOR GRAPHICS.
-
PRODUCTIVITY ON-THE-GO: 16GB RAM, 512GB SSD, AND LONG-LASTING BATTERY LIFE.
Ultraportable laptops can support multiple external monitors, but their ability to do so depends on the specific hardware and ports they offer. Many ultraportables come equipped with USB-C or Thunderbolt ports, which can be used to connect to multiple displays through compatible adapters or docking stations. The graphics capabilities of the laptop, including its GPU and drivers, also play a crucial role in determining the number of external monitors it can support as well as the resolution and refresh rates those monitors can achieve. Some ultraportable models, particularly those with integrated graphics, might be limited in how many monitors they can effectively handle. It's important to check the specifications of the ultraportable laptop and any available accessories to ensure compatibility with multiple external monitors.
How to use split-screen for productivity on external displays?
Using split-screen functionality on external displays can significantly boost productivity by allowing you to work on multiple applications simultaneously without needing to constantly switch between windows. Here’s how you can set it up on different operating systems:
Windows
- Connect Your External Display: Ensure your external display is connected to your laptop or desktop computer.
- Extend the Display: Press Windows + P and choose "Extend" to use your external monitor as an additional desktop.
- Use Snap Assist: Drag a window to the left or right edge of your external monitor or press Windows + Left Arrow or Windows + Right Arrow to snap the window to the corresponding side. Windows will then show a thumbnail view of your open applications on the other side of the screen. Click on one to fill the remaining space.
- Adjust Split-Screen: Hover over the line dividing the two windows until the cursor changes, then click and drag to adjust the size of the split.
macOS
- Connect Your External Display: Plug your external monitor into your MacBook or Mac computer.
- Set Up Display Arrangement: Go to System Settings (or System Preferences) > Displays and set the display arrangement to "Extend" rather than "Mirror."
- Use Split View: Open any application and click the green full-screen button in the upper-left corner of the window, then hold. Choose "Tile Window to Left of Screen" or "Tile Window to Right of Screen." Select another window to occupy the other half of the screen.
Linux (Ubuntu with GNOME)
- Connect Your External Display: Use a compatible cable to connect your monitor, then configure it through Settings > Displays if needed.
- Adjust Display Settings: Make sure the display is set to "Join Displays" (similar to Extend).
- Utilize Window Snapping: Drag a window to the left or right edge of your external display, or use shortcuts like Super + Left Arrow or Super + Right Arrow to snap windows.
- Resize the Split: Hover over the border to resize either of the snapped windows as needed.
Tips for All Platforms
- Third-Party Tools: Consider third-party tools and applications for more advanced window management capabilities, like PowerToys for Windows, Magnet for macOS, or Tiling Window extensions for Linux.
- Multiple Monitors: With multiple monitors, you can create split screens on each monitor, multiplying your workspace.
- Keyboard Shortcuts: Familiarize yourself with additional keyboard shortcuts to rapidly position and manage windows across screens.
Incorporating split-screen functionality on external displays will help to organize tasks more efficiently and maintain focus by reducing digital clutter.
How to check if your laptop supports additional monitors?
To determine if your laptop supports additional monitors, follow these steps:
- Check Physical Ports: Examine your laptop for available video output ports such as HDMI, DisplayPort, Mini DisplayPort, USB-C with DisplayPort support, VGA, or Thunderbolt 3/4. Each of these ports can typically support an additional monitor. Modern laptops commonly have HDMI or USB-C ports.
- Consult the Laptop Manual or Specification Sheet: Look at the manual or official spec sheet from the manufacturer's website. It often details what types of external displays are supported.
- Graphics Card Capability: Identify the graphics card in your laptop by checking the Device Manager on Windows or System Information on macOS. Visit the manufacturer's website for the GPU (such as Intel, NVIDIA, or AMD) to determine its support for multiple displays.
- Check Operating System Settings: On Windows, navigate to Settings > System > Display. Connect an external monitor and see if it’s detected under the “Multiple displays” section. On macOS, go to System Preferences > Displays and test if a second monitor is recognized and configurable.
- USB Adapter Compatibility: If your laptop doesn’t have enough video output ports, consider using a USB to HDMI/DisplayPort adapter. Check compatibility with your operating system.
- Docking Station: Some laptops, particularly those intended for business, support docking stations that offer multiple video outputs.
- Review Online Forums and Resources: Other users might share experiences with your specific laptop model in forums, which can be a useful resource for unofficial advice or workarounds.
- BIOS/UEFI Settings: For some older models, you might need to enable multiple monitor support from the BIOS/UEFI settings, though this is uncommon in modern laptops.
By following these steps, you can determine if your laptop supports additional monitors and proceed accordingly.
How to use a wireless display with an ultraportable laptop?
Using a wireless display with an ultraportable laptop can enhance your productivity and entertainment experience by allowing you to extend or mirror your laptop's screen without cumbersome cables. Here’s a step-by-step guide on how to set it up:
- Check Compatibility: Ensure your laptop supports wireless display technology. Most modern laptops support this feature through technologies like Miracast, Intel WiDi, or via adapters like Google Chromecast or Microsoft Wireless Display Adapter.
- Prepare the Wireless Display: Smart TVs: If you have a smart TV, it might already support wireless display. Check the manual or settings menu to enable this feature. Wireless Display Adapter: If your TV or monitor is not a smart device, you can use a wireless display adapter like Chromecast or Microsoft Wireless Display Adapter. Connect it to the HDMI port and a power source (if required) on your TV or monitor.
- Connect to the Wireless Display: On a Windows laptop, open "Settings" and navigate to "Devices" > "Bluetooth & other devices". Click on "Add Bluetooth or other device" and then select "Wireless display or dock". Choose your display from the list of available devices. For Macs, use an Apple TV for AirPlay, which is a similar technology. Open "System Preferences" > "Displays" and select the TV/monitor from the AirPlay Display dropdown.
- Adjust Display Settings: Once connected, you might want to adjust display settings. On Windows, right-click on the desktop and choose "Display settings". From here, select how you want to display on the second screen (duplicate, extend, etc.). On macOS, go to "System Preferences" > "Displays" to set arrangement or mirroring.
- Troubleshoot if Necessary: If you experience issues, ensure both your laptop and wireless display device have the latest firmware and drivers. Restart both devices and try reconnecting. Check if any firewall or antivirus software is blocking the connection.
By following these steps, you should be able to use your ultraportable laptop with a wireless display efficiently. If you encounter persistent problems, consulting the support documentation for your specific devices may provide additional troubleshooting steps.
How to prioritize multiple monitors in settings?
To prioritize multiple monitors in your settings, you'll typically want to adjust the display settings to designate which monitor is primary and how they are oriented. Here’s a general guide for both Windows and macOS systems:
On Windows:
- Right-click on the Desktop: Start by right-clicking on your desktop and selecting "Display settings" from the context menu.
- Identify Your Monitors: At the top of the Display settings window, you’ll see a diagram representing your monitors. Click "Identify" to see the number associated with each monitor displayed on that screen.
- Set as Primary Display: Click on the monitor you want to be your primary display (usually labeled with a number). Scroll down and look for the option that says "Make this my main display." Check this box to set it as the primary monitor. This will be the screen where your taskbar and Start menu appear.
- Arrange Monitors: Drag and drop the monitor icons to match the physical arrangement of your screens. Ensure that they align in a way that helps you move the cursor smoothly from one to another.
- Apply Settings: Once you’re satisfied with the arrangement, click "Apply" to save the changes.
On macOS:
- Open System Preferences: Click on the Apple menu in the top-left corner of the screen and select "System Preferences."
- Go to Displays: Click on "Displays" to open the display settings.
- Arrangement Tab: Navigate to the "Arrangement" tab. Here, you’ll see blue rectangles representing your monitors.
- Set Primary Display: You’ll see a white menu bar at the top of one of the blue rectangles. This indicates the primary display. Drag the white menu bar to the monitor you want to designate as the primary display.
- Arrange Monitors: Adjust the position of the blue rectangles to reflect the physical setup of your monitors.
- Close System Preferences: Once you’re finished, you can simply close the System Preferences window to save your changes.
Following these steps should help prioritize your monitors and set up a comfortable workflow for a multi-monitor setup.