
Best Monitoring Tools to Buy in July 2026
EL-50448 GM TPMS Relearn Tool Chevy TPMS Reset Tool for Cadillac GMC Buick Tire Pressure Relearn Tool Monitoring System Sensor Reset Programming Tool for Chevrolet Cruze Silverado Traverse TPMS Tool
- QUICK & EASY TPMS RESET IN 1-2 MINUTES WITH ONE BUTTON.
- COMPATIBLE WITH 100+ GM VEHICLES FOR MAXIMUM FLEXIBILITY.
- DETAILED INSTRUCTIONS & VIDEO TUTORIALS FOR DIY CONVENIENCE.


VXDAS TPA01 TPMS Relearn Tool for GM, 150PSI Digital Tire Pressure Gauge, 2 in 1 Tire Pressure Monitoring Sensor Activation Tool for Buick/Chevy/Cadillac/Opel Series Vehicles, 2 Mins Quick Reset
-
2-IN-1 TOOL FOR GM VEHICLES: RESET SENSORS & MAINTAIN TIRE PRESSURE.
-
INSTANT, ACCURATE READINGS: SWITCH BETWEEN PSI, BAR, KPA EASILY.
-
SAVE MONEY & TIME: DIY TIRE RESETS, AVOID COSTLY MECHANIC VISITS!

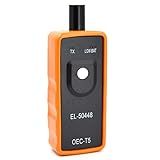
TPMS Relearn Tool for GM Tire Sensor, EL-50448 Auto Tire Monitoring System Activation Reset Tool, Tire Sensor Reset Tool OEC-T5, TPMS Programming Tool for GM Series Vehicles 2006-2024
- QUICKLY RESET TIRE SENSORS IN 1-2 MINUTES FOR OPTIMAL PERFORMANCE.
- COMPATIBLE WITH MOST CARS, SUVS, AND PICKUPS FOR VERSATILE USE.
- DURABLE DESIGN WITH EASY OPERATION SAVES TIME AND SERVICE COSTS.

Ken-Tool 30209 TPMS Sentry Tire Pressure Monitoring Sensor Tool
- DURABLE HARDENED STEEL ENSURES LONG-LASTING PERFORMANCE.
- KNURLED GRIP FOR EASY HANDLING, EVEN IN SLIPPERY CONDITIONS.
- COMPACT DESIGN FITS ANY VALVE STEM-PERFECT FOR ON-THE-GO USE!
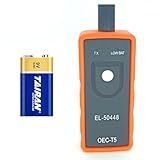
Chevy TPMS Relearn Tool with Battery GM TPMS Relearn Tool Chevy TPMS Reset Tool TPMS Programming Tool for GM Chevrolet Cadillac Buick GMC Tire Pressure Sensor Reset Tool EL 50448
-
READY TO USE: COMES WITH A PRE-INSTALLED 9V BATTERY FOR INSTANT USE.
-
WIDE COMPATIBILITY: SUPPORTS 100+ GM MODELS FOR VERSATILE APPLICATION.
-
USER-FRIENDLY: ONE-BUTTON DESIGN FOR QUICK AND EASY OPERATION.
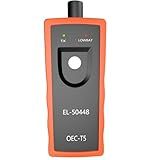
EL-50448 TPMS Relearn Tool Chevy TPMS Reset Tool for Chevrolet Cadillac GMC Buick GM Tire Pressure Sensor Reset Tool Chevy Tire Pressure Monitoring System Sensor Activation Tool TPMS Programming Tool
- COMPATIBLE WITH 100+ GM MODELS: VERSATILE FOR MANY DRIVERS.
- ONE-BUTTON DESIGN: EASY, DIY SETUP SAVES TIME AND MONEY!
- RELIABLE AND SAFE: ENSURES ACCURATE TIRE PRESSURE SENSOR RESETS.
To add a Prometheus data source for Grafana using Helm, follow these steps:
- First, ensure you have Helm installed on your system.
- Open the command prompt or terminal and add the official Grafana Helm repository by running the following command: helm repo add grafana https://grafana.github.io/helm-charts
- Update the helm repositories by executing: helm repo update
- Install Grafana with Helm by running: helm install grafana grafana/grafana
- Verify the installation using: kubectl get pods
- Once the Grafana pod is running, you can access the Grafana UI by port-forwarding the service. Use the following command to achieve this: kubectl port-forward service/grafana- :Replace with the actual namespace where Grafana is deployed, and with the port number on your local system.
- Now, open a browser and visit http://localhost: to access the Grafana dashboard.
- Login with the default username and password, which is usually admin for both. Remember to change the password after the first login.
- Once logged in, go to the Configuration icon (gear icon on the left sidebar), and select "Data sources" under Configuration.
- Click on the "Add data source" button.
- In the data source selection screen, search for "Prometheus" and click on it.
- Configure the Prometheus data source by providing the URL of your Prometheus server. Optionally, you can also set a custom name for the data source.
- Click on the "Save & Test" button. If everything is configured correctly, you should see a success message.
- Now, you have successfully added the Prometheus data source to Grafana using Helm.
You can now start using Prometheus queries and visualizing the data on Grafana dashboards.
How to delete a data source from Grafana?
To delete a data source from Grafana, follow these steps:
- Open Grafana in your web browser and log in to your account.
- In the left-hand menu, click on "Configuration" and then select "Data Sources".
- A list of all the data sources will appear. Locate the data source you want to delete and click on its name to open the settings.
- On the data source settings page, click on the "Delete" button located at the bottom of the page.
- A confirmation dialog box will appear asking if you are sure you want to delete the data source. Click on "Confirm".
- The data source will be deleted and removed from Grafana.
Note: Deleting a data source will permanently remove all associated dashboards, panels, and data queries. Make sure to back up any important data before deleting a data source.
How to configure Grafana dashboards for Prometheus data source?
To configure Grafana dashboards for Prometheus data source, follow these steps:
- Install and configure Prometheus: Before configuring Grafana, ensure you have Prometheus installed and running. Verify that Prometheus is collecting metrics from your target application or system.
- Install Grafana: Download and install Grafana from the official Grafana website. Follow the installation instructions specific to your operating system.
- Access Grafana: Once the installation is complete, access Grafana by opening a browser and navigating to the Grafana URL. By default, the URL is http://localhost:3000/.
- Log in: Log in to Grafana using the default username and password. The default credentials are admin/admin. It is recommended to change the password after the first login.
- Add Prometheus as a data source: After logging in, click on the "Configuration" gear icon on the left-hand menu and select "Data Sources". Click on the "Add data source" button and select "Prometheus" as the data source type.
- Configure Prometheus data source: Provide the necessary details to configure Prometheus as a data source, including a name for the data source, the URL of the Prometheus server (e.g., http://localhost:9090/), and any required authentication details.
- Save and test the configuration: Click on the "Save & Test" button to save the configuration and test the connection to Prometheus. If the configuration is correct, you should see a success message.
- Create a new dashboard: To create a new dashboard, click on the "+" icon on the left-hand menu and select "Dashboard". Choose "Add new panel", which will open the panel editor.
- Add visualizations: In the panel editor, you can add various visualizations like graphs, single stats, tables, etc. Under the "Metrics" tab, select the Prometheus data source you configured earlier.
- Query Prometheus data: Use the query editor to define the Prometheus queries for the desired metrics. You can select metrics, add functions, and apply filters to create the desired visualization.
- Customize the dashboard: Customize the dashboard layout, add additional panels, and configure various options like time range, panel titles, legends, etc., to meet your specific requirements.
- Save the dashboard: Once you have configured the dashboard to your satisfaction, click on the "Save" button to save the dashboard. Provide a name for the dashboard and optionally specify a folder to organize your dashboards.
- Explore and share the dashboard: Explore your newly created dashboard, make any further adjustments if needed, and share it with others by providing them with the dashboard URL or embedding it in other applications.
By following these steps, you can configure Grafana dashboards to visualize data from a Prometheus data source.
How to install Grafana using Helm?
To install Grafana using Helm, follow the steps below:
- Initialize Helm: If you haven't already done so, initialize Helm on your Kubernetes cluster by running helm init.
- Add the official Grafana repository: Add the official Grafana Helm chart repository by running the following command: helm repo add grafana https://grafana.github.io/helm-charts
- Update Helm repositories: Make sure the Helm repositories are up to date by running helm repo update.
- Install Grafana: Use the Helm install command to install Grafana, providing a release name and specifying the chart from the Grafana repository: helm install grafana/grafana This will install Grafana with default configuration values. You can customize the installation by specifying different values using the --set flag, or by providing a values.yaml file with your desired configuration.
- Access Grafana: To access Grafana, you need to retrieve the admin password. You can do this by running: kubectl get secret --namespace -grafana -o jsonpath="{.data.admin-password}" | base64 --decode ; echo Replace with the namespace where Grafana is installed, and with the name you provided in Step 4. After retrieving the password, you can access Grafana using its service URL. To find the URL, run: kubectl get svc --namespace -grafana Look for the EXTERNAL-IP or CLUSTER-IP depending on your Kubernetes cluster, and use this IP along with the port (default is 3000) to access Grafana in your browser.
That's it! You have now successfully installed Grafana using Helm.