
Best Grafana Dashboard Tools to Buy in July 2026
Getting Started with Grafana: Real-Time Dashboards for IT and Business Operations


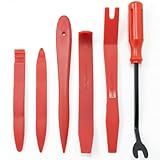
EldHus 5 Pcs Car Trim Removal Tool Kit Upholstery Tools, Auto Clip Removal Pry Tool for Door Dash Dashboard Panel Fastener Remover, Push Pin Puller Body Repair Tools, Black
- 5-PIECE TOOL SET FOR EASY RIVET & FASTENER REMOVAL-MUST-HAVE!
- ERGONOMIC DESIGN & ANTI-SLIP GRIP FOR EFFORTLESS USE AND EFFICIENCY.
- DURABLE BUILD ENSURES RELIABLE PERFORMANCE WITHOUT BREAKING TOOLS.
GOOACC 11PCS Trim Removal Tool Kit, Metal & Nylon Pry Tools Set for Car Door Panel, Dashboard, Audio, Clips, Fastener Remover w/Storage Box – Blue
-
VERSATILE KIT: 11 TOOLS FOR EASY CAR PANEL & INTERIOR REPAIR/INSTALLATION.
-
ERGONOMIC DESIGN: COMFORTABLE ANTI-SLIP GRIP FOR SAFER, PRECISE USE.
-
HASSLE-FREE REMOVAL: EASILY ELIMINATE CLIPS AND FASTENERS WITHOUT DAMAGE.

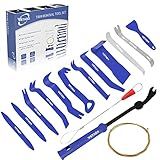
Poraxy 19Pcs Trim Removal Tool, Car Panel Dashboard Door Audio Trim Removal Tool Kit, Auto Clip Pliers Fastener Remover Set, Plastic Pry Tool, Automotive Upholstery Removal Kit
-
VERSATILE 19-PIECE SET: PERFECT FOR CAR AUDIO, PANELS, AND FURNITURE!
-
DURABLE NYLON TOOLS: NON-DESTRUCTIVE PRYING FOR SAFE MODIFICATIONS.
-
ERGONOMIC & PORTABLE: EASY GRIP DESIGN AND COMES WITH A HANDY BAG.
Practical Observability with Grafana and Prometheus: The Definitive Guide: From Zero to Dashboard: How to monitor applications, build smart alerts, and ... (Modern Cloud & DevOps Engineering Book 5)
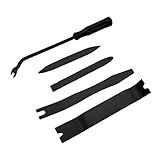
Sunplustrade Auto Trim Removal Tool Set (No Scratch Plastic Pry Tool Kit) - Auto Trim Tool Kit Car Tools, Easy Door Panel Removal Tool, Fastener Removal, Clip, Molding, Dashboards, Interior Trim Tools
- DURABLE NYLON FIBER WON’T BREAK UNDER PRESSURE LIKE ABS TOOLS.
- UNIVERSAL FIT FOR CARS, BOATS, AND RVS-TRULY VERSATILE!
- INCLUDES FASTENER REMOVER FOR EASY INTERIOR CLIP REMOVAL.
Ziciner 5 PCS Auto Trim Removal Tool Kit, No Scratch Car Door Panel Removal Tool, Plastic Clip Fastener Remover Pry Tool Set for Audio Dashboard Dismantle, Car Accessories (Black)
- VERSATILE SET: INCLUDES 5 TOOLS FOR VARIOUS DISASSEMBLY NEEDS.
- DURABLE & SAFE: MADE FROM STRONG PP, WON’T SCRATCH OR DAMAGE SURFACES.
- ERGONOMIC DESIGN: LIGHTWEIGHT AND EASY TO USE, MAXIMIZING EFFICIENCY.
Auto Trim Removal Tools Kit, Wetado 15Pcs Car Panel Removal Tool Interior Trim Kit Fastener Rivet Remover Plastic Pry Tool Set - Metal Removal of Car Molding, Dashboards, Wheel Hubs
- VERSATILE 15PCS SET FOR EASY CAR TRIM AND PANEL REMOVAL.
- DURABLE DUAL-HEAD TOOLS FOR STRONGER, EFFICIENT PRYING POWER.
- SAFE, NYLON CONSTRUCTION PROTECTS YOUR CAR'S FINISH FROM SCRATCHES.
To add multiple panels to Grafana, you can click on the "+" icon in the dashboard editor, which will allow you to add a new panel. You can then choose the type of panel you want to add and configure its settings and visualization options. Repeat this process for each additional panel you want to add to your Grafana dashboard. You can also drag and drop panels to rearrange their placement on the dashboard. Additionally, you can use the grid layout feature in Grafana to create multiple rows and columns for organizing and displaying your panels in a visually appealing way.
How do I add annotations to panels in Grafana?
To add annotations to panels in Grafana, follow these steps:
- Navigate to the dashboard where you want to add annotations.
- Click on the panel where you want to add the annotation.
- In the top right corner of the panel, click on the "Edit" button (pencil icon).
- In the panel editor, click on the "Annotations" tab.
- Click on the "New annotation" button.
- In the annotation editor, fill in the required fields such as Title, Text, Tags, and Annotation query.
- You can also configure the appearance of the annotation using options like Color, Icon, and Show line.
- Click on the "Add" button to save the annotation.
- Click on the "Save" button in the panel editor to apply the changes to the panel.
Your annotation should now be visible on the panel in Grafana.
What are the options for panel configuration in Grafana?
- Singlestat Panel: Displays a single value from a query result.
- Graph Panel: Displays time-series data as a line or bar graph.
- Table Panel: Displays query results in a tabular format.
- Gauge Panel: Displays a value as a gauge with customizable ranges and thresholds.
- Heatmap Panel: Visualizes data as a heatmap based on a query result.
- Bar Gauge Panel: Displays a single value as a bar gauge with customizable thresholds.
- Alert List Panel: Displays a list of triggered alerts.
- Pie Chart Panel: Displays data as a pie chart.
- Status Panel: Displays the status of individual components or services.
- Text Panel: Allows you to add custom text or HTML to your dashboard.
- Plugin Panels: Grafana supports a wide range of community-developed plugins that provide additional panel configurations and visualization options.
What are the options for panel layout in Grafana?
There are several options for panel layout in Grafana:
- Single Stat: Displays a single value with a large font size.
- Graph: Displays a time series graph for one or more metrics.
- Pie Chart: Displays data in a circular graph divided into slices to represent numerical proportions.
- Table: Displays data in tabular format.
- Gauge: Displays a gauge that represents a single value within a specified range.
- Bar Gauge: Displays a horizontal or vertical bar graph representing a single value within a specified range.
- Heatmap: Displays data using a color scale to represent values within a matrix.
- Alert List: Displays a list of alerts triggered by monitored metrics.
- Logs: Displays log data in a tabular format.
- Status Panel: Displays a panel with custom text or image to represent the status of a system or service.
These are just a few examples of the panel layouts available in Grafana. Each panel type has its own unique visualization and can be customized to display data in a way that best suits your needs.
What features can I use to enhance my panels in Grafana?
- Annotations: Annotations can be used to add context to your panels, such as events or incidents that may have affected your data. This can help provide more insights and context to your dashboard.
- Thresholds: Thresholds allow you to visually highlight areas of interest in your data by setting upper and lower limits. This can help draw attention to data points that fall outside of the expected range.
- Links: You can add links to your panels that can redirect users to other dashboards or external URLs for further analysis or information.
- Styling options: Grafana offers various styling options such as custom colors, font sizes, and background colors to help make your panels visually appealing and easy to read.
- Templating: Templating allows you to create dynamic and customizable dashboards by using variables. This can help you easily switch between different datasets or time ranges without having to manually update each panel.
- Custom query options: Grafana allows you to write custom queries using SQL, Prometheus, or other query languages to extract and visualize data from your data sources in a more flexible and powerful way.
- Time series functions: Grafana offers a wide range of built-in functions that can help you manipulate and analyze your time series data. These functions can be used to perform calculations, aggregations, and transformations on your data before visualizing it in your panels.