
Best Map Visualization Tools to Buy in July 2026
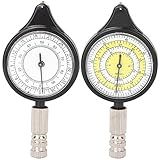
MOUMOUTEN Map Measurer, Old Fashioned Mini Outdoor Map Measurer Distance Caculator Mapping Tool, Measures The Distance Between 2 Points in Map, for Hiking, Camping, Traveling
- USER-FRIENDLY DESIGN: EFFORTLESSLY MEASURE DISTANCES ON MAPS.
- DURABLE BUILD: STURDY METAL AND PLASTIC FOR LONG-LASTING USE.
- TRAVEL ESSENTIAL: PERFECT FOR QUICK DISTANCE CALCULATIONS ON-THE-GO.


Lunar Terminator Visualization Tool (LTVT) A Guide
Interactive Data Visualization for the Web: An Introduction to Designing with D3
Bible Story Map Poster (Laminated) – 18" x 24" Educational & Kid-Friendly Christian Learning Tool for Classrooms, Homeschool, and Sunday School Embark on a Journey Through Biblical History
- KID-FRIENDLY DESIGN WITH 70 ILLUSTRATIONS BRINGS BIBLE STORIES TO LIFE.
- AVAILABLE IN TWO SIZES; PERFECT FOR CLASSROOMS OR BEDROOM DECOR.
- ENHANCES LEARNING WITH DETAILED BIBLICAL GEOGRAPHY FOR ALL AGES.
Guatemala Map (National Geographic Adventure Map, 3110)
![MindManager Professional | 1 Year Subscription | Powerful Visualization Tools and Mind Mapping Software [PC/Mac Download]](https://cdn.blogweb.me/1/31h_Vcr_J_8_L_SL_160_0eb78f238d.jpg)
MindManager Professional | 1 Year Subscription | Powerful Visualization Tools and Mind Mapping Software [PC/Mac Download]
- TRANSFORM IDEAS INTO VISUAL MAPS: STREAMLINE BRAINSTORMING AND PLANNING.
- COLLABORATE IN REAL-TIME WITH MICROSOFT TEAMS AND SEAMLESS SHARING TOOLS.
- ENHANCE PROJECT WORKFLOWS WITH GANTT CHARTS AND CUSTOMIZABLE TEMPLATES.
Truthful Art, The: Data, Charts, and Maps for Communication (Voices That Matter)
To create a map visualization in D3.js, you first need to obtain a GeoJSON file that contains the geographical data you want to display on the map. This file should include the coordinates of the boundaries of the areas you want to visualize.
Next, you will need to set up a basic HTML file that includes the necessary scripts to load D3.js and any other libraries you may want to use for mapping. You will also need to create an SVG element in your HTML file where you will render the map visualization.
Using D3.js, you can load the GeoJSON file using the d3.json() function and then bind the data to SVG elements to create your map. You can use D3.js functions like d3.geoPath() to convert the GeoJSON data into SVG path elements that represent the boundaries of the geographical areas on the map.
You can customize the map visualization by styling the SVG elements using CSS and adding interactivity using D3.js event listeners. You can also add additional elements like legends, tooltips, or data labels to enhance the visualization.
Once you have created your map visualization in D3.js, you can publish it online or embed it in a web page to share it with others. D3.js provides powerful tools for creating interactive and visually appealing map visualizations that can be used for various data visualization and storytelling purposes.
How to create a choropleth map in D3.js?
To create a choropleth map in D3.js, follow these steps:
- Prepare the GeoJSON data: First, you'll need GeoJSON data for the regions you want to display on the map. You can find GeoJSON data for various regions online, or create your own using tools like QGIS or geojson.io.
- Set up your HTML document: Create an HTML document with the necessary elements for creating the map, including an svg element that will contain the map.
- Set up the SVG: Use D3.js to create an SVG element within your HTML document that will display the map. Specify the width and height of the SVG element based on your design requirements.
- Load the GeoJSON data: Use D3.js to load the GeoJSON data for the regions you want to display on the map. You can use the d3.json() function to asynchronously load the GeoJSON data from a file or URL.
- Create a projection: Define a geographic projection using D3.js to transform the coordinates of the GeoJSON data into positions on the SVG element. You can use projection functions like d3.geoMercator() or d3.geoAlbers() to create different types of projections.
- Create a color scale: Define a color scale using D3.js to assign colors to different values or ranges of values in your dataset. You can use functions like d3.scaleLinear() or d3.scaleQuantile() to create a color scale based on your data.
- Draw the map: Use D3.js to draw the map on the SVG element by binding the GeoJSON data to SVG path elements and applying the geographic projection to transform the coordinates. Use the color scale to assign colors to the regions based on their data values.
- Add a legend: Optionally, you can add a legend to your choropleth map to help viewers understand the color scale and the corresponding data values.
By following these steps, you can create a choropleth map in D3.js that effectively visualizes geographic data with color-coded regions.
How to create interactive filters for a map visualization in D3.js?
To create interactive filters for a map visualization in D3.js, you can follow these steps:
- Determine the data you want to display on the map and load it into your D3.js code.
- Create the map visualization using D3.js. This can be done by loading a GeoJSON file with the map data or using a map library like Leaflet.js.
- Add elements to the map that will act as filters. This could be buttons, dropdown menus, checkboxes, or sliders.
- Add event listeners to these filter elements so that when they are interacted with (clicked, selected, etc.), the map data is filtered accordingly.
- Implement JavaScript functions that will update the map based on the selected filter criteria. This might involve filtering the data based on certain attributes or properties.
- Update the map visualization based on the filtered data. This could involve changing the color, size, or opacity of the map elements based on the filter criteria.
- Test the interactive filters to make sure they are working as intended and provide a good user experience.
- Consider adding additional interactive features, such as tooltips or legends, to enhance the map visualization.
By following these steps, you can create interactive filters for a map visualization in D3.js that allow users to dynamically explore and interact with the data on the map.
What is the best way to share and publish a map visualization created in D3.js?
There are several ways to share and publish a map visualization created in D3.js:
- Embedding: You can embed the D3.js code directly into a web page or blog post by copying and pasting the code into the HTML file. This allows you to easily share the visualization on your website or blog.
- GitHub: If you have the D3.js code saved in a GitHub repository, you can share the visualization by providing a link to the repository. This allows others to view and download the code for the visualization.
- CodePen: CodePen is a popular online code editor that allows you to create and share interactive D3.js visualizations. You can easily create a CodePen project with your D3.js code and share the link with others.
- Visual Studio Code Live Server: If you are using Visual Studio Code as your code editor, you can use the Live Server extension to quickly launch your visualization in a local server. You can then share the local server link with others to view the visualization.
- Publishing to a web hosting service: If you have a domain or web hosting service, you can upload the D3.js visualization files to the server and share the link to the visualization.
Ultimately, the best way to share and publish a map visualization created in D3.js will depend on your specific needs and preferences. Consider the audience you want to reach and the level of interactivity you want to provide when choosing the best method for sharing your visualization.
How to integrate external APIs with a map visualization in D3.js?
To integrate external APIs with a map visualization in D3.js, you can follow these steps:
- Obtain API key: First, you need to obtain an API key from the provider of the API you want to use for map data. This key will allow you to access and retrieve data from the API.
- Make API calls: Use JavaScript's fetch() or XMLHttpRequest to make API calls to retrieve the data you need for the map visualization. You can pass parameters like latitude, longitude, zoom level, etc. to get specific data for your map.
- Parse API response: Once you receive the data from the API in JSON format, parse it to extract the relevant information for your map visualization.
- Render map using D3.js: Use D3.js to render the map visualization on your webpage. You can use GeoJSON data or TopoJSON data to create map elements like paths, points, polygons, etc. and style them according to the data obtained from the API.
- Update the map dynamically: You can update the map dynamically by making periodic API calls to fetch real-time data or by allowing users to interact with the map and trigger API calls based on their actions.
- Handle errors and exceptions: Make sure to handle error responses from the API gracefully in your code. You can display error messages to users or fallback to default data if API calls fail.
By following these steps, you can integrate external APIs with a map visualization in D3.js and create interactive and dynamic maps on your website.
What are the limitations of using D3.js for map visualizations?
- Steeper learning curve: D3.js is a complex and powerful library that requires a solid understanding of JavaScript and SVG (Scalable Vector Graphics) to use effectively. This can make it challenging for beginners to create map visualizations.
- Performance issues: D3.js is known for being slower and less efficient than other mapping libraries such as Leaflet or Google Maps API, especially when dealing with large datasets or complex visualizations.
- Lack of out-of-the-box features: Unlike other mapping libraries that come with pre-built features and functionalities, D3.js requires users to create custom code for almost every aspect of the map visualization, including zooming, panning, and labeling.
- Browser compatibility issues: D3.js may not work as expected on older browsers or on certain mobile devices, leading to inconsistent user experiences.
- Limited documentation and community support: D3.js has a smaller user base compared to other mapping libraries, which can make it difficult to find help or resources when encountering problems or trying to implement advanced features.
- No built-in map tile services: D3.js does not include built-in support for map tile services, which means users have to manually source and integrate map tiles from third-party providers, adding complexity to the process.
How to add interactivity to a map visualization in D3.js?
To add interactivity to a map visualization in D3.js, you can follow these steps:
- Add event listeners: Use D3.js to attach event listeners, such as click or mouseover, to the map elements you want to make interactive. This will allow you to trigger functions when a user interacts with the map.
- Change styles on interaction: Define functions that change the styles, such as colors or opacity, of the map elements when a user interacts with them. This can help to provide visual feedback and highlight the selected elements.
- Display information: Create popups or tooltips that display additional information about the map elements when a user interacts with them. This can help to provide context and enhance the user experience.
- Filter and update data: Implement filtering functionality to allow users to interactively explore different aspects of the data on the map. This can involve updating the displayed data based on user inputs or selections.
- Use animations: Incorporate animations to make the interactive elements more engaging and visually appealing. This can include transitions between different states or highlighting specific changes on the map.
By implementing these techniques, you can enhance the interactivity of your map visualization in D3.js and provide users with a more engaging and informative experience.