
Best Android App Development Tools Using Delphi to Buy in July 2026

Android App Development For Dummies


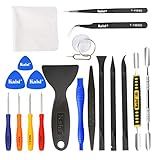
Kaisi Professional Electronics Opening Pry Tool Repair Kit with Metal Spudger Non-Abrasive Nylon Spudgers and Anti-Static Tweezers for Cellphone iPhone Laptops Tablets and More, 20 Piece
- COMPREHENSIVE 20-PIECE KIT FOR ALL ELECTRONICS REPAIR NEEDS.
- DURABLE STAINLESS STEEL TOOLS FOR RELIABLE, LONG-LASTING USE.
- INCLUDES CLEANING CLOTH FOR A SPOTLESS FINISH AFTER REPAIRS.
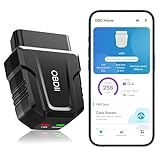
OBD2 Scanner Reader Bluetooth Wireless Auto Diagnostic Scan Tool for iOS & Android for Performance Test Bluetooth 5.4 Car Check Engine Car Code Reader, Clear Error Code Live Data Reset Exclusive APP
-
COMPREHENSIVE DIAGNOSTICS: COMPLETE VEHICLE ASSESSMENT WITH 9 PROTOCOLS!
-
USER-FRIENDLY: INTUITIVE APP GUIDES DIAGNOSTICS, SAVES REPAIR COSTS!
-
BROAD COMPATIBILITY: WORKS WITH 96% OF VEHICLES, SUPPORTS MULTIPLE LANGUAGES!

Head First Android Development: A Learner's Guide to Building Android Apps with Kotlin

How to Build a Billion Dollar App

App Inventor 2: Create Your Own Android Apps

Android App Design & Development for Beginners: A Practical Guide to Building Real Apps from Scratch

User Interface Development for Android App Using Kotlin and Jetpack Compose: Maize Info App as an Example
To create Android apps using Delphi, you need to follow a few key steps.
First, you need to have Embarcadero Delphi installed on your computer. Delphi is a powerful cross-platform development tool that allows you to build applications for multiple platforms, including Android.
Once you have Delphi installed, open the IDE (Integrated Development Environment) and start a new project. From the project templates, select "Mobile Application" to create a new Android app.
Next, you'll need to design the user interface of your app. Delphi provides a drag-and-drop interface designer, where you can add, position, and customize various user interface components such as buttons, labels, text boxes, and more. You can also make use of pre-built UI templates or create your own custom designs.
After designing the user interface, it's time to add functionality to your app. Delphi uses the Object Pascal programming language for development, so you'll need to write Pascal code to implement different features. You can handle button clicks, process user input, perform calculations, access APIs, and perform other tasks by writing Pascal code.
Delphi comes with a variety of components and libraries that you can use to enhance your app's capabilities. These include database components, web services components, sensor components, and more. You can easily integrate these components into your app to add desired functionality.
To test your app, you can use the Delphi emulator or connect an actual Android device to your computer. Delphi provides tools for deploying and running your app directly on a connected Android device for testing and debugging.
Once you are satisfied with your app's functionality and design, you can proceed to build and distribute your Android app. Delphi offers various options to package your app, such as generating an APK (Android Package) file, which can be installed on Android devices.
In summary, Delphi provides a comprehensive development environment for creating Android apps. It includes a visual UI designer, a powerful programming language, a wide range of components, and tools for testing and deployment. Using Delphi, you can build Android apps with ease and efficiency.
How do I design the user interface for an Android app in Delphi?
To design the user interface for an Android app in Delphi, you can follow these steps:
- Open Delphi and create a new Android Application project.
- In the Project Manager, expand the "Project files" node and locate the "MainForm" item.
- Double-click on the "MainForm" item to open the form designer.
- The form designer will show a blank form. From the "Tool palette" on the left side, you can drag and drop various components to design your interface. Delphi provides a wide range of components like buttons, labels, text boxes, etc.
- Arrange and position the components on the form as desired by dragging them and resizing them.
- Use the "Properties" window to set properties for each component. You can change properties like text, color, size, etc., to customize the appearance.
- Add event handlers to the components by double-clicking on them. This will generate an event handler procedure where you can write the code to handle events such as button clicks or text changes.
- You can also access additional components and settings from the "Structure" pane on the right side of the form designer.
- Test your interface by running the application on an Android device or emulator. Click on the green "Run" button in the toolbar to build and deploy the app.
- Once deployed, interact with the app on the Android device or emulator to see how the interface behaves. Make any necessary adjustments and repeat the testing process if needed.
By following these steps, you can design the user interface for your Android app using Delphi.
Can Delphi be used for Android app development?
Yes, Delphi can be used for Android app development. Delphi is a versatile development tool that supports cross-platform app development, including Android. With Delphi, developers can write code once and deploy it on multiple platforms, including Android, iOS, Windows, and macOS. Delphi provides developers with the necessary tools and resources to create native Android apps efficiently.
How do I add functionality to my Android app using Delphi?
To add functionality to your Android app using Delphi, you can follow these steps:
- Open your Delphi IDE and create a new Android project or open an existing one.
- Identify the functionality you want to add to your app. This could be anything from accessing device features like camera or GPS, integrating with APIs, or implementing custom features.
- Determine the appropriate components or libraries to use for the desired functionality. Delphi provides a wide range of components and libraries that you can leverage. You can also use third-party libraries if needed.
- Add the required components to your project. To add a component, go to the "Tool Palette" in Delphi, find the desired component under the relevant category, and drag it onto your app's form.
- Configure the component's properties to suit your requirements. Most components have properties that can be set through the Object Inspector. Customize these properties as necessary.
- Write code to handle the component's events or methods. Components often have events that can be triggered when specific actions occur, such as button clicks or data retrieval. Implement event handlers to respond to these events or call methods to achieve the desired functionality.
- Test your app on an Android device or emulator. Build and deploy your app to an Android device or emulator to verify that the added functionality works as expected. Debug any issues that arise and make necessary adjustments to your code.
- Iterate and refine as needed. Refine your functionality implementation based on user feedback or any issues encountered during testing. Update and enhance your code accordingly, and continue testing until you are satisfied with the results.
Remember to refer to the Delphi documentation and resources, such as forums and tutorials, for specific implementation details and additional guidance.