
Best Tools to Create Grafana Dashboards to Buy in July 2026

Practical Observability with Grafana and Prometheus: The Definitive Guide: From Zero to Dashboard: How to monitor applications, build smart alerts, and ... (Modern Cloud & DevOps Engineering Book 5)


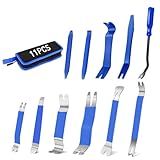
GOOACC 11PCS Trim Removal Tool Kit, Metal & Nylon Pry Tools Set for Car Door Panel, Dashboard, Audio, Clips, Fastener Remover w/Storage Box – Blue
-
11-PIECE TOOL SET FOR EFFORTLESS CAR PANEL REPAIR & INSTALLATION.
-
ERGONOMIC, ANTI-SLIP DESIGN PREVENTS TOOL SLIPPAGE DURING USE.
-
EASILY REMOVE CLIPS & FASTENERS WITHOUT BREAKING THEM.
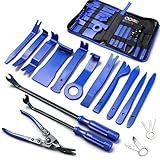
Poraxy 19Pcs Trim Removal Tool, Car Panel Dashboard Door Audio Trim Removal Tool Kit, Auto Clip Pliers Fastener Remover Set, Plastic Pry Tool, Automotive Upholstery Removal Kit
-
VERSATILE USE: PERFECT FOR CAR AUDIO INSTALLS, PANEL REMOVALS, AND REPAIRS.
-
DURABLE MATERIAL: TOUGHENED NYLON ENSURES NON-DESTRUCTIVE PRYING.
-
CONVENIENT STORAGE: COMES WITH A ZIPPERED BAG FOR EASY ORGANIZATION.
Getting Started with Grafana: Real-Time Dashboards for IT and Business Operations

Sunplustrade Auto Trim Removal Tool Set (No Scratch Plastic Pry Tool Kit) - Auto Trim Tool Kit Car Tools, Easy Door Panel Removal Tool, Fastener Removal, Clip, Molding, Dashboards, Interior Trim Tools
-
DURABLE NYLON FIBER PREVENTS BREAKAGE UNDER PRESSURE; BUILT TO LAST!
-
UNIVERSAL FIT FOR ALL VEHICLES: CARS, BOATS, AND RVS INCLUDED!
-
VERSATILE SHAPES TACKLE HARD-TO-REACH AREAS EFFORTLESSLY!

Ziciner 5 PCS Auto Trim Removal Tool Kit, No Scratch Car Door Panel Removal Tool, Plastic Clip Fastener Remover Pry Tool Set for Audio Dashboard Dismantle, Car Accessories (Black)
-
VERSATILE TOOL SET: 5 ESSENTIAL TOOLS FOR DIVERSE DISASSEMBLY TASKS.
-
DURABLE & SAFE: STRONG PP MATERIAL PREVENTS SCRATCHES AND DAMAGE.
-
ERGONOMIC DESIGN: LIGHTWEIGHT SHAPE ENHANCES COMFORT AND EFFICIENCY.
To create a Grafana dashboard without a time range, you can simply remove the time range picker from the dashboard settings. By default, Grafana includes a time range picker that allows users to choose a specific time range for the data displayed on the dashboard. However, if you do not want to use a time range for your dashboard, you can customize the settings to hide or disable the time range picker.
Additionally, you can also set a fixed time range for the data displayed on the dashboard by using a fixed time filter in the query or panel settings. This will ensure that the data shown on the dashboard remains constant and does not change based on the current time range.
Overall, creating a Grafana dashboard without a time range is possible by customizing the settings to remove or hide the time range picker and by setting a fixed time range for the data displayed on the dashboard.
What is the effect of omitting a time range in a Grafana dashboard configuration?
Omitting a time range in a Grafana dashboard configuration will result in the dashboard showing data for the default time range specified in the dashboard settings. This default time range could be the last 6 hours, 24 hours, 7 days, or a custom time range. Without specifying a time range, the dashboard will display data based on this default setting.
What is the difference between a time-free and time-bound Grafana dashboard?
A time-free Grafana dashboard does not have any time constraints set, meaning that the data displayed on the dashboard is not limited by a specific time range. Users can view data across all time periods without any restrictions.
On the other hand, a time-bound Grafana dashboard has a specified time range for the data displayed on the dashboard. Users are limited to viewing data only within the set time range, which can be customized based on specific time periods such as hours, days, weeks, or months.
In summary, the main difference between a time-free and time-bound Grafana dashboard is the presence or absence of a specified time range for the data displayed on the dashboard.
How to set up data refresh intervals in a time-free Grafana dashboard?
To set up data refresh intervals in a time-free Grafana dashboard, you can follow these steps:
- Access the Grafana dashboard you want to configure.
- Click on the dashboard settings icon in the top menu bar (it looks like a gear).
- In the dashboard settings menu, select the "Settings" option.
- Scroll down to find the "Time Picker" section.
- In the "Time Picker" section, you will see an option for setting the refresh interval. By default, it is set to "Off".
- Click on the drop-down menu next to "Off" and choose the desired refresh interval. You can select intervals like 5 seconds, 10 seconds, 30 seconds, 1 minute, etc.
- Save your changes by clicking on the "Save" button at the bottom of the settings menu.
Once you have set the refresh interval, your Grafana dashboard will automatically refresh the data at the specified interval without relying on any time range selection. This can be useful for real-time monitoring and staying up-to-date with the latest data.
How to schedule automated report generation from a time-free Grafana dashboard?
To schedule automated report generation from a Grafana dashboard that doesn't have a specific time frame, you can use the following steps:
- Use Grafana's built-in feature to create a snapshot of the dashboard you want to generate a report from. You can do this by clicking on the "Share" button at the top right corner of the dashboard and selecting the "Snapshot" option.
- Once you have created a snapshot of the dashboard, you can use an external tool or service that allows you to schedule automated tasks, such as Cron jobs or a cloud-based automation platform like Zapier or IFTTT.
- Set up the scheduled task to run at the desired frequency, such as daily, weekly, or monthly, depending on when you want the report to be generated.
- In the scheduled task, specify the URL of the snapshot of the Grafana dashboard that you created in step 1. This URL will be used to fetch the snapshot and generate the report automatically.
- Configure the scheduled task to download the snapshot from the specified URL, and save it in a location of your choice, such as a shared drive or cloud storage.
- You can also set up additional actions in the scheduled task, such as sending the generated report via email or uploading it to a specific location for easy access by other team members.
By following these steps, you can easily schedule automated report generation from a time-free Grafana dashboard, ensuring that the necessary data and insights are available to you and your team on a regular basis.