Best Email Display Tools to Buy in July 2026
Datacolor SpyderExpress – Easy Monitor Calibration for Photo, Design & Content Creation, Supports MacBook M4 mini-LED, Calibrates 3 Displays, Fast 90-Second Setup, Upgradeable Software
- ACHIEVE TRUE-TO-LIFE COLOR IN JUST 90 SECONDS FOR QUICK EDITS.
- SUPPORTS THE LATEST LIQUID RETINA XDR DISPLAYS FOR VIBRANT VISUALS.
- UPGRADE SOFTWARE EASILY FOR ADVANCED FEATURES, NO NEW HARDWARE NEEDED.


GeeekPi Micro Python Programing Kit for Raspberry Pi Pico, Breadboard, I2C 1602 LCD Display Module for Raspberry Pi Beginners & Software Engineer
- COMPLETE KIT WITH QUALITY MODULES FOR RASPBERRY PI PICO PROJECTS!
- LEARN PYTHON & EMBEDDED SYSTEMS WITH HANDS-ON EXPERIMENTS.
- FREE DETAILED MANUAL AND DOWNLOADABLE TUTORIALS FOR YOUR SUCCESS!
Individual Software AnyTime Organizer Standard 16 - Organize Your Calendar, To-Do’s and Contacts!
-
SEAMLESSLY INTEGRATES WITH WINDOWS 11, 10, & 8 FOR ULTIMATE CONVENIENCE.
-
EFFORTLESSLY ORGANIZE WORK & PERSONAL SCHEDULES WITH MULTIPLE CALENDARS.
-
CREATE CUSTOM PDFS OF YOUR LAYOUTS AND SHARE THEM EASILY VIA EMAIL.
Professor Teaches Office 2019 & Windows 11 Computer Training - Software for Microsoft Office & Windows 11 Includes Interactive Training for Word, Excel, PowerPoint, Outlook, Windows 11, & More – CD
-
COMPREHENSIVE TRAINING FOR WINDOWS 11, 10, & 8 – START MASTERING NOW!
-
HANDS-ON SIMULATIONS MAKE LEARNING OFFICE 2019 EASY AND ENGAGING.
-
INTERACTIVE QUIZZES ENSURE 100% RETENTION OF THE MATERIAL LEARNED!
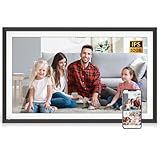
15.6-inch Smart Picture Frame Digital Calendar - 1920x1080 Pixel IPS Touch Screen Display, 32GB Memory, Share Photo and Video via App Email, Free Cloud Storage, Best Gifts for Women Men
- EFFORTLESSLY ORGANIZE FAMILY SCHEDULES WITH OUR COLOR-CODED CALENDAR.
- INSTANT PHOTO SHARING VIA 2.4G/5G WIFI FOR SEAMLESS CONNECTIVITY.
- GENEROUS 32GB STORAGE LETS YOU SHOWCASE AND UPLOAD 50 IMAGES EASILY.
Adobe Dreamweaver | Website and web design software | 12-month Subscription with auto-renewal, PC/Mac
- RAPIDLY CREATE BEAUTIFUL, RESPONSIVE WEBSITES FOR ANY DEVICE.
- SIMPLIFIED CODING TOOLS STREAMLINE SITE MANAGEMENT AND REDUCE ERRORS.
- CUSTOMIZE STARTER TEMPLATES FOR QUICK LAUNCH OF DIVERSE WEB PAGES.
To display email messages in tkinter, you can create a Text widget in your tkinter application and insert the email content into the Text widget using the insert() method.
First, you need to parse the email message and extract the relevant information such as the sender, recipient, subject, and body of the email. You can use the email library in Python to parse email messages.
Once you have parsed the email message, you can create a new Text widget in your tkinter application and insert the email content into the Text widget using the insert() method. You can format the email content using HTML tags if needed.
You can also add scrolling functionality to the Text widget so that users can easily read long email messages. This can be done by adding a Scrollbar widget to the Text widget and configuring the Scrollbar to scroll the Text widget when the user scrolls.
Overall, displaying email messages in tkinter involves parsing the email message, extracting the relevant information, and inserting the email content into a Text widget in your tkinter application.
How do I format email messages for display in tkinter?
To format email messages for display in tkinter, you can use the Text widget in tkinter to display the content of the email message. Here is a simple example of how you can format and display an email message in tkinter:
import tkinter as tk
root = tk.Tk()
Create a Text widget to display the email message
email_text = tk.Text(root, wrap='word') email_text.pack()
Sample email message content
from_email = "sender@example.com" to_email = "recipient@example.com" subject = "Example Email" body = "This is the content of the email message. It can include multiple lines and formatting."
Format the email message
email_content = f"From: {from_email}\nTo: {to_email}\nSubject: {subject}\n\n{body}"
Insert the formatted email content into the Text widget
email_text.insert('1.0', email_content)
root.mainloop()
In this example, we first create a Text widget to display the email message content. We then format the email message with the sender, recipient, subject, and body of the message. Finally, we insert the formatted email content into the Text widget for display. You can further style the display of the email message by using different font styles, colors, and alignments in tkinter.
How to display email messages in tkinter using Python?
To display email messages in a tkinter window using Python, you can use the following steps:
- Import the necessary modules:
import tkinter as tk from tkinter import Scrollbar import imaplib import email
- Create a tkinter window:
root = tk.Tk() root.title("Email Messages")
- Create a text widget to display the email messages:
text_widget = tk.Text(root, wrap='word') text_widget.pack(fill='both', expand=True)
- Create a function to fetch and display email messages:
def display_emails(): # Connect to the IMAP server mail = imaplib.IMAP4_SSL('imap.gmail.com') mail.login('your_email@gmail.com', 'your_password') mail.select('inbox')
# Search for all emails
status, data = mail.search(None, 'ALL')

# Loop through the email ids and fetch the email content
for num in data\[0\].split():
    status, data = mail.fetch(num, '(RFC822)')
    raw\_email = data\[0\]\[1\]
    email\_message = email.message\_from\_bytes(raw\_email)

    # Display the email message in the text widget
    text\_widget.insert(tk.END, f"From: {email\_message\['From'\]}\\n")
    text\_widget.insert(tk.END, f"Subject: {email\_message\['Subject'\]}\\n")
    text\_widget.insert(tk.END, f"Date: {email\_message\['Date'\]}\\n\\n")
    text\_widget.insert(tk.END, email\_message.get\_payload(decode=True).decode("utf-8", errors='ignore'))

# Close the connection
mail.close()
mail.logout()
Call the function to display email messages
display_emails()
- Add a scrollbar to the text widget:
scrollbar = Scrollbar(root, command=text_widget.yview) scrollbar.pack(side='right', fill='y') text_widget.config(yscrollcommand=scrollbar.set)
- Run the tkinter main loop:
root.mainloop()
Make sure to replace 'your_email@gmail.com' and 'your_password' with your actual email credentials before running the script. This code will fetch all emails from the inbox and display them in the tkinter window.
What are the options for customizing the appearance of email messages in tkinter?
In tkinter, there are several options for customizing the appearance of email messages. Some of the options include:
- Changing the font style, size, and color of the text in the message
- Adding images and icons to the email message
- Adding hyperlinks to the text
- Changing the background color of the message window
- Adding borders and padding to the message window
- Formatting the text in different styles, such as bold, italic, or underline
- Adding bullet points or numbered lists to the message
- Customizing the layout of the message by using grid or pack methods
- Adding scrollbars to the message window for longer messages
Overall, there are many ways to customize the appearance of email messages in tkinter, and these options can help create a visually appealing and user-friendly interface for sending and receiving emails.
How to implement scrolling functionality for long email messages in tkinter?
To implement scrolling functionality for long email messages in tkinter, you can use a Text widget embedded within a Scrollbar widget. Here's a step-by-step guide to implementing scrolling functionality for email messages in tkinter:
- Import the necessary modules:
from tkinter import *
- Create a tkinter window:
root = Tk() root.title("Scrollable Email Message")
- Create a Text widget to display the email message:
email_message = Text(root, wrap=WORD) email_message.pack(side=LEFT, fill=BOTH, expand=True)
- Create a Scrollbar widget and attach it to the Text widget:
scrollbar = Scrollbar(root, command=email_message.yview) scrollbar.pack(side=RIGHT, fill=Y) email_message.config(yscrollcommand=scrollbar.set)
- Insert the long email message into the Text widget:
long_email = "This is a long email message that needs scrolling functionality in tkinter. You can add as much text as needed to test the scrolling feature." email_message.insert(END, long_email)
- Run the tkinter main loop:
root.mainloop()
With these steps, you can create a tkinter window with scrolling functionality for long email messages. Users can scroll through the email message using the scrollbar attached to the Text widget. Customize the appearance and functionality of the widgets to suit your application's specific requirements.