Best Gzip Compression Tools to Buy in July 2026
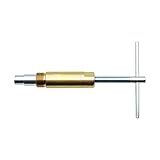
Compression Sleeve Puller Tool Remove Nut & Ferrule Of Pipe 03943, Sleeve Remover For 1/2” Compression Fittings Only, Corroded & Frozen Supply Stops, Plumbing Tools Compression Ring Removal Tool
- NO WALL DAMAGE: EFFORTLESSLY REMOVES SLEEVES WITHOUT HURTING WALLS.
- TIME-SAVER: SKIP CUTTING PIPES; QUICKLY REMOVES CORRODED FITTINGS.
- DURABLE DESIGN: BUILT TO LAST WITH CORROSION-RESISTANT MATERIALS.


Compression Sleeve Puller Remove Tool Nut & Ferrule of Pipe 03943 - Sleeve Remover for 1/2-Inch Compression Fittings Only - Plumbing Tools Compression Ring Removal Tool Corroded & Frozen Supply Stops
-
EFFORTLESSLY REMOVE OLD FITTINGS-SAVES TIME & REDUCES STRESS!
-
DAMAGE-FREE SLEEVE REMOVAL-PROTECTS WALLS & PIPING!
-
BUILT TO LAST-CORROSION RESISTANT FOR TOUGH JOBS!
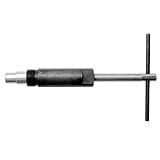
Compression Sleeve Puller Tool For Ferrule Puller For 1/2” Copper Water Compression Sleeve, 1/2-Inch Copper Tubing, Remove Ferrule & Nut Of Pipe(4461), Plumbing Tools Ring Removal Tool (Black)
- EFFORTLESS PIPE REPAIR: QUICKLY REMOVES OLD CASINGS, SAVING TIME.
- HANDLES TOUGH CONDITIONS: WORKS ON CORRODED OR FROZEN VALVES EASILY.
- DURABLE CONSTRUCTION: MADE WITH PREMIUM MATERIALS FOR LASTING USE.
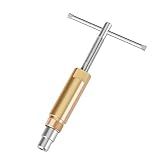
Compression Sleeve Puller Tool Remove Nut & Ferrule Of Pipe 03943- Sleeve Remover for 1/2-Inch Compression Fittings Only Corroded & Frozen Supply Stops Plumbing Tools Compression Ring Removal Tool
-
EFFORTLESSLY REMOVES OLD COMPRESSION FITTINGS-SAVES YOU TIME!
-
PROTECTS WALLS WHILE PULLING 1/2-INCH COPPER SLEEVES-EASY TO USE.
-
CORROSION-RESISTANT DESIGN TACKLES EVEN THE TOUGHEST FITTINGS!
Superior Tool Bleckman Compression Sleeve Puller
- EFFORTLESS SLEEVE REMOVAL: SAVES TIME AND REDUCES STRAIN.
- DURABLE CONSTRUCTION: BUILT TO WITHSTAND HEAVY USE AND LAST LONGER.
- ERGONOMIC DESIGN: ENHANCES GRIP FOR PRECISE AND COMFORTABLE HANDLING.

THE CIMPLE CO Coaxial Compression Tool - RG59, RG6, RG7, and RG11 Compression for F81 / RF Connectors - Adjustable length and type, for almost all connectors manufactured
-
CUSTOMIZE COAX CABLES EASILY WITH OUR VERSATILE COMPRESSION TOOL.
-
COMPATIBLE WITH VARIOUS RG COAX CABLES FOR BROAD APPLICATIONS.
-
DURABLE DESIGN ENSURES SECURE CONNECTIONS FOR RELIABLE PERFORMANCE.
DURATECH Compression Sleeve Puller Tool, Ferrule Puller for 1/2 ” Compression Fittings, Without Damage, Corrosion Resistance, Remove Nut and Ferrule of Pipe in Kitchen, Sinks, and Bathtubs
-
CORROSION-RESISTANT A3 STEEL: TACKLE FROZEN PIPES WITH EASE.
-
NO DAMAGE DESIGN: REMOVE FITTINGS WITHOUT HARMING WALLS OR PIPES.
-
COMPACT & PORTABLE: ESSENTIAL TOOL FOR HOME REPAIRS IN TIGHT SPACES.
To enable Gzip compression in Nginx, you need to follow these steps:
- Access your Nginx configuration file. Usually, it is located at /etc/nginx/nginx.conf or /etc/nginx/conf.d/default.conf.
- Open the configuration file using a text editor like nano or vi.
- Search for the http block in the configuration file. This block contains general settings for the web server.
- Inside the http block, add the following code to enable Gzip compression: gzip on; gzip_comp_level 5; gzip_min_length 256; gzip_proxied any; gzip_vary on; gzip_types application/atom+xml application/javascript application/json application/rss+xml application/vnd.ms-fontobject application/x-font-ttf application/x-web-app-manifest+json application/xhtml+xml application/xml font/opentype image/svg+xml image/x-icon text/css text/plain text/x-component; Adjust the gzip_comp_level to set the compression level. The range is 1-9, with 1 being the fastest and 9 being the most compressed.
- Save the configuration file and exit the text editor.
- Test the configuration file for syntax errors by running the command sudo nginx -t. If any errors are found, fix them before proceeding.
- Once the configuration file is error-free, apply the changes by restarting Nginx using the command sudo service nginx restart.
By following these steps, you should be able to enable Gzip compression in Nginx and reduce the size of your website's files for faster loading times.
How do you verify if Gzip compression is working after enabling it in Nginx?
To verify if Gzip compression is working after enabling it in Nginx, you can follow these steps:
- Ensure that Gzip compression is enabled in the Nginx configuration file (nginx.conf or a separate file included in nginx.conf). Look for the gzip on; directive.
- Save the configuration file and reload/restart Nginx to apply the changes.
- Open your website or web application in a web browser such as Chrome or Firefox.
- Open the browser's developer tools by right-clicking on the page, selecting "Inspect" (Chrome) or "Inspect Element" (Firefox), and then navigating to the "Network" tab.
- Refresh the page by pressing F5 or using the browser's refresh button.
- Find the request for the webpage in the network tab and click on it to view the details.
- Look for the "Response Headers" section and check if there is a "Content-Encoding: gzip" header. If this header is present, it means Gzip compression is working correctly.
Note: The absence of the "Content-Encoding: gzip" header may indicate that Gzip compression is not working. In that case, double-check your Nginx configuration and ensure that it is set up correctly.
Can you configure Nginx to only enable Gzip compression for specific HTTP methods?
Yes, it is possible to configure Nginx to enable Gzip compression only for specific HTTP methods. You can do this by using the gzip_methods directive.
Inside your Nginx configuration file, locate the http block and add the following line:
http { gzip_methods GET POST; # Modify this line to specify the desired HTTP methods ... }
In the example above, Gzip compression will only be enabled for GET and POST HTTP methods. You can modify the list of methods as per your requirements.
After making the changes, save the configuration file and restart or reload Nginx for the changes to take effect.
Note that enabling Gzip compression selectively for specific HTTP methods might not provide significant benefits because compression is primarily based on reducing the size of the response body, which is usually consistent across different methods for the same resource.
What is the recommended value for the "gzip_types" directive in Nginx?
The recommended value for the "gzip_types" directive in Nginx depends on the specific content types you want to compress. By default, Nginx includes commonly compressed content types like text/html, text/plain, text/css, application/javascript, application/json, application/xml, and image/svg+xml.
However, the choice of compressible content types may vary based on the types of files you serve on your website. It's important to include the appropriate content types that you want to compress to achieve efficient compression without wasting server resources.
Here is an example of a recommended configuration for "gzip_types" that includes commonly compressed content types:
gzip_types text/html text/plain text/css application/javascript application/json application/xml image/svg+xml;
How can you view the Gzip compression ratio in Nginx logs?
To view the Gzip compression ratio in Nginx logs, you can enable the $gzip_ratio variable in the log format configuration.
Here are the steps to enable and view the Gzip compression ratio:
- Open the Nginx configuration file, usually located at /etc/nginx/nginx.conf or /etc/nginx/conf.d/default.conf, using a text editor.
- Locate the log_format directive that defines the log format. It is usually in the http context or within a specific server block.
- Add the $gzip_ratio variable to the log format configuration. Here's an example: log_format compression '$remote_addr - $remote_user [$time_local] ' '"$request" $status $body_bytes_sent ' '"$http_referer" "$http_user_agent" "$gzip_ratio"'; In the above configuration, $gzip_ratio is appended at the end.
- Find the access_log directive within the server block and update it with the new log format. For example: access_log /var/log/nginx/access.log compression; Here, compression corresponds to the log format name defined earlier.
- Save the changes and reload or restart Nginx for the configuration to take effect.
Now, the Gzip compression ratio should be appended as the last field in each log entry in the specified access log file. The value indicates the compression ratio achieved for that particular request/response.
Note that the $gzip_ratio only works if HTTP response compression using Gzip is enabled in Nginx configuration.
Can you use both Gzip and Deflate compression simultaneously in Nginx?
No, you cannot use both Gzip and Deflate compression simultaneously in Nginx. You have to choose either one or the other.
Nginx supports both Gzip and Deflate compression methods for reducing the size of transmitted data and improving website performance. However, enabling both at the same time may cause conflicts and result in unpredictable behavior.
To enable Gzip compression in Nginx, you can use the gzip directive in your Nginx configuration file. For example:
gzip on; gzip_types text/plain text/css application/javascript;
To enable Deflate compression, you can use the deflate directive. For example:
gzip off; deflate on;
It's recommended to choose one compression method that satisfies your requirements and enables better performance for your website.