Best Networking Solutions to Buy in July 2026
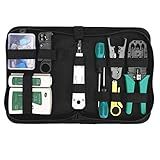
Gaobige Network Tool Kit for Cat5 Cat5e Cat6, 11 in 1 Portable Ethernet Cable Crimper Kit with a Ethernet Crimping Tool, 8p8c 6p6c Connectors rj45 rj11 Cat5 Cat6 Cable Tester, 110 Punch Down Tool
- ALL-IN-1 TOOLKIT: CRIMP, TEST, AND STRIP FOR EFFICIENT NETWORKING!
- BOOST PRODUCTIVITY: SAVE TIME WITH OUR ERGONOMIC CRIMPING TOOL.
- PORTABLE DESIGN: KEEP YOUR NETWORK TOOLS SAFE AND EASY TO CARRY.


InstallerParts Professional Network Tool Kit 15 In 1 - RJ45 Crimper Tool Cat 5 Cat6 Cable Tester, Gauge Wire Stripper Cutting Twisting Tool, Ethernet Punch Down Tool, Screwdriver, Knife
-
PORTABLE, DURABLE CASE: KEEPS TOOLS ORGANIZED; PERFECT FOR ANY SETTING.
-
ERGONOMIC NETWORK CRIMPER: EASY TO USE FOR VARIOUS CABLE TYPES; SAFE DESIGN.
-
ESSENTIAL TESTING TOOLS: INCLUDES CABLE TESTER AND PUNCH DOWN TOOL FOR PROS.

Cable Matters 110 Punch Down Tool with 110 Blade, Ethernet PunchDown Tool, Keystone Punch Down Device for Cat 8/7/6A, Cat 6, Cat5e/5 Network
- EFFORTLESS CABLE TERMINATION FOR QUICK INSTALLATIONS
- SECURE BLADE STORAGE FOR EASY PORTABILITY
- CUSTOMIZABLE IMPACT SETTINGS FOR PRECISE TERMINATIONS
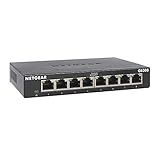
NETGEAR 8-Port Gigabit Ethernet Unmanaged Essentials Switch (GS308) - Home Network Hub, Office Ethernet Splitter, Plug-and-Play, Silent Operation, Desktop or Wall Mount
- 8 GIGABIT PORTS FOR LIGHTNING-FAST CONNECTIVITY!
- PLUG-AND-PLAY SETUP-NO TECH SKILLS NEEDED!
- SILENT, ENERGY-EFFICIENT DESIGN PERFECT FOR ANY SPACE!
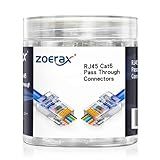
ZOERAX 100-Pack RJ45 Cat6 Pass Through Connector RJ45 Modular Plugs for Solid or Stranded UTP Cable
- QUICK TERMINATIONS: EFFORTLESS CRIMPING WITH PASS-THROUGH DESIGN SAVES TIME.
- GIGABIT READY: OPTIMIZED FOR HIGH-SPEED NETWORKS, COMPATIBLE WITH CAT 5E.
- DURABLE PACKAGING: SEALED PACKAGING PROTECTS CONNECTORS FROM MOISTURE DAMAGE.

Klein Tools VDV226-110 Ratcheting Modular Data Cable Crimper / Wire Stripper / Wire Cutter for RJ11/RJ12 Standard, RJ45 Pass-Thru Connectors
- STREAMLINED PASS-THRU RJ45 TOOL FOR QUICK, EFFICIENT INSTALLS.
- 3-IN-1 TOOL: CRIMPER, STRIPPER, AND CUTTER FOR VERSATILE USE.
- FULL-CYCLE RATCHET ENSURES SECURE, RELIABLE CONNECTIONS EVERY TIME.

Hi-Spec 9pc Network Cable Tester Tool Kit Set for CAT5, CAT6, RJ11, RJ45. Ethernet LAN Crimper, Punchdown, Coax Stripper & More
- COMPREHENSIVE TESTING: TEST RJ45/RJ11 CABLES UP TO 1000FT EFFORTLESSLY.
- EFFORTLESS CRIMPING: SOLID CRIMPER WITH TEXTURED HANDLES FOR SECURE CONNECTIONS.
- ORGANIZED ACCESSORIES: INCLUDES TOOLS AND CONNECTORS IN A SPLASH-PROOF CASE.
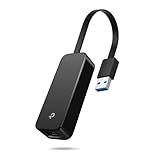
TP-Link USB to Ethernet Adapter (UE306), Supports Nintendo Switch, 1Gbps Gigabit RJ45 to USB 3.0 Network Adapter, Foldable & Portable Design, Plug and Play, Compatible with Windows, macOS, and Linux
- HIGH-SPEED 10/100/1000 MBPS FOR SEAMLESS FILE TRANSFERS.
- PLUG AND PLAY FOR EASY SETUP ON MULTIPLE DEVICES, NO DRIVERS NEEDED.
- ULTRA-COMPACT DESIGN PERFECT FOR TRAVEL AND ON-THE-GO USE.
To expose Docker or Kubernetes ports on DigitalOcean, you can follow these steps:
- For Docker, when running a container, you can use the -p flag to specify the port mapping. For example, docker run -p 80:80 mycontainer will expose port 80 on the host machine to port 80 on the container.
- For Kubernetes, you can expose ports using Services. Define a Service with the appropriate selector to target the pods running your application. Use the NodePort, LoadBalancer, or ClusterIP type depending on your needs.
- In DigitalOcean, make sure the firewall rules allow traffic on the ports you are exposing. You can configure the firewall settings in the DigitalOcean control panel.
- If you are using Kubernetes, you may need to configure a Load Balancer to route traffic to your exposed ports. DigitalOcean provides Load Balancer services that can be integrated with your Kubernetes cluster.
By following these steps, you can successfully expose Docker and Kubernetes ports on DigitalOcean for your applications to communicate with external services or clients.
How to create a LoadBalancer service in Kubernetes?
To create a LoadBalancer service in Kubernetes, follow these steps:
- Create a YAML file for the service definition. For example, create a file named my-loadbalancer-service.yaml and add the following content:
apiVersion: v1 kind: Service metadata: name: my-loadbalancer-service spec: type: LoadBalancer selector: app: my-app ports: - protocol: TCP port: 80 targetPort: 8080
In this YAML file, the spec field defines the type of service as LoadBalancer, selects the pods to load balance based on the app: my-app label, and specifies the port mapping from the service to the target pods.
- Apply the service definition by running the following command:
kubectl apply -f my-loadbalancer-service.yaml
This command will create the LoadBalancer service in your Kubernetes cluster.
- Verify that the LoadBalancer service has been created by running the following command:
kubectl get services my-loadbalancer-service
This command will show you the details of the LoadBalancer service, including the external IP address assigned by the cloud provider for accessing the service.
That's it! You have successfully created a LoadBalancer service in Kubernetes.
How to expose a Job port in Kubernetes?
To expose a Job port in Kubernetes, you can use a Service resource. Here is a step-by-step guide on how to do it:
- Create a Service resource for the Job:
apiVersion: v1 kind: Service metadata: name: job-service spec: selector: app: your-job-label ports: - name: job-port protocol: TCP port: 8080 targetPort: 8080
- Apply the Service resource to expose the Job port:
kubectl apply -f service.yaml
- Verify that the Service is created and running:
kubectl get services
This will expose the Job port to other pods within the Kubernetes cluster. You can now access the Job using the Service's cluster IP and port number.
What is Docker networking?
Docker networking refers to the process of setting up communication among Docker containers that are running on the same host or across different hosts. Docker provides several networking options, such as bridge networking, overlay networking, host networking, and macvlan networking, to facilitate communication between containers. By configuring Docker networking, containers can communicate with each other, share resources, and connect to external networks. This enables better flexibility, scalability, and security in managing containerized applications.
What is a headless service in Kubernetes?
A headless service in Kubernetes is a service that does not have an associated cluster IP address. Instead of load balancing traffic to a set of pods like a regular service, a headless service allows direct communication with specific pods by their individual IP addresses. This is useful for services that require direct access to each pod, such as databases or stateful applications. By using a headless service, clients can discover and connect to each pod individually without going through a load balancer.
How to expose Docker ports on DigitalOcean?
To expose Docker ports on DigitalOcean, follow these steps:
- First, ensure that you have Docker and Docker Compose installed on your DigitalOcean Droplet.
- Next, create a Docker container with the desired port(s) exposed. You can do this by adding the EXPOSE directive in your Dockerfile, or by using the -p flag when running the docker run command.
- Once your Docker container is running with the ports exposed, you need to configure your DigitalOcean Droplet's firewall settings to allow inbound traffic on the exposed ports. You can do this by accessing the DigitalOcean control panel, navigating to the networking section, and then adding a new firewall rule to allow traffic on the specified ports.
- Finally, you can test the exposed ports by trying to access your Docker container from a remote machine using the Droplet's public IP address and the exposed port number.
By following these steps, you can successfully expose Docker ports on DigitalOcean and allow external access to your Docker containers.
How to expose a Pod port in Kubernetes?
To expose a Pod port in Kubernetes, you can use a Service object. Here are the steps to expose a Pod port:
- Create a Service object: Create a Service definition file (e.g., service.yaml) with the following contents:
apiVersion: v1 kind: Service metadata: name: my-service spec: selector: app: my-app ports: - protocol: TCP port: 80 targetPort: 8080
In this example, the Service will expose port 80 externally and forward traffic to port 8080 of Pods with the label "app=my-app".
- Apply the Service object: Apply the Service object using kubectl:
kubectl apply -f service.yaml
- Verify the Service: Verify that the Service is created and running:
kubectl get svc
- Access the exposed port: To access the exposed port, use the ClusterIP or NodePort of the Service. You can use tools like curl or a web browser to access the service.
That's it! Your Pod port is now exposed and accessible within the Kubernetes cluster.