Best PyTorch Programming Books to Buy in February 2026

Hands-On Machine Learning with Scikit-Learn and PyTorch: Concepts, Tools, and Techniques to Build Intelligent Systems


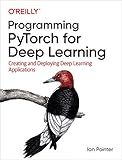
Programming PyTorch for Deep Learning: Creating and Deploying Deep Learning Applications


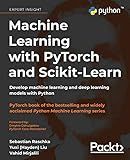
Machine Learning with PyTorch and Scikit-Learn: Develop machine learning and deep learning models with Python


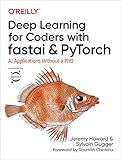
Deep Learning for Coders with Fastai and PyTorch: AI Applications Without a PhD


AI Systems Performance Engineering: Optimizing Model Training and Inference Workloads with GPUs, CUDA, and PyTorch



Deep Learning with PyTorch Step-by-Step: A Beginner's Guide: Volume I: Fundamentals


To implement custom layers in PyTorch, you need to create a new class that inherits from the base class nn.Module. This allows you to define your own forward pass and parameters for the layer.
Here is an example of a custom layer called CustomLayer:
import torch import torch.nn as nn
class CustomLayer(nn.Module): def __init__(self, input_size, output_size): super(CustomLayer, self).__init__() self.weight = nn.Parameter(torch.Tensor(input_size, output_size)) self.bias = nn.Parameter(torch.Tensor(output_size))
def forward(self, x):
    # Perform some operations on the input
    out = torch.matmul(x, self.weight) + self.bias
    return out
In the __init__ method, we define any learnable parameters for the layer. In this example, we initialize a weight matrix and a bias vector. To make these parameters trainable, we wrap them as instances of the nn.Parameter class.
The forward method is where the actual operations of the layer are performed. In this case, we perform a matrix multiplication followed by an addition operation on the input tensor x using the layer's weight and bias.
Once you have defined your custom layer, you can use it like any other PyTorch layer. You can instantiate it and use it in a neural network as needed.
# Instantiate the custom layer layer = CustomLayer(input_size=100, output_size=50)
Use the custom layer in a neural network
class MyModel(nn.Module): def __init__(self): super(MyModel, self).__init__() self.custom_layer = CustomLayer(input_size=100, output_size=50)
def forward(self, x):
    out = self.custom\_layer(x)
    return out
model = MyModel()
By creating custom layers in PyTorch, you have the flexibility to define your own operations and parameters, giving you more control over your neural network architecture.
What are skip connections in PyTorch custom layers?
Skip connections in PyTorch custom layers refer to connections that bypass a few layers in the network architecture and directly connect input to output, enabling the information to skip certain stages of the layer. These connections are commonly used in deep neural networks to tackle the vanishing gradient problem, improve gradient flow, and enhance the model's ability to learn and represent complex patterns.
PyTorch provides a convenient way to implement skip connections in custom layers using the nn.Identity() module. The nn.Identity() module represents a identity mapping, which means it simply passes its input as output without any change. By adding an nn.Identity() module as a part of the layer stack, the skip connection can be established.
For example, consider the following custom layer with a skip connection in PyTorch:
import torch import torch.nn as nn
class CustomLayer(nn.Module): def __init__(self, in_channels, out_channels): super(CustomLayer, self).__init__() self.conv1 = nn.Conv2d(in_channels, 64, kernel_size=3, padding=1) self.relu1 = nn.ReLU(inplace=True)
    self.skip = nn.Identity()  # Skip connection

    self.conv2 = nn.Conv2d(64, out\_channels, kernel\_size=3, padding=1)
    self.relu2 = nn.ReLU(inplace=True)

def forward(self, x):
    residual = self.skip(x)  # Skip connection
    out = self.conv1(x)
    out = self.relu1(out)

    out = out + residual  # Skip connection

    out = self.conv2(out)
    out = self.relu2(out)

    return out
In this example, the input x is passed through conv1 and relu1 layers. The same input x is also passed through the skip connection defined by skip layer (in this case, nn.Identity()). The output from the skip connection adds to the intermediate output of the layer. Finally, the output goes through conv2 and relu2 layers. This way, the skip connection allows the network to bypass certain operations and preserve information from earlier layers, aiding the training process.
What are the different types of custom layers in PyTorch?
In PyTorch, there are different types of custom layers that can be created. Here are some of them:
- Subclassing nn.Module: This is the most common way to create custom layers in PyTorch. You subclass the nn.Module class and define the forward pass logic. This allows you to define any kind of layer, such as fully connected layers (nn.Linear), convolutional layers (nn.Conv2d), recurrent layers (nn.LSTM), etc.
- nn.ModuleList and nn.Sequential: These are convenience classes that allow you to build custom layers by combining existing PyTorch layers. nn.ModuleList allows you to define a list of layers, while nn.Sequential allows you to define a sequence of layers. These can be useful for creating custom architectures or blocs of layers.
- nn.Parameter and nn.ParameterList: These classes are used to define learnable parameters within a custom layer. By wrapping a tensor in nn.Parameter, it becomes a trainable parameter that is recognized by PyTorch's optimizers. nn.ParameterList can be used to manage a list of such parameters.
- nn.Functional interface: PyTorch also provides a functional interface (torch.nn.functional) that allows you to define custom layers as functions instead of classes. This can be useful for simple layer operations that don't have any learnable parameters.
These are some of the common types of custom layers in PyTorch, but you can always create more specialized layer types based on your needs.
What is the concept of padding in PyTorch custom layers?
In PyTorch, padding is a concept used in custom layers and convolutional neural networks (CNNs). It refers to the process of adding extra pixels or values around the borders of an input image or feature map.
Padding is necessary because CNN operations, such as convolution and pooling, can reduce the spatial dimensions of the input. Without padding, this reduction may result in the loss of valuable information and cause the output size to gradually diminish.
By adding padding, we can preserve the spatial dimensions of the input feature map, ensuring that the output feature maps have the same shape as the input. Padding is typically achieved by extending the input values with an appropriate number of rows and columns of zeros.
The amount of padding is usually specified as a parameter, and there are different types of padding available:
- Valid padding (or no padding): It means no padding is added, and the input image is processed as is. This results in smaller output dimensions compared to the input.
- Same padding: It ensures that the output feature map has the same spatial dimensions as the input. The necessary amount of padding is calculated based on the kernel size and stride. Same padding is useful when we want to avoid spatial reduction in each layer.
- Custom padding: In some cases, we might want to specify a specific amount of padding rather than using the automatic calculations of "same padding." This can be useful when we want finer control over the model architecture.
Overall, padding plays an important role in maintaining spatial information during convolutional operations and can be adjusted based on the requirements of the model and the underlying problem.
