Best Tools to Buy in July 2026
Oracle Data Integration: Tools for Harnessing Data


Business Intelligence Guidebook: From Data Integration to Analytics
Qualitative Data Collection Tools: Design, Development, and Applications (Qualitative Research Methods)
Building Integrations with MuleSoft: Integrating Systems and Unifying Data in the Enterprise
Ultimate Qlik Cloud Data Analytics and Data Integration: Master Data Integration and Analytics with Qlik Cloud to Drive Real-Time, Insightful, and ... Across Your Organization (English Edition)

Data Engineering with dbt: A practical guide to building a cloud-based, pragmatic, and dependable data platform with SQL
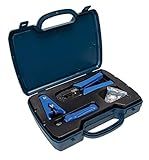
DataShark PA70007 Network Tool Kit | Wire Crimper, Network Cable Stripper, Punch Down Tool, RJ45 Connectors | CAT5, CAT5E, CAT6 (2023 Starter Kit)
- COMPLETE TOOLKIT FOR EFFORTLESS NETWORK INSTALLATION AND UPGRADES.
- CUSTOM CASE ENSURES ORGANIZED STORAGE AND EASY PORTABILITY.
- PROFESSIONAL-GRADE TOOLS GUARANTEE DURABILITY AND OPTIMAL PERFORMANCE.
To import data from Redis to ClickHouse, you can use the ClickHouse's built-in functionality for importing data from various data sources, including Redis. One common approach is to use the ClickHouse Redis Engine to connect to the Redis server and import data into ClickHouse tables. This can be done by setting up a ClickHouse table with the appropriate storage engine, configuring the connection parameters for the Redis server, and executing the necessary SQL statements to import the data. Additionally, you can also use external tools or scripts to extract data from Redis and load it into ClickHouse using ClickHouse's client libraries or REST API. Overall, the process involves establishing a connection between Redis and ClickHouse, extracting the data from Redis, and loading it into ClickHouse tables for further analysis and processing.
What are the considerations for data retention policies when importing from Redis to ClickHouse?
When importing data from Redis to ClickHouse, there are several considerations for data retention policies that need to be taken into account:
- Data storage capacity: ClickHouse is optimized for storing and querying large volumes of data, so it is important to consider the capacity of the ClickHouse cluster to ensure that it can handle the volume of data being imported from Redis. This includes considering the disk space available, as well as any potential performance implications of storing large amounts of data in ClickHouse.
- Data retention requirements: It is important to consider the data retention requirements for the imported data and to configure ClickHouse accordingly. This includes determining how long the data should be retained in ClickHouse before it is archived or deleted, as well as any legal or compliance requirements for data retention.
- Data ingestion frequency: When importing data from Redis to ClickHouse, it is important to consider the frequency at which new data is being ingested into Redis and how frequently this data needs to be synced with ClickHouse. This will help determine the appropriate scheduling for data imports and ensure that data is being synced in a timely manner.
- Data transformation and normalization: When importing data from Redis to ClickHouse, it is important to consider any necessary transformation or normalization of the data to ensure that it is compatible with the schema and data types in ClickHouse. This may involve converting data types, aggregating or summarizing data, or applying any necessary data cleansing processes.
- Backup and disaster recovery: It is important to consider the backup and disaster recovery processes for the imported data in ClickHouse. This includes implementing regular backups of the data in ClickHouse, as well as having a plan in place to recover the data in the event of a system failure or data loss.
Overall, when importing data from Redis to ClickHouse, it is important to carefully consider the data retention policies and ensure that the data is being stored and managed effectively in ClickHouse to meet the requirements of the business and any regulatory or compliance mandates.
How to connect Redis to ClickHouse for data import?
To connect Redis to ClickHouse for data import, you can follow these steps:
- Install the ClickHouse ODBC driver on your machine. This driver allows ClickHouse to connect to external data sources, including Redis.
- Configure the ODBC driver by creating a DSN (Data Source Name) that points to your Redis database. You will need to provide the connection details such as the host, port, username, and password of your Redis server.
- Once the ODBC driver is configured, you can use ClickHouse's built-in SQL commands to import data from Redis into ClickHouse. You can use the INSERT INTO ... SELECT statement to move data from Redis to ClickHouse tables.
- You can also use external tools and scripts to automate the data import process. For example, you can use Python scripts with the pyodbc library to connect to both Redis and ClickHouse, and transfer data between the two databases.
By following these steps, you can easily connect Redis to ClickHouse for data import and perform data analytics and queries on the combined datasets.
What is the role of data partitioning in optimizing data import from Redis to ClickHouse?
Data partitioning plays a crucial role in optimizing data import from Redis to ClickHouse by improving the efficiency and speed of the import process. By partitioning data, it is possible to distribute the data across multiple shards or nodes, allowing for parallel processing and reducing the bottleneck on a single node. This can greatly improve the overall performance of the data import process, as it allows for better utilization of resources and faster data transfer.
Additionally, data partitioning helps to reduce the impact of data skew and hotspots by evenly distributing the data across multiple partitions. This can help to prevent uneven distribution of data and ensure that all nodes are working efficiently during the import process. Overall, data partitioning is essential for optimizing data import from Redis to ClickHouse and improving the overall performance and scalability of the system.
How to optimize the import process for real-time data streams from Redis to ClickHouse?
When optimizing the import process for real-time data streams from Redis to ClickHouse, consider the following best practices:
- Use the Redis pipeline feature to optimize bulk data transfers in a single round trip to reduce latency and improve performance.
- Implement parallel data fetching and import processes to efficiently handle high volumes of real-time data streams.
- Utilize asynchronous import methods and batch insert operations in ClickHouse to improve throughput and reduce latency.
- Optimize the data schema and storage engine settings in ClickHouse to ensure efficient storage and retrieval of real-time data streams.
- Monitor and tune the system resources, such as CPU, memory, and network bandwidth, to ensure optimal performance during data importing.
- Use compression techniques to reduce the size of data transferred between Redis and ClickHouse, thus improving overall transfer speed.
- Consider using dedicated tools or frameworks, such as Kafka Connect or Apache NiFi, to streamline the data ingestion process from Redis to ClickHouse.
- Implement proper error handling and data validation mechanisms to ensure data consistency and accuracy during the import process.
What is the recommended format for data when importing from Redis to ClickHouse?
When importing data from Redis to ClickHouse, it is recommended to use a format that ClickHouse supports, such as the TabSeparated format. This format is easy to read and parse, making it suitable for importing large amounts of data efficiently.
The recommended steps for importing data from Redis to ClickHouse in TabSeparated format are as follows:
- Export data from Redis in a format that can be easily converted to TabSeparated format, such as JSON or CSV.
- Convert the exported data to TabSeparated format using a script or tool that can handle this conversion.
- Use ClickHouse's native utilities, such as clickhouse-client or ClickHouse's client libraries, to import the TabSeparated data into ClickHouse.
By following these steps and using the TabSeparated format, you can efficiently import data from Redis to ClickHouse and take advantage of ClickHouse's fast processing capabilities for analytics and data warehousing.