
Best Tools and Resources for Java Developers to Buy in July 2026
DevOps Tools for Java Developers: Best Practices from Source Code to Production Containers


Full Stack Development with Spring Boot 3 and React: Build modern web applications using the power of Java, React, and TypeScript
Real-World Java: Helping You Navigate the Java Ecosystem (Tech Today)
Hands-On Selenium WebDriver with Java: A Deep Dive into the Development of End-to-End Tests

Get Your Hands Dirty on Clean Architecture: A hands-on guide to creating clean web applications with code examples in Java
Java: Learn Java in One Day and Learn It Well. Java for Beginners with Hands-on Project. (Learn Coding Fast with Hands-On Project Book 4)
Java: The Comprehensive Guide to Java Programming for Professionals (Rheinwerk Computing)
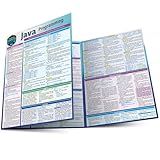
Java Programming Language: a QuickStudy Laminated Reference Guide
To install OpenJDK 17 using Terraform, you can first create a Terraform configuration file (usually given a .tf extension) with the necessary provider and resource definitions.
Start by specifying the provider as "local-exec" and defining a null_resource that will be used to execute the shell commands to download and install OpenJDK 17.
Within the null_resource block, use the "provisioner" argument to specify the "local-exec" provisioner and provide the shell commands for downloading and installing OpenJDK 17. You can use commands like wget to download the OpenJDK 17 tar.gz file and then use commands to extract and set the JAVA_HOME environment variable.
Finally, run the terraform init command in the directory containing your Terraform configuration file to initialize Terraform. Then, run the terraform apply command to execute the configuration and install OpenJDK 17 using Terraform.
If all goes well, Terraform will download and install OpenJDK 17 on the target machine as specified in your Terraform configuration file. Make sure to handle any errors or exceptions that may occur during the installation process.
What is terraform and how can it be used to install openjdk17?
Terraform is an open-source infrastructure as code software tool created by HashiCorp that allows users to define and provision data center infrastructure using a declarative configuration language. It can be used to automate the deployment of infrastructure resources such as virtual machines, storage, networks, and containers on cloud providers such as AWS, Azure, and Google Cloud Platform.
To install OpenJDK 17 using Terraform, you can create a Terraform configuration file (often named main.tf) that specifies the desired infrastructure configuration including the provision of an instance or virtual machine and installation of OpenJDK 17.
Here is an example Terraform configuration file that creates an AWS EC2 instance and installs OpenJDK 17 using a remote-exec provisioner:
provider "aws" { region = "us-east-1" }
resource "aws_instance" "example" { ami = "ami-0c55b159cbfafe1f0" instance_type = "t2.micro" }
resource "null_resource" "install_openjdk" { provisioner "remote-exec" { inline = [ "sudo yum update -y", "sudo yum install java-1.8.0-openjdk -y" ]
connection {
  type        = "ssh"
  user        = "ec2-user"
  private\_key = file("~/.ssh/id\_rsa")
  host        = aws\_instance.example.public\_ip
}
} }
In the above example, the configuration file specifies an AWS provider, creates an EC2 instance of type t2.micro, and uses a null_resource with a remote-exec provisioner to install OpenJDK 17 on the instance using sudo yum install java-1.8.0-openjdk -y.
To apply this Terraform configuration, save the file and run the following commands in the terminal:
- Initialize Terraform in the directory with the configuration file:
terraform init
- Create and provision the resources defined in the configuration file:
terraform apply
This will create the EC2 instance and install OpenJDK 17 on it according to the specified configuration.
What is the syntax for defining resources in terraform for openjdk17?
To define a resource in Terraform for OpenJDK 17, you need to use the openjdk provider and the openjdk_jdk resource.
Here is an example of the syntax for defining a resource in Terraform for OpenJDK 17:
provider "openjdk" { version = ">= 0.5.0" }
resource "openjdk_jdk" "my_jdk" { version = "17" install_path = "/usr/lib/jvm/openjdk-17" }
In this example, we are using the openjdk provider with a version constraint of >= 0.5.0. We are defining an openjdk_jdk resource named my_jdk with a specified version of 17 and an install path of /usr/lib/jvm/openjdk-17.
You can customize the resource further by adding additional configuration settings as needed for your specific use case.
What is the difference between terraform apply and terraform plan for openjdk17 installation?
terraform apply and terraform plan are both commands used in Terraform, an infrastructure as code tool, to manage and provision resources. However, they serve different purposes:
- terraform plan: This command is used to create an execution plan that shows what actions Terraform will take when you run terraform apply. It allows you to preview the changes that will be made to your infrastructure without actually executing them. This is useful for reviewing and verifying the changes before applying them.
- terraform apply: This command is used to apply the changes defined in your Terraform configuration files to your infrastructure. It will create, update, or delete resources as needed to match the desired state defined in your configuration files. Running terraform apply will execute the actions outlined in the execution plan generated by terraform plan.
For the installation of OpenJDK17, you would typically use terraform apply after running terraform plan to ensure that the changes are as expected before applying them to your infrastructure.
What are the best practices for provisioning openjdk17 with terraform?
Some best practices for provisioning OpenJDK 17 with Terraform include:
- Use a dedicated provisioning module: Create a dedicated Terraform module for provisioning OpenJDK 17 to keep the Terraform code organized and reusable.
- Use variables and data sources: Utilize Terraform variables and data sources to pass necessary configurations or information required for provisioning OpenJDK 17, such as version number, installation directory, etc.
- Use Terraform provisioners: Use Terraform provisioners to execute custom scripts or commands during the provisioning process, such as installing OpenJDK 17 from a specific source or setting environment variables.
- Ensure idempotency: Make sure your Terraform code for provisioning OpenJDK 17 is idempotent, meaning it can be run multiple times without causing unintended changes or errors.
- Use Terraform state files: Store the Terraform state files securely in a remote backend to ensure consistency and manageability of the infrastructure provisioning process.
- Test and validate: Always test and validate your Terraform code for provisioning OpenJDK 17 in a non-production environment before applying changes to production to avoid unexpected issues.
- Use Terraform modules from the Terraform Registry: Leverage existing Terraform modules from the Terraform Registry that are specifically designed for provisioning OpenJDK 17 to simplify and speed up the provisioning process.