
Best Rust Struct Testing Tools to Buy in July 2026
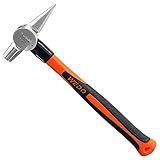
WEDO Stainless Testing Hammer with Fiberglass Handle, Pointed Head, Corrosion Resistant, Rust Proof, Durable, Environmental friendly, 150g, 280mm, 11"
-
DURABLE DESIGN: RUST-PROOF, HIGH HARDNESS FOR TOUGH ENVIRONMENTS.
-
USER-FRIENDLY: COMFORTABLE, LABOR-SAVING WITH SMART MECHANICS.
-
GLOBAL TRUST: PRAISED WORLDWIDE, BACKED BY STRONG AFTER-SALES SUPPORT.


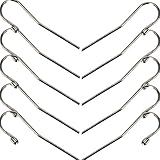
10Pcs Dental Lip Hooks for Apex Locator, Stainless Steel Tester Endo Instrument Tools Used for Dental Clinic, Lab Equipment - Acid and Rust Resistance|2 mm
- DURABLE STAINLESS STEEL: REUSABLE, EASY TO CLEAN, AND LONG-LASTING.
- COMPATIBLE DESIGN: FITS MOST TOOTH APEX LOCATORS FOR VERSATILE USE.
- SAFE AND EASY TO USE: ROUNDED EDGES PREVENT MOUTH INJURIES; PORTABLE TOOL.

Network Cable Tester, HABOTEST HT812A with RJ45 RJ11 Port, Ethernet Cable Tester Tool,Speaker, Coax, Video, and Data Fast/Slow Gear, 60V Cable Telephone Line Continuity Test for CAT5/CAT5E/CAT6/CAT6A
- TEST VARIOUS CABLES EFFORTLESSLY: CAT5 TO CAT6A & PHONE CONTINUITY.
- COMPACT DESIGN: PORTABLE, DURABLE, AND EASY TO USE ANYWHERE.
- ADJUSTABLE SPEED: FAST/SLOW TESTING FOR FLEXIBILITY & ACCURATE RESULTS.
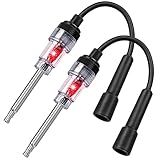
2PCS Inline Spark Plug Testers, Small Armature Diagnostic Detector Tool, Ignition Coil Tester for Engines for Automotive, Cars, Lawnmowers, Small & Big Internal/External Engines
-
QUICK DIAGNOSIS OF IGNITION ISSUES WITH EASY-TO-USE DESIGN.
-
DURABLE MATERIALS ENSURE LONG-LASTING PERFORMANCE AND RELIABILITY.
-
COMPATIBLE WITH ALL COMBUSTION ENGINES-VERSATILE AND ESSENTIAL TOOL.
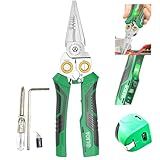
LAOA 8-in-1 Electrician Pliers with Voltage Tester - Rechargeable Stainless Steel Multitool for Wire Strip/Cut/Crimp/Split/Wrap/Slit/Pull
- ALL-IN-ONE TOOL: STRIPS, CUTS, CRIMP, AND TESTS VOLTAGE SAFELY.
- PRECISION BLADES: HANDLE WIRES WITHOUT DAMAGE; DURABLE SK5-STEEL.
- ERGONOMIC DESIGN: ANTI-SLIP GRIP AND LIGHTWEIGHT FOR FATIGUE-FREE USE.
Write Powerful Rust Macros
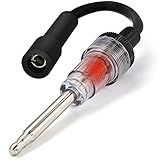
Ram-Pro Inline Spark Tester, Plug Engine Ignition 6-12 Volt Fool-Proof – Pick Up Coil/Armature Diagnostic Detector Tool for Automotive, Car, Lawnmower, Small & Big Internal/External Engines
- DIAGNOSE SPARK ISSUES QUICKLY WITH EASY-TO-USE DIAGNOSTIC TOOL.
- SAVES TIME AND MONEY BY PINPOINTING IGNITION PROBLEMS INSTANTLY.
- VERSATILE USE FOR ALL COMBUSTION ENGINES, FROM CARS TO LAWNMOWERS.

AAwipes Lead Test Swab Kit (60 Rapid Home Testing Swabs) 30-Second Results. Dip in Water. Home Use for All Surfaces - Painted, Dishes, Toys, Jewelry, Metal, Ceramics, Wood (LS60)
- 60 COUNTS VALUE PACK: COST-EFFECTIVE SOLUTION WITH 2-YEAR SHELF LIFE!
- INSTANT RESULTS: GET LEAD TEST RESULTS IN JUST 30 SECONDS!
- EASY TO USE: SIMPLE SWAB TEST, NO VINEGAR NEEDED, EASY COLOR COMPARISON!
To instantiate a struct for testing in Rust, you can simply create a new instance of the struct by providing values for its fields. First, define the struct with its fields and their data types. Then, create a new instance of the struct using the struct's name followed by curly braces {} containing the values for the fields. You can then use this instance in your tests to run assertions or perform operations on it. Make sure to import the required modules or structs in your test file to access the defined struct.
What is the best way to organize structs in Rust code?
There is no one definitive best way to organize structs in Rust code as it heavily depends on the specific project and its requirements. However, here are some common ways to organize structs in Rust code:
- Group related structs together: Grouping structs that are related to each other in the same module can help improve code maintainability and readability.
- Use modules to organize related structs: Use modules to organize related structs into separate files or directories. This can help in better structuring the codebase and makes it easier to navigate and manage.
- Use enums for related structs: Instead of defining multiple separate structs for related data types, consider using enums to represent different variants of data structures. This can help in reducing code duplication and improving code clarity.
- Create a separate module for structs: In some cases, it may make sense to create a separate module specifically for defining all the structs in a project. This can help in keeping the codebase organized and separating data types from the rest of the logic.
Overall, the best way to organize structs in Rust code will depend on the specific project requirements, team preferences, and coding style guidelines. It is important to maintain consistency and clarity in code organization to ensure better readability and maintainability.
What is the difference between a mutable and immutable struct in Rust?
In Rust, structs are categorized as either mutable or immutable based on whether their fields can be changed after the struct is created.
- Mutable struct: Mutable structs have fields that can be modified after the struct is instantiated. This means you can update the values of the fields of a mutable struct using the mut keyword. Mutable structs allow for mutation and are typically used when you need to change the values of the struct's fields over time.
Example of a mutable struct:
struct Person { name: String, age: u32, }
let mut person = Person { name: String::from("Alice"), age: 30, };
person.age = 31; // Updating the age field
- Immutable struct: Immutable structs have fields that cannot be changed after the struct is created. This means once you assign values to the fields of an immutable struct, you cannot modify those values. Immutable structs are useful when you want to ensure that the values of the struct's fields remain constant throughout the program.
Example of an immutable struct:
struct Point { x: f32, y: f32, }
let point = Point { x: 10.0, y: 20.0, };
// Cannot update the values of the fields in an immutable struct // point.x = 15.0; // Will result in an error
In summary, the key difference between mutable and immutable structs in Rust is that mutable structs allow for the modification of field values, while immutable structs do not permit any changes to the values of their fields once they are set.
What is the lifetime of a struct instance in Rust?
The lifetime of a struct instance in Rust is determined by how and where it is created and how it is used within the program. The lifetime of a struct instance is tied to the scope in which it is defined and used.
For example, if a struct instance is created within a function and returned from that function, its lifetime will be limited to the scope of the function. If the struct instance is stored in a data structure such as a vector or a hashmap, its lifetime will be tied to the lifetime of the data structure itself.
Rust uses a concept called lifetimes to track how long references to data need to be valid. This ensures that references are always valid and prevents issues such as dangling pointers or use-after-free errors.
In summary, the lifetime of a struct instance in Rust is determined by how and where it is created and used within the program, and it is managed through the use of lifetimes to ensure safety and prevent memory-related errors.
What is the purpose of deriving traits for a struct in Rust?
The purpose of deriving traits for a struct in Rust is to automatically implement common functionality for the struct without having to manually write the required code. This can save time and reduce the chances of making errors when implementing functionality that is commonly needed for the struct.
For example, by deriving the Debug trait for a struct, you can automatically make the struct printable using the {:?} format specifier in Rust. Similarly, deriving the Copy and Clone traits allows you to implement copy and clone behavior for the struct with minimal effort.
In Rust, traits can be derived for structs using the #[derive] attribute above the struct definition. Some common traits that are often derived for structs include Debug, Copy, Clone, PartialEq, Eq, and Hash.
How to compare two instances of a struct in Rust?
To compare two instances of a struct in Rust, you need to implement the PartialEq and Eq traits for the struct. Here's an example of how you can compare two instances of a struct:
#[derive(Debug, PartialEq, Eq)] struct Point { x: i32, y: i32, }
fn main() { let point1 = Point { x: 1, y: 2 }; let point2 = Point { x: 1, y: 2 };
if point1 == point2 {
    println!("point1 and point2 are equal");
} else {
    println!("point1 and point2 are not equal");
}
}
In this example, the Point struct implements the PartialEq and Eq traits by deriving them using #[derive(PartialEq, Eq)]. This allows us to compare two instances of the Point struct using the == operator.
When implementing custom comparison logic for a struct, you can also manually implement the PartialEq trait for the struct like this:
impl PartialEq for Point { fn eq(&self, other: &Self) -> bool { self.x == other.x && self.y == other.y } }
By implementing the PartialEq trait, you can define custom logic for comparing instances of the struct. This allows you to compare the struct fields in a way that makes sense for your specific use case.
What is the role of traits in working with structs in Rust?
In Rust, traits play a crucial role in working with structs by defining behavior for structs and allowing them to be used polymorphically. Traits can be implemented for structs to provide methods and functionality that can be shared among different types of structs.
Traits enable structs to have common behavior and share functionality, which helps in writing more modular and reusable code. By defining a trait for a struct, you can ensure that the struct adheres to a certain interface and can be used interchangeably with other types that implement the same trait.
Additionally, traits allow for generic programming in Rust, making it possible to write functions and data structures that operate on any type that implements a specific trait. This enables more flexible and powerful abstractions in Rust programs.
Overall, traits are an essential feature in Rust for working with structs, enabling code reuse, polymorphism, and generic programming.