Best Python Canvas Tools to Buy in February 2026

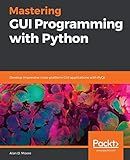
Mastering GUI Programming with Python: Develop impressive cross-platform GUI applications with PyQt


Python GUI Projects for Developers : Design and build projects and user-friendly GUI applications


Python GUI with Tkinter: From Basics to Real Projects: Master Widgets, Layouts, and Mini Projects with Step-by-Step Examples


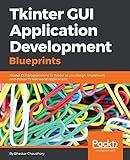
Tkinter GUI Application Development Blueprints: Master GUI programming in Tkinter as you design, implement, and deliver 10 real-world applications


Make GUI Applications with Python for Deveplopers: Build Apps with PyQt, PyQt's, SQL and more


PYTHON TKINTER GUI PROJECTS: PRACTICAL EXERCISES FOR BEGINNERS| Python Tkinter Tutorial with Real-World Projects | Learn to Design Interactive GUIs | Build ... GUI Creative Projects and 500 Assignments)


Learning OpenCV 4 Computer Vision with Python 3: Get to grips with tools, techniques, and algorithms for computer vision and machine learning, 3rd Edition


To make a canvas (rectangle) in wxPython, you can create a subclass of wx.Panel and override its default drawing behavior to draw on a wx.DC object. You can use methods such as DrawRectangle, DrawLine, or DrawText to draw on the canvas. Additionally, you can handle mouse events to interact with the canvas, such as clicking or dragging to draw shapes or move objects. This allows you to create custom graphic user interfaces and interactive applications in wxPython.
What printing options are available for a canvas in wxPython?
In wxPython, there are several printing options available for a canvas:
- The PrintDialog class allows the user to select the printer and its settings before printing the canvas.
- The PrintPreview class allows the user to preview the canvas on the screen before printing, which can be useful for ensuring the layout and scale are correct.
- The PrintData class allows the user to specify printing options such as page size, orientation, margins, and scaling.
- The Printout class is used to actually draw the canvas content to the printer or print preview window.
These classes can be used together to provide flexible and customizable printing options for any canvas or drawing in wxPython.
How to rotate text on a canvas in wxPython?
To rotate text on a canvas in wxPython, you can use the wx.GraphicsContext class to draw text at a specific angle. Here is an example code that demonstrates how to rotate text on a canvas:
import wx
class MyCanvas(wx.Panel): def __init__(self, parent): super().__init__(parent) self.Bind(wx.EVT_PAINT, self.on_paint)
def on\_paint(self, event):
    dc = wx.AutoBufferedPaintDC(self)
    gc = wx.GraphicsContext.Create(dc)

    gc.SetFont(wx.Font(14, wx.FONTFAMILY\_SWISS, wx.FONTSTYLE\_NORMAL, wx.FONTWEIGHT\_NORMAL))
    gc.SetTextForeground(wx.Colour(0, 0, 0))

    text = "Rotated Text"
    x, y = 50, 50
    angle = 45 # Rotate text by 45 degrees

    gc.Translate(x, y)
    gc.Rotate(angle)
    gc.DrawText(text, 0, 0)
app = wx.App() frame = wx.Frame(None, title="Rotate Text on Canvas", size=(400, 300)) canvas = MyCanvas(frame) frame.Show() app.MainLoop()
In this code, we first create a custom MyCanvas class that inherits from wx.Panel and binds the EVT_PAINT event to the on_paint method. Inside the on_paint method, we create a wx.GraphicsContext object from the wx.AutoBufferedPaintDC.
We then set the font and text color for the text to be drawn. Next, we specify the text to be drawn, its starting position (x, y), and the rotation angle. We then translate the current origin to the starting position of the text, rotate the canvas by the specified angle, and finally draw the text at the origin (0, 0).
When you run this code, you should see the rotated text "Rotated Text" displayed on the canvas at a 45-degree angle.
How to resize a canvas in wxPython?
To resize a canvas in wxPython, you can use the SetSize method of the canvas object. Here is an example code snippet that demonstrates how to resize a canvas in wxPython:
import wx
class MyCanvas(wx.Panel): def __init__(self, parent): super().__init__(parent)
    self.SetBackgroundColour(wx.Colour(255, 255, 255))
    self.Bind(wx.EVT\_PAINT, self.on\_paint)

def on\_paint(self, event):
    dc = wx.PaintDC(self)
    dc.Clear()
    dc.SetPen(wx.Pen(wx.Colour(0, 0, 0)))
    dc.DrawRectangle(10, 10, 100, 100)
class MyFrame(wx.Frame): def __init__(self): super().__init__(None, title="Resizing Canvas Example")
    self.canvas = MyCanvas(self)
    self.SetSize((400, 300))

    self.Bind(wx.EVT\_SIZE, self.on\_resize)

def on\_resize(self, event):
    size = self.GetClientSize()
    self.canvas.SetSize(size)
app = wx.App() frame = MyFrame() frame.Show() app.MainLoop()
In this code, we first create a custom canvas class MyCanvas that inherits from wx.Panel. In the __init__ method of the canvas class, we set the background color, bind the EVT_PAINT event to the on_paint method, and draw a rectangle on the canvas.
Next, we create a frame class MyFrame that inherits from wx.Frame. In the __init__ method of the frame class, we create an instance of the custom canvas class, set the initial size of the frame, and bind the EVT_SIZE event to the on_resize method.
In the on_resize method, we get the size of the client area of the frame using GetClientSize method and set the size of the canvas to match the new size of the frame.
Finally, we create an instance of the wxPython App class, show the frame, and start the event loop using MainLoop method.
What image formats are supported on a canvas in wxPython?
In wxPython, the following image formats are supported for displaying on a canvas widget:
- Bitmap (BMP)
- JPEG
- PNG
- GIF
- TIFF
- XPM
You can create a wx.Bitmap object from an image file in any of these formats and display it on a canvas widget using the wx.DC.DrawBitmap() method.
