
Best Tools for Version Control to Buy in July 2026
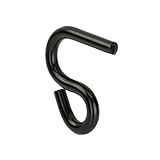
MuuTuoL 6007 Lower Control Arm Prying Tool, Designed for 7/8 Inches Diameter Pry Bar, Specialty Bushing Tool Ideal for Front-Wheel Drive Vehicles, Imports, and Minivans (1 Pack)
- TRANSFORMS 2-PERSON TASKS INTO QUICK 1-PERSON JOBS!
- VERSATILE FIT FOR MOST FRONT WHEEL DRIVE VEHICLES.
- DURABLE ALLOY BUILT TO LAST, RESISTS RUST AND DEFORMATION.


Version Control with Git: Powerful tools and techniques for collaborative software development
- AFFORDABLE PRICES FOR QUALITY READS-SAVE MONEY, READ MORE!
- ENVIRONMENTALLY FRIENDLY CHOICE-REUSE BOOKS, REDUCE WASTE!
- HAND-INSPECTED FOR QUALITY-GREAT STORIES WITHOUT THE NEW PRICE.

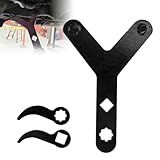
KTTOOL New Lower Control Arm Prying Tool, Suspension Specialty Bushing Tool, Lower Ball Joint Pry, Control Arm Tool Bushing Removal Tool Designed to Work with a 1/2" Drive Extension Breaker Bar
- EFFORTLESSLY SEPARATES LOWER BALL JOINTS, ENSURING SMOOTH REPAIRS.
- FITS MOST VEHICLES-IMPORT, DOMESTIC, AND MINIVANS ALIKE!
- DURABLE ALLOY STEEL DESIGN WITHSTANDS HUGE PRESSURE WITHOUT DEFORMING.
RULLINE Upgraded Lower Control Arm Prying Tool, Suspension Removal, and Casing Disassembly Adapter for Breaker Bars, Heavy-Duty 1/2" Drive Pry Bar Tool Set, Ball Joint Removal Tool Car Accessories
- PRECISION PULLING: ADJUSTABLE ARM FOR SAFE, ACCURATE POSITIONING.
- EXTREME DURABILITY: FORGED ALLOY STEEL WITHSTANDS 3500 N FORCE.
- COMPACT DESIGN: FITS TIGHT SPACES WITH VERSATILE 8-POINT DRIVE.

ReluxGO Automotive Chassis Separator Lower Control Suspension Arm Pry Extractor Tool Bar Car Wishbone Lever Auto Repair
- EFFORTLESSLY CRUSH VARIOUS CROSS ARM SHAPES WITH ADJUSTABLE CHAIN.
- DURABLE CARBON STEEL CONSTRUCTION RESISTS RUST AND DEFORMATION.
- VERSATILE LEVER TOOL FOR EASY AXLE COMPONENT REPAIRS AND REPLACEMENTS.
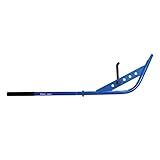
Astro Tools 78914 Lower Control Arm 4ft Pry Bar Tool
- EFFORTLESSLY FREE BALL-JOINTS WITH ADJUSTABLE PULLING ARM LEVERAGE.
- EASILY SERVICE AXLES AND STRUTS BY MOVING CONTROL ARMS OUT OF THE WAY.
- COMBAT BUSHING PRE-LOAD WITH THE MUSCLE TO EASE TOUGH TENSION.

Version Control with Git: Powerful Tools and Techniques for Collaborative Software Development

QIFEIOSHI Newly Upgraded Lower Control arm pry Tool, Suspension Control Arm Tool Bushing Removal Tool and pry Wrench Adapter Designed for use with 1/2-inch Drive Extension pry Bars (Model A)
-
VERSATILE COMBO TOOL: PRY, SEPARATE, AND REMOVE BALL JOINTS EASILY.
-
DURABLE ALLOY STEEL: RUST-RESISTANT, STURDY, PERFECT FOR TOUGH JOBS.
-
LOW PROFILE DESIGN: FITS TIGHT SPACES, ENHANCES ACCESSIBILITY AND FLEXIBILITY.
To push changes from Bitbucket to Heroku, you first need to ensure that your Bitbucket repository is linked to your Heroku app. This can be done by setting up a deployment pipeline or connecting the two platforms through a service like CircleCI.
Once your repositories are linked, you can push changes from Bitbucket to Heroku by creating a new branch or making changes to an existing branch on Bitbucket. After you have made your changes and committed them to the repository, you can then trigger a deployment to Heroku.
This can typically be done through the deployment pipeline you have set up, by running a specific command in your terminal, or by manually triggering a deployment within the Heroku dashboard.
Once the deployment is initiated, Heroku will pull in the changes from your Bitbucket repository and deploy them to your Heroku app. You can then monitor the deployment process and see the changes reflected in your live application.
It is important to ensure that your code is properly tested and reviewed before pushing changes to production, to avoid any potential issues or bugs in your application. Regularly pushing changes and keeping your codebase up to date will help maintain the stability and performance of your application on Heroku.
What is the role of a webhook in pushing changes to Heroku from Bitbucket?
A webhook is a way for an external system, such as Bitbucket, to automatically notify another system, such as Heroku, about a certain event or change. In the context of pushing changes to Heroku from Bitbucket, a webhook can be set up in Bitbucket to notify Heroku whenever a new commit is pushed to a specific branch in the repository.
When a webhook is triggered by a new commit in Bitbucket, Heroku will receive the notification and can then automatically pull in the latest changes and redeploy the application. This helps to automate the deployment process and ensures that the application on Heroku is always up to date with the latest changes from the Git repository in Bitbucket.
How to implement a deployment strategy for pushing changes from Bitbucket to Heroku in a team setting?
- Set up a staging environment on Heroku where the team can test changes before deploying them to production. This will help catch any bugs or issues before they go live.
- Create a branch in your Bitbucket repository specifically for the changes that need to be deployed. This will help keep track of the changes and allow for easier collaboration among team members.
- Use continuous integration tools, such as Jenkins or Travis CI, to automatically deploy changes from the Bitbucket repository to the staging environment on Heroku. This will streamline the deployment process and reduce the chances of errors.
- Implement a code review process where team members can review and approve the changes before they are deployed to production. This will help ensure the quality and stability of the deployment.
- Once the changes have been tested and approved in the staging environment, use a deployment tool, such as Heroku Pipelines or GitHub Actions, to push the changes to the production environment on Heroku. Make sure to monitor the deployment process to ensure that everything is running smoothly.
- After the changes have been deployed to production, conduct thorough testing to ensure that everything is working as expected. If any issues arise, be prepared to roll back the deployment and address the issues before re-deploying.
- Communicate with the team throughout the deployment process to keep everyone informed of the status and any potential issues. Encourage collaboration and open communication to ensure a successful deployment.
- Document the deployment process and any lessons learned for future reference. This will help streamline the deployment process and troubleshoot any issues that may arise in the future.
By following these steps and implementing a deployment strategy for pushing changes from Bitbucket to Heroku in a team setting, you can ensure a smooth and successful deployment process.
What steps do I need to follow to push changes to Heroku from Bitbucket?
To push changes to Heroku from Bitbucket, you can follow these steps:
- Ensure that you have set up a Heroku app and a Bitbucket repository that contains the code you want to deploy.
- Install the Heroku CLI and login to your Heroku account using the command heroku login.
- Add the Heroku remote to your local Git repository by running the command heroku git:remote -a YOUR_APP_NAME.
- Pull the latest changes from your Bitbucket repository to your local machine using Git.
- Stage and commit your changes locally using Git.
- Push the changes to the Heroku remote by running the command git push heroku master.
- Wait for the deployment process to complete. You can check the status of your deployment using the command heroku logs --tail.
- Once the deployment is complete, you can access your app at the Heroku URL specified in the output of the deployment process.
These steps should help you push changes from your Bitbucket repository to your Heroku app successfully.