Best Excel Tools to Buy in January 2026
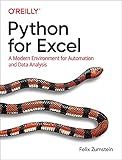
Python for Excel: A Modern Environment for Automation and Data Analysis


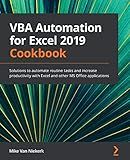
VBA Automation for Excel 2019 Cookbook: Solutions to automate routine tasks and increase productivity with Excel and other MS Office applications


Excel for Finance & Accounting: The Advanced Playbook 2025: Master Cutting-Edge Financial Modeling, Dynamic Forecasting & Data-Driven Decision Making with Excel’s Latest Tools


Shelly Cashman Series MicrosoftOffice 365 & Excel 2016: Comprehensive


101 Best Excel Tips & Tricks (101 Excel Series)


EXCEL VBA PROGRAMMING Task Optimization and Daily Work Automation (Excel Mastery Series: Unleashing the Power of Spreadsheets)


Beyond the Basics: A Quick Guide to the Most Useful Excel Data Analysis Tools for the Business Analyst


Python in Excel Advanced: Mastering Data Analysis and Financial Modeling with Python Automation in Excel


To select an Excel range in PowerShell, you first need to automate Excel using the COM object model. Start by creating a new Excel application object and open the desired workbook and worksheet. You can then select a range using the Range property of the worksheet object. For example, if you want to select a specific range like "A1:C10", you can use $worksheet.Range("A1:C10"). To select this range, leverage the Select method on the specified range object. Ensure that you handle Excel objects properly by releasing them from memory after use to avoid any memory leaks.
How to protect an Excel sheet using PowerShell?
To protect an Excel sheet using PowerShell, you need to utilize the capabilities of the Microsoft Excel COM object model. Here's a step-by-step guide to accomplish this task:
- Ensure Prerequisites: Make sure that you have Microsoft Excel installed on your machine, as the script relies on Excel's COM objects.
- Open PowerShell: Start PowerShell with appropriate privileges, especially if you plan to run scripts that interact with file systems or other system resources.
- Use the Script: Implement the following PowerShell script which will open an Excel workbook, protect a specified sheet, and then save the workbook. Customize the script for your specific requirements, such as file paths and sheet names.
# Define constants $filePath = "C:\Path\To\Your\Workbook.xlsx" # Path to the Excel file $sheetName = "Sheet1" # Name of the sheet to protect $password = "YourPassword" # Password for protection
Create an instance of Excel
$excel = New-Object -ComObject Excel.Application $excel.Visible = $false # Set to $true if you want to see Excel GUI
try { # Open the workbook $workbook = $excel.Workbooks.Open($filePath)
# Get the specific worksheet by name
$sheet = $workbook.Worksheets.Item($sheetName)

# Protect the sheet with a password
$sheet.Protect($password)

# Save the workbook
$workbook.Save()
} catch { Write-Output "An error occurred: $_" } finally { # Close the workbook and quit Excel $workbook.Close($false) $excel.Quit()
# Release COM objects
\[System.Runtime.Interopservices.Marshal\]::ReleaseComObject($sheet) | Out-Null
\[System.Runtime.Interopservices.Marshal\]::ReleaseComObject($workbook) | Out-Null
\[System.Runtime.Interopservices.Marshal\]::ReleaseComObject($excel) | Out-Null

# Collect garbage
\[System.GC\]::Collect()
\[System.GC\]::WaitForPendingFinalizers()
}
Write-Output "The sheet '$sheetName' has been protected successfully."
Key Points:
- Correct Paths: Make sure to set $filePath to the correct location of your Excel file.
- Sheet Name: Set $sheetName to the name of the sheet you want to protect.
- Password: Change $password to the password you want to use to protect the sheet.
Additional Considerations:
- Error Handling: The script includes basic error handling. It's a good idea to expand upon this if deploying in a production environment.
- Backup Files: Always keep a backup of important files, especially when automating modifications.
- Execution Policy: Depending on your PowerShell execution policy, you might need to allow script execution. You can check and change this with Get-ExecutionPolicy and Set-ExecutionPolicy commands, respectively.
- Excel Interop Objects: Make sure to properly release COM objects to prevent memory leaks.
This script demonstrates a basic approach. You may need to tweak it for more advanced features like generating workbooks on-the-fly, using more complex protection options, or integrating with other automation tasks.
What is PowerShell scripting for Excel automation?
PowerShell scripting for Excel automation involves using PowerShell, a task automation and configuration management framework from Microsoft, to create scripts that automate tasks and manipulate data in Excel. This can be particularly useful for managing large datasets, performing repetitive tasks, or integrating Excel with other systems. PowerShell provides a robust environment for executing automation scripts by leveraging the COM (Component Object Model) interface for Excel.
Here are some key aspects and steps involved in using PowerShell for Excel automation:
- Setting Up the Environment: Ensure that Microsoft Excel is installed on your system as PowerShell uses the Excel COM object to interact with Excel files. Import the necessary Excel module if you prefer using specialized modules like ImportExcel, which simplifies working with Excel files without requiring Excel to be installed.
- Creating an Excel Application Object: Use PowerShell to instantiate an Excel Application object using COM: $Excel = New-Object -ComObject Excel.Application $Excel.Visible = $true # Make Excel visible if needed
- Loading and Creating Workbooks and Worksheets: Open an existing workbook or create a new one: $Workbook = $Excel.Workbooks.Open("C:\path\to\your\file.xlsx") Or create a new workbook: $Workbook = $Excel.Workbooks.Add()
- Manipulating Data: Access a specific worksheet and manipulate data: $Sheet = $Workbook.Worksheets.Item(1) $Sheet.Cells.Item(1,1) = "Hello, World!"
- Automating Tasks: Automate tasks like formatting cells, generating charts, or performing calculations: $Sheet.Cells.Item(1,1).Font.Bold = $true $Sheet.Cells.Item(1,1).Interior.ColorIndex = 6 # Yellow background
- Saving and Closing the Workbook: Save the workbook and close the application: $Workbook.SaveAs("C:\path\to\save\file.xlsx") $Excel.Quit()
- Error Handling and Cleanup: Ensure proper error handling and cleanup to release COM objects and memory properly.
- Using External Modules: Leverage PowerShell modules like ImportExcel which simplify interactions with Excel files by providing cmdlets to read and write data without needing to mess with COM objects.
Using PowerShell for Excel automation can greatly increase productivity by streamlining repetitive tasks, enabling batch processing, and integrating Excel with other data sources or systems. It is suitable for various tasks ranging from simple data entry and reporting to more complex data manipulation and analysis tasks.
How to insert a chart in Excel with PowerShell?
To insert a chart in Excel using PowerShell, you need to use the Excel COM object model. This allows you to automate Excel tasks through PowerShell. Below is a step-by-step guide on how to create a basic chart:
- Open PowerShell as Administrator: Depending on your system policies, you might need administrator privileges to run scripts that interact with COM objects.
- Create an Excel Application: You need to start by creating an instance of Excel.
- Add Data to a Worksheet: Enter the data that will be used for the chart.
- Create a Chart: Use the Excel chart objects to insert and configure a chart.
Here’s an example script that illustrates how to do this:
# Create a new Excel application $excel = New-Object -ComObject Excel.Application
Make Excel visible (optional)
$excel.Visible = $true
Add a new workbook
$workbook = $excel.Workbooks.Add()
Select the first worksheet
$worksheet = $workbook.Worksheets.Item(1)
Add some data to the worksheet
$worksheet.Cells.Item(1, 1) = "Category" $worksheet.Cells.Item(1, 2) = "Value" $worksheet.Cells.Item(2, 1) = "A" $worksheet.Cells.Item(2, 2) = 10 $worksheet.Cells.Item(3, 1) = "B" $worksheet.Cells.Item(3, 2) = 20 $worksheet.Cells.Item(4, 1) = "C" $worksheet.Cells.Item(4, 2) = 30
Select the data range
$dataRange = $worksheet.Range("A1", "B4")
Add a chart to the worksheet
$charts = $worksheet.ChartObjects() $chartObject = $charts.Add(150, 10, 300, 200) # Adjust position and size as needed $chart = $chartObject.Chart
Set the chart data source
$chart.SetSourceData($dataRange)
Set chart type (e.g., xlColumnClustered is 51)
$chart.ChartType = [Microsoft.Office.Interop.Excel.XlChartType]::xlColumnClustered
Optional: Configure other chart properties
#$chart.HasTitle = $true #$chart.ChartTitle.Text = "My Chart Title"
Save the workbook (optional)
#$workbook.SaveAs("C:\Path\To\Your\File.xlsx")
Cleanup
$workbook.Close($false) # Close without saving $excel.Quit() [System.Runtime.Interopservices.Marshal]::ReleaseComObject($excel) | Out-Null Remove-Variable excel [gc]::collect() [gc]::WaitForPendingFinalizers()
Explanation:
- Excel COM Object: PowerShell interacts with Excel through COM objects, enabling control over Excel features.
- Data Setup: Data is needed for creating charts; it gets added to the cells of a worksheet.
- Chart Creation: A chart is created by adding it to the worksheet and setting its data source to the specified range.
- Chart Customization: Chart properties like type and title can be customized as needed.
Notes:
- Excel Installed: Ensure Excel is installed on the system where this script is run.
- Error Handling: Implement appropriate error handling for production scripts.
- Permissions: Check that you have permissions to automate Excel and write to any specified file paths.
Chart Types:
For more chart types, you can replace [Microsoft.Office.Interop.Excel.XlChartType]::xlColumnClustered with:
- xlLine
- xlPie
- xlBar
- xlArea
- ... and more. Each corresponds to a number or constant in the Excel API.
Ensure this script and its permissions align with your organization's security policies before running it in a live environment.
