Best Grid Layout Tools to Buy in July 2026
KETIPED 6" Imperial 3D Multi-Angle Measuring Ruler,45/90 Degree Aluminum Alloy Woodworking Square Protractor,Drawing Line,Miter Triangle Ruler High Precision Layout Measuring Tool for Woodworking
- VERSATILE DESIGN: MEASURES ANGLES ACCURATELY FOR DIVERSE PROJECTS.
- DURABLE MATERIAL: LIGHTWEIGHT ALUMINUM ALLOY ENSURES LONG-LASTING USE.
- EASY TO USE: CLEAR SCALES AND SIMPLE OPERATION ENHANCE MEASURING EFFICIENCY.


9 Pcs Flexible Record Template Set, Reusable Planner Stencils Bullet Journal Stencils, Plastic Stencil Drafting Tools Accessories for Calendar Making, Journal Planner, Layout Tools for DIY Planning
-
PRECISION LAYOUTS: ENJOY FLAWLESS ORGANIZATION WITH LASER-CUT STENCILS!
-
BEGINNER-FRIENDLY: SIMPLE TO USE FOR BOTH NOVICES AND EXPERTS ALIKE!
-
DURABLE & ECO-FRIENDLY: REUSABLE, WASHABLE, AND BUILT TO LAST-PLAN SUSTAINABLY!
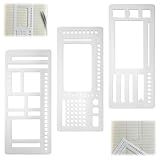
Jevehip Flexible Record Template 23Pcs Set, Reusable Dot Grid Journal Stencils for Bullet Journaling, Calendar, Checklist, Layout Planning, Drawing Lines, Compatible with Discs,Coils,Rings (Set of 23)
- PERFECT ALIGNMENT: EFFORTLESSLY CREATE STRAIGHT LINES AND BOXES.
- DURABLE MYLAR: WASHABLE, FLEXIBLE, AND BUILT TO LAST FOR DAILY USE.
- VERSATILE SHAPES: IDEAL FOR ALL PLANNING NEEDS, FROM TRACKERS TO CALENDARS.
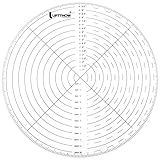
UPTTHOW 10" Round Center Finder Compass Clear Acrylic for Drawing Circles on fabric, wood, poster board, plastic, metal, glass, composites also for irregularly shaped items, Measure Alignment Tool
- CLEAR ACRYLIC DESIGN ENSURES PRECISE CIRCLE DRAWING ON ANY SURFACE.
- EASILY MARK CIRCLES FROM 1” TO 10” WITH CONVENIENT INDEXING.
- VERSATILE TOOL FOR WOOD, METAL, AND CRAFTS-PERFECT FOR ANY PROJECT!
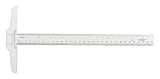
Westcott JR-12 Small Plastic T-Square for Drawing, DIY, Crafts, 12In/30cm
- VERSATILE USE: PERFECT FOR CRAFTING, DRAFTING, AND HOME PROJECTS.
- DUAL CALIBRATIONS: INCH AND METRIC SCALES FOR PRECISE MEASUREMENTS.
- DURABLE DESIGN: EASY TO USE WITH A STURDY, TRANSPARENT PLASTIC BODY.
Layout Essentials: 100 Design Principles for Using Grids (Design Essentials)
3 Pcs Journal Stencil Set - Planner Tracker Template for Dotted Journals with 5mm Spaced Dots - DIY Checklist Template - Elevate Your Planning Game
-
FLAWLESS ALIGNMENT: ACHIEVE PERFECT LAYOUTS WITH 5MM DOT GRID STENCILS.
-
TIME-SAVING TEMPLATES: CUT SETUP TIME FROM HOURS TO MINUTES EFFORTLESSLY.
-
ALL SKILL LEVELS: USER-FRIENDLY DESIGNS FOR BEGINNERS AND EXPERTS ALIKE.
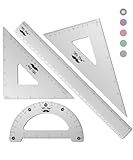
Mr. Pen- Metal Geometry Kit, 4 Pack, 45° & 30°/60° Set Squares, 6" Protractor & 12" Ruler, Durable Metal Drafting Tools for Technical Drawing, Math, Engineering & Architecture
- PRECISION ENGINEERING: ACCURATE MARKINGS FOR PROFESSIONALS AND STUDENTS.
- DURABLE ALUMINUM ALLOY: LIGHTWEIGHT YET STRONG FOR LONG-LASTING USE.
- VERSATILE SET: PERFECT FOR SCHOOLS, OFFICES, AND CREATIVE PROJECTS.
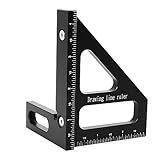
KETIPED Imperial 3D Multi-Angle Measuring Ruler,45/90 Degree Aluminum Alloy Woodworking Square Protractor, Miter Triangle Ruler High Precision Layout Measuring Tool for Engineer Carpenter,003BK
-
DURABLE ALUMINUM ALLOY: LIGHTWEIGHT, CORROSION-RESISTANT, & RUST-PROOF.
-
VERSATILE DESIGN: MEASURES ANGLES, MARKS LINES, AND EASY TO CARRY.
-
IDEAL FOR PROFESSIONALS: PERFECT FOR CARPENTERS, DIYERS, AND ENGINEERS.
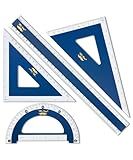
Mr. Pen- Wooden Geometry Set, 4 Pack, 8" 30°/60° Set Square, 5.5" 45°/90° Set Square, 6" Protractor & 12" Ruler for Classroom Use, Math, Drafting, Technical Drawing & Architecture
- DURABLE HIGH-QUALITY WOOD ENSURES LONG-LASTING PERFORMANCE.
- CLEAR MARKINGS IN INCHES AND CENTIMETERS FOR PRECISE MEASUREMENTS.
- SMOOTH EDGES PROVIDE COMFORT AND PROTECT PAPER FROM DAMAGE.
To set grid layout gravity using Kotlin, you can use the GridLayout.LayoutParams class to specify the gravity for each cell in the grid layout. You can create a new instance of GridLayout.LayoutParams and set the gravity using the setGravity method with the desired Gravity constant as the parameter. For example, to set the gravity of a view in the grid layout to Gravity.CENTER, you can do the following:
val params = GridLayout.LayoutParams() params.setGravity(Gravity.CENTER) view.setLayoutParams(params)
This will set the gravity of the view in the grid layout to Gravity.CENTER. You can also combine different gravity constants using the or operator. For example, to set the gravity of a view to Gravity.CENTER_HORIZONTAL and Gravity.TOP, you can do the following:
val params = GridLayout.LayoutParams() params.setGravity(Gravity.CENTER_HORIZONTAL or Gravity.TOP) view.setLayoutParams(params)
This will set the gravity of the view in the grid layout to Gravity.CENTER_HORIZONTAL and Gravity.TOP. By setting the gravity of each cell in the grid layout, you can customize the layout of your grid to meet your design requirements.
What is the purpose of specifying gravity in grid layout using kotlin?
Specifying gravity in grid layout using Kotlin allows developers to control how child views are aligned within the grid cells. By setting gravity, developers can define the alignment of the child views within the grid cells, such as centering them, aligning them to the start or end of the cell, or stretching them to fill the entire cell. This can help create a more visually appealing and organized layout for the grid.
How to set grid layout gravity to end using kotlin?
To set the grid layout gravity to end in Kotlin, you can use the following code snippet:
val layoutParams = GridLayout.LayoutParams() layoutParams.setGravity(Gravity.END) yourGridLayout.layoutParams = layoutParams
Replace yourGridLayout with the reference to your GridLayout view. This code creates a new GridLayout.LayoutParams object, sets the gravity to END using setGravity(Gravity.END) method, and then assigns these layout parameters to your GridLayout view. This will align the items in the GridLayout to the end of the grid.
How to set gravity to specific columns in grid layout using kotlin?
To set gravity to specific columns in a grid layout using Kotlin, you can use the LayoutParams class to specify the gravity. Here is an example showing how to set gravity to columns in a grid layout:
val gridLayout = findViewById
// Set gravity for column 0 val paramsColumn0 = GridLayout.LayoutParams() paramsColumn0.columnSpec = GridLayout.spec(0) paramsColumn0.setGravity(Gravity.CENTER) gridLayout.layoutParams = paramsColumn0
// Set gravity for column 1 val paramsColumn1 = GridLayout.LayoutParams() paramsColumn1.columnSpec = GridLayout.spec(1) paramsColumn1.setGravity(Gravity.RIGHT) gridLayout.layoutParams = paramsColumn1
// Set gravity for remaining columns val defaultParams = GridLayout.LayoutParams() defaultParams.setGravity(Gravity.LEFT)
for (i in 2 until gridLayout.columnCount) { val params = GridLayout.LayoutParams() params.columnSpec = GridLayout.spec(i) params.setGravity(Gravity.LEFT) gridLayout.layoutParams = params }
// Add views to the grid layout val textView1 = TextView(context) textView1.text = "Column 0" gridLayout.addView(textView1)
val textView2 = TextView(context) textView2.text = "Column 1" gridLayout.addView(textView2)
// Add more views to the grid layout...
In this example, we first get a reference to the GridLayout using findViewById. Then, we create LayoutParams objects for each column and set the gravity using the setGravity method. Finally, we set the LayoutParams for each column in the grid layout.
Note that this example assumes that you have already defined a GridLayout in your layout XML file with the id gridLayout.
How to change the position of a view within a grid layout using gravity in kotlin?
To change the position of a view within a grid layout using gravity in Kotlin, you can set the android:layout_gravity attribute of the view in the XML layout file. Here is an example of how to do this:
- Define the grid layout in your XML layout file:
<GridLayout xmlns:android="http://schemas.android.com/apk/res/android" android:layout_width="match_parent" android:layout_height="match_parent" android:columnCount="2">
<TextView
    android:id="@+id/textView1"
    android:text="TextView 1"
    android:layout\_width="wrap\_content"
    android:layout\_height="wrap\_content"
    android:layout\_gravity="center\_horizontal"/>

<TextView
    android:id="@+id/textView2"
    android:text="TextView 2"
    android:layout\_width="wrap\_content"
    android:layout\_height="wrap\_content"
    android:layout\_gravity="center\_vertical"/>
- In your Kotlin code, you can also programmatically set the layout gravity of a view using the LayoutParams class. For example, to change the gravity of textView1 to center_vertical, you can do:
val textView1 = findViewById
By setting the gravity property of the LayoutParams object, you can change the position of the view within the grid layout.