Best Tools for Managing Gists with PowerShell to Buy in February 2026
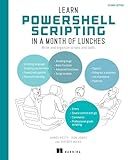
Learn PowerShell Scripting in a Month of Lunches, Second Edition: Write and organize scripts and tools


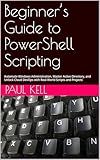
Beginner’s Guide to PowerShell Scripting: Automate Windows Administration, Master Active Directory, and Unlock Cloud DevOps with Real-World Scripts and Projects


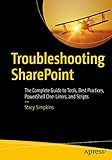
Troubleshooting SharePoint: The Complete Guide to Tools, Best Practices, PowerShell One-Liners, and Scripts


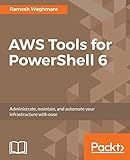
AWS Tools for PowerShell 6: Administrate, maintain, and automate your infrastructure with ease


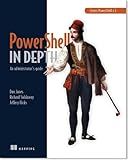
Learn PowerShell Toolmaking in a Month of Lunches


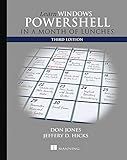
Learn Windows PowerShell in a Month of Lunches



PowerShell Advanced Cookbook: Enhance your scripting skills and master PowerShell with 90+ advanced recipes (English Edition)


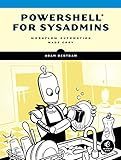
PowerShell for Sysadmins: Workflow Automation Made Easy


Learn Windows PowerShell in a Month of Lunches


Gists are a feature of GitHub that allow you to share snippets or small pieces of code. To interact with gists using PowerShell, you'll typically interact with the GitHub API, since PowerShell does not have native commands for GitHub operations. To upload, edit, or download a gist, you'll first need a GitHub account and a personal access token with appropriate permissions. With this token, you can construct HTTP requests to interact with the GitHub API. For uploading (creating) a gist, you would use the Invoke-RestMethod or Invoke-WebRequest cmdlet to send a POST request to https://api.github.com/gists, including the necessary headers (such as the Authorization header with your token) and a JSON body defining the gist content and other parameters like file names and description. To download a gist, you would issue a GET request to https://api.github.com/gists/{gist_id} to retrieve the JSON response containing the gist's content, from which you can extract the actual code. For editing a gist, a PATCH request to the same URL with the updated content in the JSON body is necessary. PowerShell's ConvertTo-Json and ConvertFrom-Json cmdlets are useful for constructing and interpreting these JSON bodies. You may also want to handle headers using @{} syntax in the cmdlets to include your authorization token securely.
What is Invoke-RestMethod in PowerShell?
Invoke-RestMethod is a cmdlet in PowerShell used to send HTTP and HTTPS requests to RESTful web services. It simplifies the interaction with REST APIs by automatically processing the response, typically converting JSON or XML data into PowerShell objects. This allows you to work with the data in a structured and intuitive way.
The cmdlet can handle various HTTP methods such as GET, POST, PUT, DELETE, etc., making it a versatile tool for automating tasks related to web services. Here are some key features and common uses of Invoke-RestMethod:
- Simplicity: Offers a straightforward way to request data from a REST API and handle responses.
- Automatic Parsing: Automatically parses JSON, XML, and other structured data formats into PowerShell objects.
- Customizable Headers: Supports custom headers to authenticate or configure requests as required by the web service.
- Support for HTTP Methods: Facilitates the full suite of RESTful operations with different HTTP methods (GET, POST, PUT, DELETE, etc.).
- Parameters: Offers various parameters to customize requests, such as -Uri for the endpoint, -Method for the HTTP method, -Body for data payload, and -Headers for custom headers.
Here is a basic example of how Invoke-RestMethod can be used to fetch data from a JSON REST API:
# Example of a GET request $response = Invoke-RestMethod -Uri "https://api.example.com/data" -Method Get
The response will be automatically converted to a PowerShell object
Write-Output $response
For sending data with a POST request:
# Example of a POST request with JSON payload $body = @{ Name = "John Doe" Email = "john.doe@example.com" } | ConvertTo-Json
$response = Invoke-RestMethod -Uri "https://api.example.com/users" -Method Post -Body $body -ContentType "application/json"
Handling the response
Write-Output $response
Invoke-RestMethod is especially useful for scripting and automation where dealing with web APIs is required, enabling programmatic access and control over web resources.
What is a JSON serializer in PowerShell?
In PowerShell, a JSON serializer is a mechanism that converts PowerShell objects into JSON (JavaScript Object Notation) format, and vice versa. JSON is a lightweight data interchange format that is easy for both humans and machines to read and write, making it a popular choice for configuration files, data interchange in web applications, and more.
PowerShell provides built-in cmdlets to handle JSON serialization and deserialization:
- ConvertTo-Json: This cmdlet converts PowerShell objects into a JSON-formatted string. It is commonly used to prepare data for web APIs or to save configuration data in a format that other systems can easily consume. $object = @{ Name = "John Doe" Age = 30 Occupation = "Software Developer" } $json = $object | ConvertTo-Json Write-Output $json This example will output a JSON string representing the object.
- ConvertFrom-Json: This cmdlet does the opposite; it takes a JSON-formatted string and converts it back into a PowerShell object. This is useful for parsing data received from web services or reading JSON configuration files. $json = '{"Name":"John Doe","Age":30,"Occupation":"Software Developer"}' $object = $json | ConvertFrom-Json Write-Output $object.Name This would output "John Doe" as it accesses the Name property of the deserialized object.
These cmdlets simplify working with JSON in PowerShell scripts, allowing for seamless integration and manipulation of JSON data.
How to parse JSON in PowerShell?
Parsing JSON in PowerShell is straightforward using the ConvertFrom-Json cmdlet. Here’s a step-by-step guide on how to do it:
- Store JSON in a Variable or File: First, make sure you have your JSON data either in a text file or stored in a variable. For demonstration, we'll use a JSON string.
- Use ConvertFrom-Json: The ConvertFrom-Json cmdlet converts JSON formatted data into a PowerShell custom object.
Here’s an example:
Example with JSON String
Suppose you have the following JSON string:
{ "name": "John Doe", "age": 30, "isEmployed": true, "skills": ["PowerShell", "C#", "SQL"], "address": { "street": "123 Main St", "city": "Anytown" } }
You can parse it in PowerShell as follows:
# Define JSON string $jsonString = @" { "name": "John Doe", "age": 30, "isEmployed": true, "skills": ["PowerShell", "C#", "SQL"], "address": { "street": "123 Main St", "city": "Anytown" } } "@
Parse JSON string
$jsonObject = $jsonString | ConvertFrom-Json
Access properties
$name = $jsonObject.name $age = $jsonObject.age $skills = $jsonObject.skills $street = $jsonObject.address.street
Output values
Write-Output "Name: $name" Write-Output "Age: $age" Write-Output "Skills: $($skills -join ', ')" Write-Output "Street: $street"
Example with JSON File
If your JSON data is stored in a file, you can read and parse it as follows:
# Read JSON file $jsonFilePath = "path\to\your\file.json" $jsonContent = Get-Content -Path $jsonFilePath -Raw
Parse JSON content
$jsonObject = $jsonContent | ConvertFrom-Json
Access properties as before
Write-Output "Name: $($jsonObject.name)"
Tips
- Handle Arrays: If a JSON property contains an array, you can iterate over it using a foreach loop or access individual elements using indices.
- Deep Nested JSON: You can access nested JSON properties by chaining property accessors (e.g., $jsonObject.address.city).
Advanced Usage
When handling more complex JSON or large files, consider using more advanced techniques like streaming JSON parsing or additional tools/modules for performance and resource management.
By following the above steps, you should be able to parse pretty much any JSON content successfully using PowerShell.
How to extract content from a gist with PowerShell?
To extract content from a GitHub Gist using PowerShell, you can use the GitHub API or directly download the raw content from the Gist URL. Here’s how you can do it:
Using the GitHub API
- Get the Gist ID: First, get the Gist URL and extract the Gist ID from it. For example, if the Gist URL is https://gist.github.com/username/1234567890abcdef, the Gist ID is 1234567890abcdef.
- Use PowerShell to Fetch the Gist Content: Use PowerShell to make an API request to GitHub to fetch the Gist content.
# Define the Gist ID $gistId = '1234567890abcdef'
Construct the URL to access the Gist via GitHub API
$url = "https://api.github.com/gists/$gistId"
Use Invoke-RestMethod to fetch Gist details
$response = Invoke-RestMethod -Uri $url -Method Get -Headers @{ "User-Agent" = "PowerShell" }
Traverse the response to extract file content
foreach ($file in $response.files.PSObject.Properties) { $filename = $file.Name $content = $file.Value.content Write-Output "Content of $filename:" Write-Output $content }
Direct Download of Raw Content
If you want to download a specific file's content directly:
- Identify the Raw URL: Each file in a Gist has a raw URL. This can typically be accessed by navigating to the file within the Gist on GitHub and clicking “Raw”.
- Download the File Directly:
# Define the direct raw URL for the specific file in the Gist $rawUrl = 'https://gist.githubusercontent.com/username/1234567890abcdef/raw/filename.ext'
Use Invoke-WebRequest to download the raw data
$content = Invoke-WebRequest -Uri $rawUrl -Headers @{ "User-Agent" = "PowerShell" }
Output the content
Write-Output $content.Content
Notes
- User-Agent Header: GitHub requires a User-Agent header when making requests to their API, even if it’s a simple script or application, to differentiate usages.
- Network Access: Ensure that your network policies allow HTTP requests to external sites like GitHub.
- Access Permissions: Public Gists can be accessed without authentication. However, for private Gists, you will need to authenticate with GitHub using an access token. You can add the token to the header for the API request.
By following these methods, you should be able to successfully extract content from a GitHub Gist using PowerShell.
How to secure sensitive data like tokens in PowerShell scripts?
Securing sensitive data such as tokens in PowerShell scripts is crucial to protect them from unauthorized access and prevent potential security breaches. Here are some strategies to enhance the security of sensitive data in your scripts:
- Environment Variables: Store tokens and other sensitive information in environment variables rather than hardcoding them directly into the script. Access these variables in your script using $env:VARIABLE_NAME.
- Secure Strings: Use PowerShell's SecureString to handle sensitive data. This encrypts the strings in memory. You can convert a plain text string to a secure string using ConvertTo-SecureString.
- Encrypted Files: Store sensitive information in a separate, encrypted file. You can use tools like Protect-CmsMessage to encrypt data. Decrypt the data during execution using Unprotect-CmsMessage.
- Credential Manager: Utilize Windows Credential Manager to store credentials and retrieve them within your script using Get-Credential. This provides a secure way to manage user credentials.
- Azure Key Vault: Use Azure Key Vault if your infrastructure is hosted on Azure. It provides secure key management to store and access tokens. Use the Azure PowerShell module to access secrets stored in Key Vault.
- Limit Access: Limit access to the scripts and the secrets they require to only those users who absolutely need it. Implement role-based access control (RBAC) where possible.
- Use Secure Connections: Ensure that any network operations such as HTTP requests use HTTPS to protect sensitive data in transit.
- Logging and Monitoring: Be cautious about logging and ensure that no sensitive data is written to logs. Implement monitoring for any unauthorized access attempts.
- Version Control: Avoid committing sensitive information into version control systems, like Git. Use .gitignore to exclude files containing sensitive information.
- Code Signing: Sign your scripts to prevent tampering. PowerShell can be configured to run only signed scripts.
- Use PSCredential: Use PSCredential objects to securely store user names and passwords. These can be integrated with SecureString for added security.
By combining these practices, you can significantly reduce the risk of exposing sensitive data in your PowerShell scripts. Remember that no single method will provide complete security-it's the combination of practices that offers strong protection.
