
Best Cloud Storage Solutions to Buy in July 2026
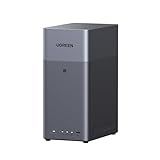
UGREEN NAS DH2300 2-Bay Desktop NASync, Support Capacity 60TB (Diskless), Remote Access, AI Photo Album, Beginner Friendly System, 4GB on Board RAM,1GbE, 4K HDMI, Network Attached Storage(Diskless)
-
SIMPLE, INTUITIVE STORAGE FOR BEGINNERS: DITCH CLUTTERED DEVICES!
-
SAVE BIG OVER TIME: ONE PURCHASE VS. COSTLY CLOUD SUBSCRIPTIONS!
-
AI-DRIVEN ORGANIZATION: EFFORTLESSLY FIND AND MANAGE YOUR PHOTOS!


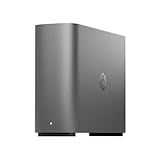
Synology BeeStation Plus 8TB Personal Cloud Storage Device (BST170-8T)
- QUICK PRIVATE CLOUD SETUP: START MANAGING DATA IN MINUTES!
- ACCESS DATA ANYWHERE: BRING ALL YOUR FILES INTO ONE SECURE PLACE.
- SHARED CLOUD SPACE: COLLABORATE EASILY WITH FAMILY OR TEAM MEMBERS!
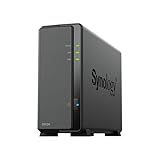
Synology 1-Bay DiskStation DS124 (Diskless)
- CENTRALIZED DATA HUB EMPOWERS COMPLETE OWNERSHIP AND ACCESS ANYWHERE.
- EFFORTLESS COLLABORATION WITH SEAMLESS SYNCING ACROSS ALL DEVICES.
- ENSURE DATA SAFETY WITH BUILT-IN PROTECTION AND RELIABLE BACKUPS.
Mastering Microsoft OneDrive: A Complete Beginner’s Guide to Cloud Storage, Collaboration, and File Management
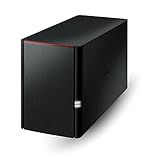
BUFFALO LinkStation SoHo 220 2-Bay Personal Cloud Office NAS 12TB (2x6TB) with Hard Drives Included
-
FAST 2.5 GBE CONNECTIVITY FOR INSTANT ACCESS TO YOUR FILES!
-
SECURE, SUBSCRIPTION-FREE PERSONAL CLOUD FOR ALL YOUR DATA!
-
12 TB CAPACITY WITH RAID FOR SAFE, AUTOMATED BACKUPS!

Beelink Me Mini, Mini PC NAS, Intel N95 CPU, 12GB LPDDR5, 1TB PCIe SSD, 6*M.2 PCIe3.0 SSD Slots(MAX 24TB), Dual 2.5G LAN/WiFi6/BT5.2/USB3.2/HDMI, HTPC, Private Cloud, Soft Router, Storage Solution
- POWERFUL INTEL ALDER LAKE N95 FOR SEAMLESS MULTITASKING AND MEDIA.
- EXPANDABLE UP TO 24TB FOR STORING THOUSANDS OF MOVIES AND PHOTOS.
- DUAL 2.5G LAN AND WIFI 6 ENABLE ULTRA-SPEED STREAMING AND SHARING.
Microsoft OneDrive 2025 Guide for Beginners: Master File Management, Data Security, and Seamless Collaboration with Step-by-Step Cloud Storage Solutions for Personal and Professional Success
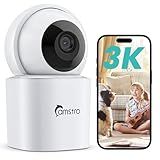
CAMSTRO 3K Indoor Security Camera 360°PTZ Home Baby/Pet Monitor, Auto Tracking,2.4/5GHz WiFi, AI Motion & Sound Detection,2-Way Audio, Night Vision, SD/Cloud Storage, Works with Alexa, No Monthly Fee
-
STUNNING 3K HD & 360° VIEW: CAPTURE EVERY DETAIL, DAY OR NIGHT!
-
SMART TRACKING & NIGHT VISION: STAY ALERT WITH CLEAR VIEWS, EVEN IN DARKNESS!
-
NO SUBSCRIPTION FEES: LOCAL STORAGE WITH AES-256 ENCRYPTION FOR PRIVACY!
To upload images from the web to DigitalOcean Spaces, first login to your DigitalOcean account and access the Spaces dashboard. Once there, create a new Space or navigate to the existing Space where you want to upload the images. Next, find the image on the web that you want to upload and right-click on it. Select the option to "Copy image address" or "Copy image location". Then, go back to the Spaces dashboard and click on the "Upload" button. In the upload prompt, paste the image URL that you copied earlier and click "Upload". The image will then be uploaded to your DigitalOcean Space. You can also use third-party tools or applications to automate and streamline the process of uploading images from the web to DigitalOcean Spaces.
What is the difference between public and private images uploaded to DigitalOcean Space?
Public images uploaded to DigitalOcean Space are visible and accessible to anyone on the internet. They can be accessed by anyone who has the URL to the image, even if they do not have an account with DigitalOcean. On the other hand, private images uploaded to DigitalOcean Space are only accessible to users who have been given specific permission to view them. These permissions can be managed through the DigitalOcean dashboard or through the Space SDK. Private images are not accessible to the public and are securely stored and protected by DigitalOcean.
How to automate the process of uploading images from a web server to DigitalOcean Space?
There are a few ways you could automate the process of uploading images from a web server to DigitalOcean Space:
- Use a script: You could write a script in a programming language like Python, PHP, or Bash that uses the DigitalOcean API to upload images to your Space. This script could run periodically on your web server to automatically upload any new images.
- Set up a cron job: You could set up a cron job on your web server to run a script at specific intervals that uploads images to your DigitalOcean Space. This way, you can automate the process without having to manually trigger the script.
- Use a cloud storage service: You could use a cloud storage service like Amazon S3 that has built-in support for automatic uploads from web servers. You could configure your web server to upload images to Amazon S3, and then configure Amazon S3 to automatically sync those images to your DigitalOcean Space.
- Use a third-party tool: There are several third-party tools available that can help automate the process of uploading images to DigitalOcean Space. Tools like rclone, Cyberduck, and WinSCP have built-in support for syncing files to cloud storage providers like DigitalOcean Space.
Overall, the best approach will depend on your specific requirements and technical expertise. It's important to consider factors like security, scalability, and ease of maintenance when choosing a method to automate the process of uploading images to DigitalOcean Space.
What is the retention policy for images stored on DigitalOcean Space?
The retention policy for images stored on DigitalOcean Space depends on the specific settings and configurations chosen by the user. By default, DigitalOcean Spaces does not have a specific retention policy for images or other objects stored on the platform. It is up to the user to manage the lifecycle of their stored images and set any necessary retention rules or expiration policies.
Users can configure lifecycle rules within their DigitalOcean Space to automatically delete or transition objects after a certain period of time, or based on other criteria such as object tags or prefixes. This can help manage storage costs and ensure that outdated or unnecessary images are removed in a timely manner.
Overall, it is important for users to regularly review and manage their stored images within DigitalOcean Space to ensure compliance with their retention policies and data management practices.
How to access uploaded images from DigitalOcean Space on different devices and platforms?
To access uploaded images from DigitalOcean Space on different devices and platforms, you can use the following methods:
- Using the DigitalOcean Spaces web interface:
- Open your web browser and go to the DigitalOcean Spaces website.
- Log in to your account and navigate to the desired Space where you have uploaded the images.
- You can now view, download, or share the images directly from the web interface.
- Using an S3-compatible client:
- You can use third-party S3-compatible clients like Cyberduck, Mountain Duck, or Transmit to access your DigitalOcean Space.
- Install the client on your device and configure it with your DigitalOcean Space credentials.
- Once configured, you can easily browse, upload, download, and manage your images in the Space.
- Using the DigitalOcean Spaces API:
- If you are a developer, you can use the DigitalOcean Spaces API to access and manage your images programmatically.
- You can use tools like cURL or programming libraries like Boto3 for Python to interact with the API and perform various operations on your images.
By using these methods, you can access your uploaded images from DigitalOcean Space on different devices and platforms easily and efficiently.
How to share uploaded images from DigitalOcean Space with others?
To share uploaded images from DigitalOcean Space with others, you can create a public URL link to the image file. Here's how you can do it:
- Log in to your DigitalOcean account and navigate to the Spaces section.
- Click on the Space where you have uploaded the images that you want to share.
- Find the image file that you want to share and click on it to select it.
- In the file details panel on the right side, click on the "Actions" button and select "Make Public" from the dropdown menu.
- Once the file is public, you can copy the public URL link provided in the file details panel.
- Share this URL link with others to allow them to access and view the image file.
Keep in mind that making a file public means that anyone who has access to the URL link can view the file. If you want to limit access to specific users, you can generate a temporary link with an expiration time or use authentication methods provided by DigitalOcean Spaces.