Best Cloud Storage Solutions to Buy in July 2026
UGREEN NAS DH2300 2-Bay Desktop NASync, Support Capacity 64TB (Diskless), Remote Access, AI Photo Album, Beginner Friendly System, 4GB RAM on Board,1GbE, 4K HDMI, Network Attached Storage(Diskless)
-
AFFORDABLE ONE-TIME PURCHASE: SAVE $6,738.82 OVER 10 YEARS!
-
MASSIVE STORAGE CAPACITY: UP TO 64TB-STORE MILLIONS OF FILES!
-
SMART AI ORGANIZATION: EFFORTLESSLY FIND AND MANAGE YOUR MEMORIES!


UGREEN NAS DH4300 Plus 4-Bay Desktop NASync, Support Capacity 128TB (Diskless), Remote Access, AI Photo Album, Beginner Friendly, 8GB LPDDR4X RAM, 2.5GbE, 4K HDMI, Network Attached Storage (Diskless)
- ENJOY 128TB CAPACITY-STORE MILLIONS OF PHOTOS AND VIDEOS SAFELY.
- SAVE OVER $6,500 ON STORAGE COSTS-ONE-TIME NAS PURCHASE ONLY!
- USER-FRIENDLY APP & EASY SETUP-ACCESS FILES FROM ANY DEVICE!
UGREEN NAS DXP2800 2-Bay Desktop Network Attached Storage, Intel N100 Quad-Core CPU, 8GB DDR5 RAM, 2.5GbE, 2X M.2 NVMe Slots, 4K HDMI, Ideal for Content Creators and Enthusiasts (Diskless)
-
AFFORDABLE STORAGE SOLUTION: ONE-TIME PURCHASE, NO ONGOING FEES!
-
MASSIVE 80TB CAPACITY: SAFEGUARD ALL YOUR FILES, PHOTOS, AND VIDEOS.
-
AI PHOTO ORGANIZATION: AUTOMATICALLY SORT PHOTOS, SAVE TIME & SPACE!
Aiolo Innovation 500GB External Hard Drive Ultra Slim Portable HDD-USB 3.0 for PC, Mac, Laptop, PS4, Xbox one,Xbox 360 HD-A4
-
SUPER FAST USB 3.0 TRANSFERS: UP TO 133MB/S READ SPEED!
-
ULTRA-THIN DESIGN: PORTABLE AND NOISE-FREE FOR ON-THE-GO USE.
-
WIDE COMPATIBILITY: WORKS SEAMLESSLY WITH MULTIPLE DEVICES AND SYSTEMS.
Synology 2-Bay DiskStation DS223j (Diskless)
-
100% DATA OWNERSHIP: ACCESS FILES SECURELY FROM ANY DEVICE, ANYWHERE.
-
EFFORTLESS FILE SHARING: COLLABORATE SEAMLESSLY WITH SAFE SYNCING OPTIONS.
-
AUTOMATED BACKUPS: SET-AND-FORGET PROTECTION ACROSS ALL YOUR DEVICES.
Synology DS124 Personal Backup & File Hub - Protect Photos, Secure Home Surveillance (1-Bay Diskless NAS)
-
EFFORTLESS, AUTOMATIC BACKUPS FOR ALL DEVICES IN ONE SECURE LOCATION.
-
ACCESS AND SHARE FILES ANYWHERE-NO COSTLY CLOUD FEES REQUIRED!
-
24/7 AI SURVEILLANCE AND ALERTS FOR ULTIMATE HOME SECURITY PEACE-OF-MIND.
TERRAMASTER D2-320 USB RAID Enclosure - USB 3.2 Gen 2 10Gbps Type C 2Bay Direct Attached Storage Supports RAID 0, 1, Single, JBOD (Diskless)
- ACHIEVE UP TO 1075MB/S SPEEDS WITH RAID-0 SSDS FOR QUICK BACKUPS.
- SECURE YOUR DATA WITH RAID 1’S MIRROR BACKUP FOR AUTOMATIC RECOVERY.
- ENJOY MASSIVE 44TB CAPACITY AND EASY DRIVE SWAPS WITH TOOL-FREE DESIGN.
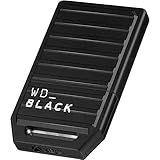
WD_Black 2TB C50 Storage Expansion Card, Officially Licensed for Xbox – Quick Resume, Plug & Play, NVMe SSD Expansion for Xbox Series X|S Gaming Consoles - WDBMPH0020BNC-WCSN
- OFFICIAL XBOX CERTIFICATION ENSURES TOP-NOTCH QUALITY AND PERFORMANCE.
- ENJOY 2TB OF STORAGE FOR EXPANSIVE GAME LIBRARIES AND ADVENTURES.
- EXPERIENCE ULTRA-FAST LOAD TIMES AND QUICK RESUME FOR SEAMLESS PLAY.
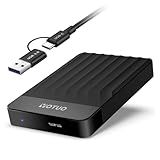
YOTUO Portable 1TB External Hard Drive Storage Expansion Mobile HDD USB 3.0 USB-C for PC, Mac, Desktop, Laptop, PS4, Xbox One, Xbox 360, Android, iPhone 15/16/17, Office & Game (Black)
- EXPAND STORAGE FOR PS5/XBOX; STORE PS4/XBOX ONE GAMES SEAMLESSLY!
- PATENTED SILICONE SLEEVE PROTECTS DATA FROM DROPS AND IMPACTS.
- PLUG & PLAY WITH ALL DEVICES; ENJOY ULTRA-FAST USB 3.0 TRANSFERS!
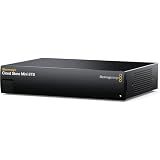
Blackmagic Design Cloud Store Mini 8TB
- ZERO LATENCY ACCESS FOR SEAMLESS COLLABORATION ON LARGE MEDIA FILES.
- COMPACT, PORTABLE DESIGN IDEAL FOR FILM SETS AND REMOTE EDITING.
- HIGH-SPEED PERFORMANCE WITH 10G ETHERNET FOR RAPID DATA SHARING.
To upload a folder to DigitalOcean Spaces, you can use the web interface or a command-line tool like Cyberduck or the AWS Command Line Interface (CLI). Start by navigating to the Spaces dashboard on DigitalOcean and creating a new Space for your folder. Then, you can either drag and drop the folder directly into the web interface or use the command-line tool to upload the folder to your Space. Make sure to adjust the permissions and settings as needed to ensure your files are secure and accessible.
How to generate access keys for DigitalOcean Spaces?
To generate access keys for DigitalOcean Spaces, follow these steps:
- Log in to your DigitalOcean account.
- Click on "Spaces" in the main navigation menu.
- Click on the Spaces environment for which you want to create access keys.
- Click on the "Settings" tab.
- Under the "API Keys" section, click on the "Generate New Key" button.
- Give the key a name to help identify it.
- Click on the "Generate Key" button.
- Copy and securely store the Access Key ID and Secret Access Key that are generated. These keys will be used to authenticate requests to your DigitalOcean Space.
Once you have generated the access keys, you can use them to programmatically access your DigitalOcean Space using the AWS SDK, CLI tools, or other tools that support AWS S3-compatible APIs. Be sure to keep your access keys secure and do not share them publicly.
How to set up automatic backups for files stored in a DigitalOcean space?
To set up automatic backups for files stored in a DigitalOcean space, you can use the DigitalOcean Spaces Sync tool to sync your files to a local storage location on a regular schedule. Here's how you can set it up:
- Install the DigitalOcean Spaces Sync tool on your local machine by following the instructions provided in the documentation: https://github.com/do-community/spaces-sync
- Once the tool is installed, configure it with your DigitalOcean Spaces credentials by creating a configuration file. You can copy the sample configuration file provided in the documentation and update it with your access key, secret key, and space name.
- Set up the sync command to run on a regular schedule using a tool like cron. You can create a cron job that runs the sync command at specific intervals, such as daily or weekly, to ensure that your files are backed up automatically.
- Test the setup by running the sync command manually to make sure that it is working as expected. You can also check the output of the command to verify that your files are being synced correctly.
By following these steps, you can set up automatic backups for files stored in a DigitalOcean space using the Spaces Sync tool and ensure that your data is secure and easily recoverable.
What is the process for syncing files between a local directory and a DigitalOcean space?
To sync files between a local directory and a DigitalOcean space, you can use the following steps:
- Install the DigitalOcean CLI tool by following the instructions provided on the DigitalOcean website.
- Configure the DigitalOcean CLI tool by running the command doctl auth init and following the prompts to authenticate with your DigitalOcean account.
- Use the doctl command to create a new DigitalOcean space if you haven't already done so. You can do this by running the command doctl spaces create --region=, replacing with the desired name for your space and with the region where you want the space to be located.
- Use the doctl command to upload files from your local directory to the DigitalOcean space. You can do this by running the command doctl compute storage upload --recursive, replacing with the path to the local directory containing the files you want to upload and with the name of the DigitalOcean space you created in step 3.
- To sync files between a local directory and a DigitalOcean space, you can use the doctl command with the storage sync subcommand. You can run the command doctl compute storage sync --recursive to sync files from the local directory to the DigitalOcean space, or the command doctl compute storage sync --recursive to sync files from the DigitalOcean space to the local directory.
By following these steps, you can easily sync files between a local directory and a DigitalOcean space using the DigitalOcean CLI tool.