Best External Hard Drives for Fast Transfer Speeds to Buy in July 2026
Seagate Portable 2TB External Hard Drive HDD — USB 3.0 for PC, Mac, PlayStation, & Xbox -1-Year Rescue Service (STGX2000400)
- STORE 2TB OF DATA EFFORTLESSLY-IDEAL FOR ON-THE-GO ACCESS!
- SIMPLE DRAG-AND-DROP BACKUP FOR WINDOWS AND MAC USERS.
- PLUG-AND-PLAY SETUP-NO SOFTWARE NEEDED, JUST CONNECT AND GO!


WD 2TB Elements Portable External Hard Drive for Windows, USB 3.2 Gen 1/USB 3.0 for PC & Mac, Plug and Play Ready - WDBU6Y0020BBK-WESN
- UP TO 6TB CAPACITY IN A COMPACT, PORTABLE DESIGN.
- PLUG-AND-PLAY FOR INSTANT ACCESS TO YOUR DATA.
- SUPERSPEED USB 3.2 GEN 1 FOR FAST FILE TRANSFERS.
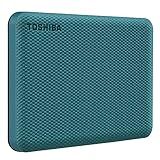
Toshiba Canvio Basics 2TB Portable External Hard Drive USB 3.0, Black - HDTB520XK3AA
- SLEEK, MATTE DESIGN: SMUDGE-RESISTANT FOR A POLISHED LOOK.
- PLUG & PLAY: EFFORTLESS SETUP, NO SOFTWARE NEEDED.
- EXPAND STORAGE QUICKLY VIA USB 3.0/2.0, NO POWER CORD REQUIRED.
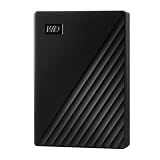
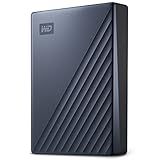
WD 5TB My Passport, Portable External Hard Drive, Black, backup software with defense against ransomware, and password protection, USB 3.1/USB 3.0 compatible - WDBPKJ0050BBK-WESN
- SLIM, DURABLE DESIGN FOR ON-THE-GO FILE STORAGE.
- MASSIVE 6TB CAPACITY FOR ALL YOUR ESSENTIAL FILES.
- ENHANCED SECURITY WITH PASSWORD PROTECTION AND ENCRYPTION.
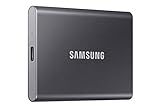
SAMSUNG T7 Portable SSD, 1TB External Solid State Drive, Speeds Up to 1,050MB/s, USB 3.2 Gen 2, Reliable Storage for Gaming, Students, Professionals, MU-PC1T0T/AM, Gray
- LIGHTNING FAST SPEEDS: ACHIEVE UP TO 1,050 MB/S READ/WRITE SPEEDS.
- MASSIVE STORAGE: STORE UP TO 4TB FOR ALL YOUR CREATIVE PROJECTS.
- DURABLE DESIGN: SHOCK-RESISTANT AND BUILT FOR ANY ADVENTURE.
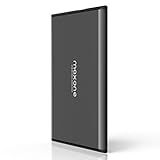
Maxone 500GB Ultra Slim Portable External Hard Drive HDD USB 3.0 Compatible with PC, Laptop, Charcoal Grey
- ULTRA SLIM DESIGN: JUST 0.4 INCHES, SLEEK & STURDY FOR PORTABILITY.
- FAST USB 3.0: LIGHTNING SPEEDS UP TO 5 GBIT/S FOR EASY DATA TRANSFER.
- HASSLE-FREE SETUP: PLUG AND PLAY WITH NO SOFTWARE NEEDED-READY TO GO!
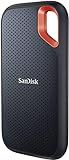
SanDisk 1TB Extreme Portable SSD - Up to 1050MB/s, USB-C, USB 3.2 Gen 2, IP65 Water and Dust Resistance, Updated Firmware - External Solid State Drive - SDSSDE61-1T00-G25
-
BLAZING-FAST NVME SPEEDS: 1050MB/S READ & 1000MB/S WRITE.
-
RUGGED DESIGN: 3-METER DROP PROTECTION & IP65 WATER RESISTANCE.
-
256-BIT AES ENCRYPTION FOR SECURE FILE STORAGE AND PRIVACY.
WD 5TB My Passport Ultra, Blue, Portable External Hard Drive, backup software with defense against ransomware, and password protection, USB-C and USB 3.1 - WDBFTM0050BBL-WESN
- FAST DATA TRANSFER WITH USB-C AND USB 3.1 COMPATIBILITY.
- STYLISH DESIGN WITH A DURABLE, REFINED METAL COVER.
- SECURE YOUR DATA WITH 256-BIT AES HARDWARE ENCRYPTION.
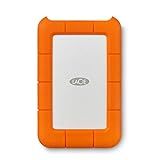
LaCie Rugged Mini 2TB External Hard Drive Portable HDD - USB 3.0/ 2.0 Compatible, Drop Shock Dust Rain Resistant Shuttle Drive, For Mac And PC Computer (LAC9000298), orange
- SHOCKPROOF AND RUGGED: SURVIVES DROPS UP TO 4 FEET!
- FAST DATA TRANSFER: USB 3.0 SPEEDS UP TO 4X FASTER THAN USB 2.0!
- BONUS OFFER: FREE 1-MONTH ADOBE CREATIVE CLOUD MEMBERSHIP INCLUDED!
Toshiba Canvio Advance 1TB Portable External Hard Drive USB 3.0, Green - HDTCA10XG3AA, Backup 2.0
- STYLISH, COMPACT DESIGN WITH CUSTOMIZABLE COLOR OPTIONS!
- EFFORTLESS, AUTOMATIC BACKUPS FOR YOUR CONTENT-JUST DOWNLOAD!
- SECURE YOUR DATA WITH FREE PASSWORD PROTECTION SOFTWARE!
The transfer speed of an external hard drive depends on several factors, including the type of connection interface it uses, the drive technology (HDD vs. SSD), and the specific model and manufacturer. Typically, external hard drives using USB 3.0 ports offer transfer speeds up to 5 Gbps, though actual speeds are lower due to overhead. USB 3.1 and USB 3.2 can offer even faster speeds-up to 10 Gbps and 20 Gbps, respectively-again, actual transfer rates will generally be lower when accounting for real-world conditions. External drives using Thunderbolt connections can achieve even higher speeds, up to 40 Gbps. However, traditional spinning hard disk drives (HDD) tend to max out at around 150 MB/s due to mechanical limitations, while solid-state drives (SSD) used externally can transfer data much faster, potentially reaching speeds in the range of several hundred MB/s to over 1 GB/s, depending on the interface and the drive's technology.
What is the fastest external hard drive connection type?
As of the latest available information, Thunderbolt 4 is one of the fastest external hard drive connection types, offering data transfer speeds of up to 40 Gbps (gigabits per second). It is important to note that the actual speed can also depend on the devices being used, the specific external drive technology, and data transfer protocols. Other fast connection types include USB4, which can also reach speeds of up to 40 Gbps, and USB 3.2 Gen 2x2, which offers speeds up to 20 Gbps. Always check compatibility between your external hard drive and your device to ensure optimal performance.
How to connect an external hard drive to a PC?
Connecting an external hard drive to a PC is typically quite straightforward. Here's a step-by-step guide:
- Choose the Right Connection Type: Most external hard drives use USB connections. They may come with USB-A, USB-C, or even Thunderbolt cables. Ensure you have the right ports on your PC. If needed, you can use an adapter.
- Power Supply: Some external hard drives require their own power source. If yours does, plug it into a power outlet before connecting it to your PC.
- Connect the Hard Drive: For USB-powered drives, simply plug the USB cable into an available USB port on your computer. If it requires an external power source, turn on the drive after it's plugged in.
- Wait for Recognition: Once connected, your PC should recognize the external hard drive. This can take a few moments, especially if it's the first time being connected.
- Access the Drive: On Windows, open "File Explorer" and look for the new drive under "This PC" or "My Computer." It should appear as a new drive with a designated letter (e.g., E:). On macOS, the drive usually appears on the desktop or in the Finder sidebar.
- Install Drivers if Necessary: Most external hard drives don’t require extra drivers, but if your system prompts you to install one, follow the on-screen instructions.
- Format the Drive (if needed): If the drive is new, or if it doesn't appear, you might need to format it. Be cautious: formatting will erase all data on the drive. On Windows: Right-click on the drive in "File Explorer" and select "Format." Choose the file system (usually NTFS or exFAT) and follow prompts. On macOS: Open "Disk Utility," select the drive, and use the "Erase" function to format it in the appropriate file system.
- Safely Eject the Drive: When you're done using the drive, it's important to eject it safely to avoid data loss. On Windows: Right-click on the drive in "File Explorer" and select "Eject." On macOS: Drag the drive to the Trash, or click the "Eject" button next to its name in Finder.
By following these steps, you should be able to successfully connect and use your external hard drive with your PC.
How to clone an external hard drive?
Cloning an external hard drive involves creating an exact copy of the drive's data and structure onto another drive. Here’s a general guide on how to do it:
Preparation:
- Backup Data: Before starting, back up any important data from both the source and target drives to prevent data loss.
- Check Drive Compatibility: Ensure the destination drive is equal to or larger in capacity than the source drive.
- Connect Drives: Connect both the source and destination external hard drives to your computer via USB, Thunderbolt, or any appropriate interface.
Cloning Process:
Depending on your operating system, here are steps for Windows, macOS, and Linux:
Windows:
- Software Installation: Download and install disk cloning software. Popular options include Macrium Reflect, AOMEI Backupper, or EaseUS Todo Backup.
- Using Cloning Software: Open the chosen software and look for an option like “Clone Disk” or “Disk Clone”. Select the source drive (the drive to be cloned). Choose the target drive (the drive where the information will be copied). Start the cloning process and wait until it’s complete. This may take some time, depending on the data size.
macOS:
- Using Disk Utility: Open Disk Utility (found in Applications > Utilities). Click on the ‘View’ menu and select ‘Show All Devices’ to make sure both drives are visible. Select the target drive and use the “Erase” option to format it correctly (usually Mac OS Extended (Journaled) or APFS, depending on your requirements).
- Cloning with Disk Utility: Select the source drive in Disk Utility. Choose the “Restore” tab. Drag the source drive to the “Source” field and the destination drive to the “Destination” field. Click “Restore” to begin the cloning process.
Linux:
- Using dd Command: Open a terminal. Find the device names for your drives using lsblk or fdisk -l. Use the dd command (replace /dev/sdX with your source and /dev/sdY with your destination): sudo dd if=/dev/sdX of=/dev/sdY bs=64K conv=noerror,sync Exercise caution with dd as it is a potent tool and can overwrite data if used incorrectly.
- Using Clonezilla: Download and run Clonezilla, a free disk cloning utility. Follow the on-screen instructions to select the source and destination disks and ensure the correct settings to perform disk cloning.
Post-Cloning:
- Verification: After the cloning process completes, check whether the data has been copied correctly by accessing the destination drive.
- Eject Safely: Make sure to safely eject both drives before disconnecting them.
Notes:
- This process will overwrite any data on the destination drive.
- Ensure that you have no open files on the drives being cloned to avoid errors.
- The time taken for cloning depends on the size and speed of the drives being used.
How to partition an external hard drive?
Partitioning an external hard drive involves dividing the storage space of the drive into separate sections, which can be useful for organizing data, installing multiple operating systems, or simply managing storage more efficiently. Here's a step-by-step guide for both Windows and macOS:
On Windows:
- Connect the External Hard Drive: Plug in your external hard drive to your computer.
- Open Disk Management: Right-click on the "Start" button and select "Disk Management." Alternatively, press Win + R, type diskmgmt.msc, and press Enter.
- Locate the External Drive: In Disk Management, find your external drive. It should be listed under your primary drive (often labeled as Disk 0).
- Shrink the Existing Volume (if necessary): Right-click on the existing partition of the external drive and select "Shrink Volume." Enter the amount of space you want to shrink in MB. This frees up unallocated space for a new partition.
- Create a New Partition: Right-click on the unallocated space and choose "New Simple Volume." Follow the New Simple Volume Wizard to specify the size, assign a drive letter, and format the partition (usually as NTFS or exFAT).
- Complete the Wizard: Once you finish the wizard, your new partition should appear as a separate drive in Windows Explorer.
On macOS:
- Connect the External Hard Drive: Plug in your external hard drive to your Mac.
- Open Disk Utility: Go to "Applications" > "Utilities" > "Disk Utility."
- Select the External Drive: In Disk Utility, choose the external hard drive from the list on the left.
- Partition the Drive: Click on the "Partition" button in the toolbar. If the button is grayed out, click on the "View" menu in the top left corner, select "Show All Devices," and then select the root level of your external drive. Click on the "+" button to add a new partition. Adjust the size of each partition by dragging the partition divider or by entering a specific size.
- Name and Format the Partition: Enter a name for the partition and choose a format. For compatibility with both macOS and Windows, you might choose exFAT. Choose "APFS" or "Mac OS Extended (Journaled)" if only using it with macOS.
- Apply Changes: Click "Apply" and confirm your changes. Disk Utility will create the partition and format it accordingly.
Important Considerations:
- Backup Data: Partitioning can potentially lead to data loss. Make sure to back up any important data before proceeding.
- Choose Appropriate Format: If you need cross-platform compatibility, exFAT is usually the best option as it works on both Windows and macOS without file size limitations.
- Data Safety: Be cautious while selecting the disk and partitions to avoid accidental data deletion on the wrong drive.
By following these steps, you can partition your external hard drive according to your needs.
How to optimize an external hard drive for speed?
Optimizing an external hard drive for speed involves a combination of software and hardware adjustments. Here are several strategies you can implement:
- Check the Connection Type: Use the fastest connection port available on your computer. USB 3.0 or newer (like USB 3.1, USB-C, or Thunderbolt) are significantly faster than USB 2.0. Ensure that both your external drive and your computer support the same high-speed connection standards.
- Disk Cleanup: Remove unnecessary files and applications from your external hard drive. Keeping the drive's data load lower can enhance performance.
- Defragment (for HDDs): If you're using a traditional HDD, consider defragmenting the drive. This process reorganizes fragmented data so the drive can access files more quickly. Note that defragmentation is not required for SSDs. On Windows, you can use the built-in disk defragmenter tool. For macOS, drives are often automatically managed without the need for manual defragmentation.
- Format the Drive: Choose the right file system format. NTFS is suitable for Windows, while exFAT can be read and written by both Windows and macOS. APFS is optimized for Macs. Reformatting can boost performance, but it will erase all data on the drive, so back up important information first.
- Update Drivers and Firmware: Ensure that your computer’s USB or Thunderbolt drivers are up to date. Check the manufacturer's website for firmware updates for your external hard drive, as these updates can enhance speed and stability.
- Minimize External Interference: Avoid using USB hubs that share bandwidth among multiple devices, as these can slow down data transfer rates. Place your external hard drive away from electronic devices that could cause interference or disruption.
- Eject Safely: Always safely eject your external hard drive before disconnecting. This helps prevent data corruption and can improve the longevity and performance of the drive.
- Use a Dedicated Power Source: If your drive has the option, use an external power source (as opposed to depending solely on USB power), which can ensure stable performance.
- Check for Hardware Issues: Test the drive with a diagnostic tool to see if there are any hardware issues. Tools like CrystalDiskInfo for Windows can be useful for identifying potential problems.
By applying these strategies, you should see improvements in the performance and speed of your external hard drive. Remember that the actual speed you achieve will also depend on the drive’s specs and the capabilities of your computer’s hardware.
What is the maximum transfer speed of USB 2.0?
The maximum transfer speed of USB 2.0 is 480 megabits per second (Mbps), which is equivalent to 60 megabytes per second (MB/s).