
Best User Management Tools to Buy in July 2026

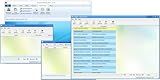
EMR Software and Practice Management, Patient Scheduling, Medical Billing All in One (Online Access Code Card) Win, Mac, Smartphone
- STREAMLINED EMR & PRACTICE MANAGEMENT IN ONE USER-FRIENDLY PROGRAM.
- ROBUST SECURITY WITH MULTIUSER ROLES AND PASSWORD PROTECTION.
- SIMPLIFIED DRUG MANAGEMENT AND INSURANCE HANDLING FOR EFFICIENCY.


Engineering Manager's Handbook: An insider’s guide to managing software development and engineering teams
EMR Electronic Medical Record (EMR) Software and Practice Management Software Suite, E-PracticeSoft Professional, Patient Scheduling, Medical Billing All in One, Multiuser, Win PCs Only
- SIMPLIFIED EMR & PRACTICE MANAGEMENT IN ONE POWERFUL TOOL.
- ENHANCED SECURITY WITH MULTIUSER ACCESS AND ROLE MANAGEMENT.
- STREAMLINED INSURANCE HANDLING FOR EFFICIENT CLAIMS PROCESSING.

Product Management in Practice: A Practical, Tactical Guide for Your First Day and Every Day After
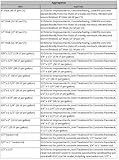
Construction Management and Estimating Software (Multiuser Edition) RSMeans construction cost data pre-embedded
- ACCESS 13,884 PREFILLED CONSTRUCTION COST ITEMS FOR ACCURACY.
- STREAMLINE PROJECTS WITH 2,485 DETAILED COST DATA CATEGORIES.
- UTILIZE 66 UNITS OF MEASURE FOR VERSATILE PROJECT ESTIMATION.
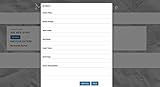
Membership Manage Professional; 100,000 Member Database Tracking and Management Software; Multiuser License (Online Access Code Card) Win, Mac, Smartphone
-
ONE-TIME PAYMENT FOR LIFETIME ACCESS, NO HIDDEN MONTHLY FEES!
-
EFFORTLESSLY MANAGE MEMBER INFO, ATTENDANCE, AND PAYMENT DETAILS.
-
STREAMLINE INVOICING, EVENT REGISTRATION, AND RENEWAL REMINDERS!

Quickbooks Pro Desktop User Guide 2024: A Step-by-Step Handbook for Efficient Bookkeeping and Finance Management

User Stories Applied: For Agile Software Development
To add users to a Ubuntu server, follow these steps:
- Connect to the server: SSH into the Ubuntu server using the terminal or an SSH client.
- Switch to root user: Execute the command su - and enter the root user's password.
- Create a new user: Use the adduser command followed by the username you want to create. For example, adduser john will create a user named "john".
- Set a password: You will be prompted to set a password for the new user. Enter a strong password and confirm it.
- Configure user information: Provide additional information about the user, such as full name, room number, phone number, etc. Press enter to skip any fields you want to leave blank.
- Grant sudo privileges (optional): If you want to allow the new user to execute administrative commands with sudo, add the user to the "sudo" group using the usermod command. For example, usermod -aG sudo john.
- Create a home directory (optional): The user's home directory is created by default, but if needed, you can manually create it using the command mkdir /home/username (replace "username" with the actual username).
- Set permissions for the home directory: Ensure that the user has the necessary permissions for their home directory using the command chown -R username:username /home/username (replace "username" with the actual username).
- Test the user account: Switch to the newly created user by executing su - username (replace "username" with the actual username) and provide the previously set password. If successful, you should be logged in as the new user.
That's it! You have successfully added a new user to your Ubuntu server.
How can you specify the expiration date for a user's account?
To specify the expiration date for a user's account, you can follow these steps:
- Identify the user account: Locate the user account that needs to have an expiration date.
- Access user management tools: Use the appropriate user management tools or interfaces that are specific to the system or platform you are using.
- Set the expiration date: Once you have accessed the user management tools, look for the option to set an expiration date for the account. This option might be located under user settings or account details.
- Choose the expiration date: Select the date when you want the user account to expire. Some systems may also allow you to set a specific time of day.
- Save the changes: After selecting the expiration date, save the changes to apply the new settings.
- Notify the user: It is best practice to inform the user about the expiration date of their account. Send them a notification well in advance, giving them time to take any necessary actions before the expiration.
- Post-expiration actions: Determine what should happen once the account expires. You can set up automatic processes to disable the account or remove access rights, or you may need to manually take action to disable or delete the account.
Note that the steps to specify the expiration date may vary depending on the system or platform you are using. It's always recommended to refer to the official documentation or user guides provided by the specific service or software you are using for detailed instructions.
Can you explain the syntax of the useradd command?
The syntax of the useradd command, used to create a new user on Linux-based systems, is as follows:
useradd [options] username
- [options]: The command supports several options that can be used to modify its behavior. Some commonly used options are: -c or --comment: Adds a comment or description for the new user. -d or --home: Specifies the home directory of the user. -g or --gid: Sets the primary group for the user. -G or --groups: Sets additional groups for the user. -m or --create-home: Creates the user's home directory. -p or --password: Sets the password for the user. -s or --shell: Sets the default shell for the user. -u or --uid: Specifies the user ID for the new user.
- username: The desired username for the new user.
Note that the useradd command usually requires superuser privileges, so it may need to be executed with sudo or as the root user.
What is the default shell assigned to a new user? Can it be modified?
The default shell assigned to a new user can vary depending on the operating system or distribution being used.
In many Linux distributions, the default shell is Bash (Bourne Again SHell). This is because Bash is a popular and widely supported shell that offers extensive features and compatibility with various Unix utilities.
However, there are other shells available such as sh (Bourne Shell), csh (C Shell), tcsh (Tenex C Shell), zsh (Z Shell), etc., depending on the system.
The default shell can usually be modified by the system administrator or by the user themselves. The system administrator can modify the default shell to be assigned to all new users, while an individual user can change their own shell to a different one if it is available and installed on the system.
The command "chsh" (change shell) can be used by a user to change their default shell. This command allows the user to select a different shell, provided it is available on the system and listed in the user's allowed shells file (usually "/etc/shells"). However, changing the default shell for a new user usually requires administrative privileges.
Is it possible to specify the expiration date of a user's password?
Yes, it is possible to specify the expiration date of a user's password in many computer systems and applications. Password expiration policies are commonly implemented by organizations to enforce regular password changes for security reasons. The expiration date determines the duration for which a user's password remains valid before they are required to change it. Once the specified expiration date is reached, users are typically prompted to create a new password. This practice helps mitigate the risk of unauthorized access to user accounts by ensuring passwords are regularly updated.
Can you explain the purpose of the -G option in the useradd command?
The -G option in the useradd command is used to specify the comma-separated list of supplementary groups that the new user will be a member of.
By default, when a new user is created, a primary group with the same name as the username is also created and the user is assigned as a member of this primary group. However, sometimes it is necessary for the user to be a member of additional groups apart from the primary group.
The -G option allows us to specify the supplementary groups for the user during user creation. These supplementary groups can grant the user specific access rights and permissions to files, directories, or other resources that are only available to those groups.
For example, if a user needs access to a certain directory that is restricted to a specific group, the -G option can be used to assign the user to that group, providing them the necessary privileges and access.
In summary, the purpose of the -G option in the useradd command is to assign supplementary group memberships to a user during creation, allowing them additional permissions and access rights.