
Best Bitbucket Username Tools to Buy in July 2026
MuuTuoL 6007 Lower Control Arm Prying Tool, Designed for 7/8 Inches Diameter Pry Bar, Specialty Bushing Tool Ideal for Front-Wheel Drive Vehicles, Imports, and Minivans (1 Pack)
- TRANSFORM 2-PERSON JOBS INTO 1 WITH UNMATCHED LEVERAGE POWER.
- FITS MOST FRONT-WHEEL DRIVE VEHICLES FOR VERSATILE APPLICATIONS.
- DURABLE, RUST-RESISTANT ALLOY ENSURES LONG-LASTING PERFORMANCE.


Version Control with Git: Powerful tools and techniques for collaborative software development
- QUALITY ASSURANCE: EACH BOOK IS THOROUGHLY INSPECTED FOR QUALITY.
- BUDGET-FRIENDLY: ENJOY SIGNIFICANT SAVINGS WITH PRE-OWNED SELECTIONS.
- ECO-FRIENDLY CHOICE: SUPPORT SUSTAINABILITY BY CHOOSING USED BOOKS.
KTTOOL New Lower Control Arm Prying Tool, Suspension Specialty Bushing Tool, Lower Ball Joint Pry, Control Arm Tool Bushing Removal Tool Designed to Work with a 1/2" Drive Extension Breaker Bar
-
EFFORTLESSLY SEPARATES BALL JOINTS WITHOUT DAMAGING YOUR VEHICLE.
-
UNIVERSAL COMPATIBILITY FOR MOST FRONT-WHEEL DRIVE AND MINIVANS.
-
DURABLE ALLOY STEEL WITHSTANDS 3500N PRESSURE FOR RELIABLE USE.
RULLINE Upgraded Lower Control Arm Prying Tool, Suspension Removal, and Casing Disassembly Adapter for Breaker Bars, Heavy-Duty 1/2" Drive Pry Bar Tool Set, Ball Joint Removal Tool Car Accessories
-
EXTREME DURABILITY: FORGED STEEL WITHSTANDS 3500 N-TOUGH FOR HEAVY USE.
-
PRECISION & SAFETY: ADJUSTABLE ARM AND NON-SLIP GRIP ENSURE DAMAGE-FREE REPAIRS.
-
COMPACT DESIGN: LOW-PROFILE HEAD FITS TIGHT SPACES FOR HARD-TO-REACH JOBS.

ReluxGO Automotive Chassis Separator Lower Control Suspension Arm Pry Extractor Tool Bar Car Wishbone Lever Auto Repair
- EASY INSTALLATION WITH ADJUSTABLE CHAIN FOR VARIOUS CROSS ARMS.
- DURABLE CARBON STEEL SHAFT ENSURES LONG-LASTING, RUST-FREE USE.
- VERSATILE LEVER TOOL FOR AXLE COMPONENT ASSEMBLY AND REPAIR.
Version Control with Git: Powerful Tools and Techniques for Collaborative Software Development
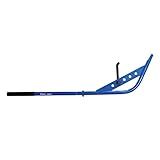
Astro Tools 78914 Lower Control Arm 4ft Pry Bar Tool
- EFFORTLESSLY FREES LOWER CONTROL ARMS FOR QUICK ACCESS.
- ADJUSTABLE ARM POSITIONS TOOL EXACTLY WHERE NEEDED.
- CLEARS SPACE FOR EASY SERVICE ON STRUTS, AXLES, AND KNUCKLES.
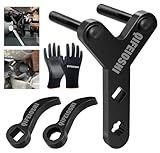
QIFEIOSHI Newly Upgraded Lower Control arm pry Tool, Suspension Control Arm Tool Bushing Removal Tool and pry Wrench Adapter Designed for use with 1/2-inch Drive Extension pry Bars (Model A)
- VERSATILE COMBO TOOL: PRY, SEPARATE, AND REMOVE BALL JOINTS EASILY.
- DURABLE ALLOY STEEL: RUST-RESISTANT, STURDY DESIGN ENSURES LONG-LASTING USE.
- COMPACT LOW PROFILE: ACCESS HARD-TO-REACH AREAS WITH EASE AND PRECISION.
To change the committed user name in Bitbucket, you can use the command line interface (CLI) to update the global configuration settings. First, navigate to the repository directory in your local machine. Then, use the following command to change the user name:
git config --global user.name "Your New Name"
Replace "Your New Name" with the desired username that you want to use for committing changes to the repository. After running this command, all future commits made from this directory will be attributed to the new user name.
What are the steps to follow in order to change the committed user name in Bitbucket?
To change the committed user name in Bitbucket, follow these steps:
- Open a terminal window.
- Navigate to the repository where you want to change the committed user name.
- Use the following command to change the committed user name:
git config user.name "New Name"
Replace "New Name" with the name you want to use for your commits. 4. Check that the user name has been successfully changed by using the following command:
git config user.name
This command should return the new user name you set in step 3. 5. Commit your changes with the new user name by using the following command:
git commit -m "Your commit message"
- Push your changes to the remote repository by using the following command:
git push
- Verify that the committed user name has been changed on Bitbucket by checking the commit history on the website.
Following these steps will allow you to change the committed user name in Bitbucket.
What is the correct approach to changing the committer name for my Bitbucket account?
To change the committer name for your Bitbucket account, you will need to update the user settings in your Git configuration on your local machine. Here is the correct approach to changing the committer name for your Bitbucket account:
- Open a terminal or command prompt on your local machine.
- Use the following command to set your Git username:
git config --global user.name "Your New Name"
- Use the following command to set your Git email address:
git config --global user.email "your_email@example.com"
- Verify that your Git configuration has been updated correctly by running the following command:
git config --global --list
- Now, when you commit changes to your Bitbucket repositories from your local machine, your new name and email address will be used as the committer information.
Please note that these changes will only affect your future commits. If you want to change the committer information for past commits, you will need to re-commit those changes with the correct committer information.
What is the recommended way to change the committed user name in Bitbucket?
To change the committed user name in Bitbucket, you can follow these steps:
- Open Git Bash or the terminal in your local repository.
- Run the following commands to update the user name:
git config user.name "New Name"
Replace "New Name" with the desired new user name.
- Run the following command to update the user email:
git config user.email "newemail@example.com"
Replace "newemail@example.com" with the desired new email address.
- Finally, commit the changes with the new user name and email:
git commit --amend --reset-author
- Push the changes to the remote repository:
git push --force
By following these steps, you can update the committed user name in Bitbucket.