Best Server Software Configuration Guides to Buy in February 2026
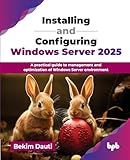
Installing and Configuring Windows Server 2025: A practical guide to management and optimization of Windows Server environment (English Edition)


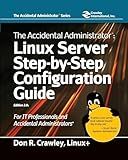
The Accidental Administrator: Linux Server Step-By-Step Configuration Guide


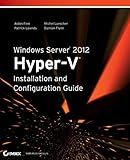
Windows Server 2012 Hyper-V Installation and Configuration Guide


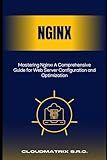
Mastering Nginx: A Comprehensive Guide for Web Server Configuration and Optimization


Windows Server 2025 Administration Fundamentals: A beginner's guide to managing and administering Windows Server environments


MCTS Windows Server Virtualization Configuration Study Guide: Exam 70-652


To set up a virtual host in XAMPP, you will need to navigate to the "httpd-vhosts.conf" file located in the "apache" folder within the XAMPP installation directory. You can open this file using a text editor.
In the "httpd-vhosts.conf" file, you will need to add a VirtualHost block for your new virtual host. Within this block, you can specify the ServerName (the domain name of your virtual host) and the DocumentRoot (the directory where your website files are located).
After configuring the VirtualHost block, you will also need to edit the "hosts" file on your computer to map the virtual host domain name to the localhost IP address (127.0.0.1).
Save your changes to the "httpd-vhosts.conf" and "hosts" files, and then restart the Apache server in XAMPP. Your virtual host should now be set up and accessible through the specified domain name in your web browser.
How to test virtual host configuration in XAMPP?
To test virtual host configuration in XAMPP, you can do the following:
- Open the "httpd-vhosts.conf" file located in the "conf/extra" directory of your XAMPP installation.
- Add a virtual host configuration for the website you want to test. Make sure to specify the DocumentRoot and ServerName for the virtual host.
- Save the changes to the "httpd-vhosts.conf" file and restart the Apache server in XAMPP.
- Edit the hosts file on your computer to map the ServerName of the virtual host to localhost. The hosts file is located in "C:\Windows\System32\drivers\etc" on Windows or "/etc/hosts" on macOS and Linux.
- Add the following line to the hosts file: 127.0.0.1 yourservername
Replace "yourservername" with the ServerName specified in the virtual host configuration.
- Open a web browser and type the ServerName of the virtual host in the address bar (e.g. http://yourservername). If the virtual host configuration is correct, you should see the website you specified in the DocumentRoot.
- If the virtual host does not work, check the Apache error log in XAMPP (located in the "logs" directory) for any error messages that may help you troubleshoot the issue.
By following these steps, you can test the virtual host configuration in XAMPP and ensure that your websites are working correctly.
What is the impact of virtual host configuration changes on existing websites in XAMPP?
When making virtual host configuration changes in XAMPP, such as adding, modifying, or removing virtual hosts, it can have a significant impact on existing websites.
- Access issues: If the virtual host configuration is not set up correctly, it can cause issues with accessing existing websites. Users may encounter errors or be unable to access the website at all.
- Website downtime: Making changes to the virtual host configuration may require restarting the Apache server, which can result in downtime for existing websites hosted on XAMPP. During this time, the websites will be inaccessible to users.
- Configuration conflicts: If the changes to the virtual host configuration are not properly configured or conflict with existing settings, it can cause issues with existing websites. This can lead to errors, broken links, or other issues with the website's functionality.
- Data loss: Incorrectly configuring virtual hosts can result in data loss for existing websites. This can happen if the changes cause the website files to be inaccessible or if they are accidentally deleted during the configuration process.
Overall, it is important to carefully plan and test any virtual host configuration changes in XAMPP to minimize the impact on existing websites and ensure that they continue to function properly. Backing up important website files and data before making any changes is also recommended to prevent potential data loss.
How to manage virtual hosts with XAMPP control panel?
To manage virtual hosts with XAMPP control panel, follow these steps:
- Open the XAMPP control panel and start Apache server.
- Navigate to the Apache configuration file located at C:\xampp\apache\conf\extra\httpd-vhosts.conf.
- Add a new virtual host configuration by adding the following lines to the end of the file:
<VirtualHost *:80> ServerName yourdomain.local DocumentRoot "C:/xampp/htdocs/yourproject" <Directory "C:/xampp/htdocs/yourproject"> Options Indexes FollowSymLinks AllowOverride All Require all granted
Replace "yourdomain.local" with the desired domain name for your virtual host and "C:/xampp/htdocs/yourproject" with the path to your project folder.
- Save the changes and close the configuration file.
- Open the hosts file located at C:\Windows\System32\drivers\etc\hosts.
- Add a new entry at the end of the file to map the domain name to the local IP address:
127.0.0.1 yourdomain.local
Replace "yourdomain.local" with the domain name specified in the virtual host configuration.
- Save the changes and close the hosts file.
- Restart the Apache server in the XAMPP control panel to apply the changes.
- Access the virtual host in your web browser by entering the domain name (e.g. http://yourdomain.local) in the address bar.
You can add more virtual hosts by following the same steps and configuring the virtual host settings according to your needs.
What is the purpose of using virtual hosts in XAMPP?
The purpose of using virtual hosts in XAMPP is to allow developers to create multiple independent websites on a single server. This helps in efficiently managing and organizing different websites, as each virtual host can have its own domain name and configuration settings. Virtual hosts enable developers to test and deploy multiple websites on their local machine, without the need for separate physical servers. Additionally, virtual hosts enable developers to simulate a live server environment and test website functionality before deploying it to a production server.
