
Best Cloud Monitoring Tools to Buy in July 2026
Cloud Observability with Azure Monitor: A practical guide to monitoring your Azure infrastructure and applications using industry best practices


Mastering Python Networking: Utilize Python packages and frameworks for network automation, monitoring, cloud, and management

Security Monitoring with Wazuh: A hands-on guide to effective enterprise security using real-life use cases in Wazuh

Mastering Prometheus: Gain expert tips to monitoring your infrastructure, applications, and services
Prometheus: Up & Running: Infrastructure and Application Performance Monitoring

Monitoring with Ganglia: Tracking Dynamic Host and Application Metrics at Scale
- QUALITY ASSURANCE: EACH USED BOOK IS VETTED FOR GOOD CONDITION.
- ECO-FRIENDLY CHOICE: PROMOTE SUSTAINABILITY BY BUYING USED BOOKS.
- BUDGET-FRIENDLY: SAVE MONEY WHILE ENJOYING QUALITY READS!

Oracle Cloud Infrastructure (OCI) Security Handbook: A practical guide for OCI Security (English Edition)
Microservices with Spring Boot 3 and Spring Cloud: Build resilient and scalable microservices using Spring Cloud, Istio, and Kubernetes
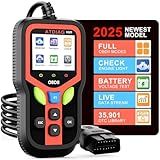
OBD2 Scanner Diagnostic Tool, Check Engine Lights and Clear Vehicle Trouble Code, Battery Start Test, Live Data, Cloud Printing, Freeze Frame, Car Scanner for All OBDII Vehicles Since 1996
- ACCURATE DIAGNOSIS: READ & CLEAR OVER 35,901 TROUBLE CODES EASILY.
- WIDE COMPATIBILITY: WORKS WITH MOST CARS POST-1996; 10 LANGUAGES SUPPORTED.
- USER-FRIENDLY: PLUG & PLAY DESIGN; BRIGHT DISPLAY & CLEAR MANUAL INCLUDED.
Sure! Running Grafana on Google Cloud is a straightforward process that involves setting up a virtual machine (VM), installing Grafana, and configuring it to access your data sources. Here are the steps:
- Create a new virtual machine: Start by creating a new VM instance on Google Cloud. You can choose the appropriate machine type, disk size, and other settings based on your requirements.
- Set up firewall rules: Configure firewall rules to allow incoming traffic to Grafana. Open the necessary ports, such as HTTP (default: 3000), to access Grafana externally.
- Connect to the VM: Use SSH or Google Cloud's web-based SSH to connect to the newly created VM.
- Install Grafana: Once connected to the VM, you need to install Grafana. Start by updating the package list and then install Grafana using the package manager or by downloading the binary.
- Configure Grafana: After installing Grafana, you need to configure it. Open the Grafana configuration file and make any necessary changes, such as server port, domain, and SSL settings.
- Start the Grafana service: Start the Grafana service using the appropriate command for your operating system. This will launch the Grafana server and make it accessible through the configured port.
- Access Grafana: Open a web browser and enter the IP address or domain of your VM, followed by the Grafana port (e.g., http://:3000). This will take you to the Grafana login page.
- Log in and configure data sources: Log in to Grafana using the default username and password (admin/admin), and then change the password. Configure data sources based on your requirements, such as MySQL, Prometheus, or InfluxDB.
- Create dashboards: Once data sources are configured, you can start creating dashboards by adding panels and visualizing data. Customize your dashboards with various visualization options offered by Grafana.
That's it! You have now successfully set up and run Grafana on Google Cloud. You can further explore Grafana's features and integrations to create powerful monitoring and visualization solutions.
How to install Grafana on Google Cloud?
To install Grafana on Google Cloud, you can follow these steps:
- Create a virtual machine (VM) instance on Google Cloud. Make sure to select the appropriate region and machine type based on your requirements.
- SSH into the created VM instance using a tool like Google Cloud Shell or any SSH client.
- Update the package list on the VM by running the following command:
sudo apt-get update
- Install necessary dependencies by running the following command:
sudo apt-get install -y adduser libfontconfig1
- Download the Grafana package using wget:
wget https://dl.grafana.com/oss/release/grafana\_8.1.2\_amd64.deb
- Install Grafana using dpkg:
sudo dpkg -i grafana_8.1.2_amd64.deb
- Start the Grafana server:
sudo systemctl start grafana-server
- Enable the Grafana service to start on boot:
sudo systemctl enable grafana-server
- By default, Grafana listens on port 3000. If your VM has a firewall, make sure to allow incoming connections on port 3000.
- Access the Grafana web interface by opening a web browser and entering the following URL: http://[VM_PUBLIC_IP]:3000
- The first time you access the Grafana interface, you'll need to set up an admin user account. Follow the on-screen instructions to complete the setup.
That's it! You have successfully installed Grafana on Google Cloud. You can now start creating and managing dashboards for monitoring and visualization.
What are the different visualization options in Grafana on Google Cloud?
Grafana on Google Cloud offers a variety of visualization options to help users effectively display and analyze their data. Some of the main visualization options available in Grafana are:
- Graph: Graphs are one of the most commonly used visualization options, allowing users to plot time series data as line charts, bar charts, or area charts. They provide a visual representation of trends, patterns, and correlations in data.
- Singlestat: Singlestat panels are used to display a single value, such as the latest data point or a summary statistic, typically styled with a large font size. This visualization is useful to provide an instant overview of a single metric.
- Table: Tables are used to present tabular data in a structured format. They are customizable and can be sorted, filtered, and styled to suit specific needs. Tables are useful for displaying large sets of data or comparing multiple metrics.
- Heatmap: Heatmaps are a way to represent data using colors to visualize the density of a data set. They are well-suited for visualizing data that has two axes, such as time and value, and allow users to quickly identify patterns or anomalies.
- Gauge: Gauge panels display a single value within a predefined range, represented as a circular gauge. They are often used to represent metrics like CPU usage, memory usage, or disk space.
- Bar Gauge: Bar gauges are similar to gauges but represent the value as a vertical bar instead of a circular gauge. They are useful for displaying percentages or values within a specified range.
- Pie Chart: Pie charts are circular charts divided into slices, with each slice representing a different category or data series. They are useful for visualizing data distributions or proportions.
- Alert List: Alert lists provide a summary of triggered alerts, displaying relevant information such as the alert name, severity, and time of occurrence. Users can click on the alerts to get more details or take appropriate actions.
These are just a few of the visualization options available in Grafana on Google Cloud. Users can further enhance their visualizations by applying customizations, such as annotations, thresholds, and metrics transformations, to create meaningful and interactive dashboards.
What is the purpose of Grafana's query editor on Google Cloud?
Grafana's query editor on Google Cloud is a tool designed to interact with various data sources and retrieve data for visualization and analysis in the Grafana dashboard. It allows users to define queries to fetch data from databases, cloud services, and other sources, and then display that data in charts, graphs, and other visualizations within Grafana.
The query editor in Grafana provides a user-friendly interface where users can define their queries using a query language specific to the data source. It simplifies the process of retrieving and transforming data, making it easier to create meaningful and insightful visualizations.
Overall, the purpose of Grafana's query editor is to empower users to explore and analyze their data dynamically, enabling them to gain valuable insights and make data-driven decisions.
What is the purpose of Grafana's dashboard annotations on Google Cloud?
The purpose of Grafana's dashboard annotations on Google Cloud is to provide a way to add contextual information to a specific point or range of time on a timeseries graph in a Grafana dashboard. Annotations can be used to highlight events, incidents, maintenance windows, deployments, or any other relevant information that should be displayed alongside the data in the dashboard. It helps in providing additional context and insights to the metrics being visualized, making it easier to understand and troubleshoot issues in real-time.
What are the best practices for optimizing Grafana performance on Google Cloud?
Here are some best practices for optimizing Grafana performance on Google Cloud:
- Instance sizing: Deploy Grafana on a compute instance with adequate CPU and memory resources based on your workload requirements. Monitor the resource utilization to ensure it is appropriately provisioned.
- Disk performance: Use a high-performance disk type (such as SSD) to store Grafana's databases and other data files. This ensures fast read/write operations and better overall performance.
- Database optimization: Use a high-performance database backend for Grafana, such as Google Cloud Spanner or BigQuery, to handle large volumes of data efficiently and enable fast queries.
- Caching: Enable result set caching in Grafana to avoid repeated queries on the same data. This can significantly improve dashboard loading time, especially for resource-intensive queries.
- Proactive monitoring: Set up monitoring and alerting for key performance metrics of your Grafana instance, such as CPU usage, memory utilization, and disk I/O. This enables you to identify performance bottlenecks and take proactive actions to optimize them.
- Query optimization: Optimize your data queries to ensure they are efficient and targeted. Use appropriate filters, aggregates, and query optimizations techniques offered by the underlying data source to reduce the query response time.
- Use Grafana plugins wisely: Choose and configure only the necessary Grafana plugins to avoid a performance impact. Evaluate the impact of each plugin on your instance's resource utilization and enable/disable them accordingly.
- Security measures: Implement appropriate security measures such as VPC firewall rules, SSL/TLS encryption, and access control policies to protect your Grafana instance and data.
- Enable compression: Configure Grafana to enable compression for HTTP responses. This reduces the amount of data transferred over the network, resulting in faster load times.
- Regular maintenance: Perform routine maintenance tasks such as cleaning up old data, optimizing database indexes, and upgrading Grafana to the latest version to benefit from performance improvements and bug fixes.
Remember to monitor the performance of your Grafana instance regularly and fine-tune the settings based on your specific workload requirements to achieve optimal performance.
What is the role of Prometheus in Grafana on Google Cloud?
Prometheus is an open-source monitoring and alerting system that collects metrics from various sources. It acts as a data source for Grafana, which is a popular data visualization tool.
In the context of Google Cloud, Prometheus can be deployed on Google Kubernetes Engine (GKE) to monitor and collect metrics from various Kubernetes resources, such as pods, nodes, services, and containers.
The role of Prometheus in Grafana on Google Cloud is to provide the necessary metrics and data to visualize and monitor the health, performance, and behavior of applications, services, and infrastructure running on Google Cloud Platform. Grafana can then utilize these metrics to create rich and customizable dashboards, charts, and visualizations for monitoring, troubleshooting, and analysis purposes.
By integrating Prometheus with Grafana on Google Cloud, users can gain valuable insights into the performance and stability of their systems, identify bottlenecks, track resource utilization, and set up alerts or notifications based on specific metric thresholds.